
Today we learn how to use Eclipse, a fully-featured Interactive Development Environment (IDE). We'll use Eclipse to write our first object oriented code.
Goals:
Open up a terminal and update your svn directory to collect lab4. Then start Eclipse by running the command eclipse &.
You will see the following screen asking where you should set your workspace. The default location is fine. Check the "Use this as the default" checkbox and press OK
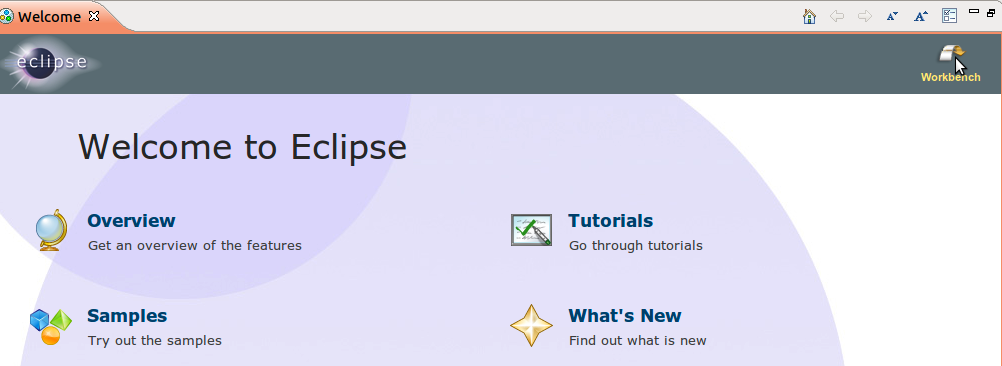
The first time you run Eclipse you will be presented with the following welcome screen. Click on workbench to move forward.
You will be taken to the Workspace. (From now on, whenever you open Eclipse, you will be taken automatically to the Workspace.)
The lab4 directory in your username-cs121 directory contains source code for the "Gambler's Ruin" simulation from the first programming assignment. This code simulates a coin toss game where the player starts with $5 and bets $1 on a coin toss until they either run out of cash or obtain their predefined goal ($0 and $20 respectively). We play this game several times (each game is called a trial) and count how many times the player wins.
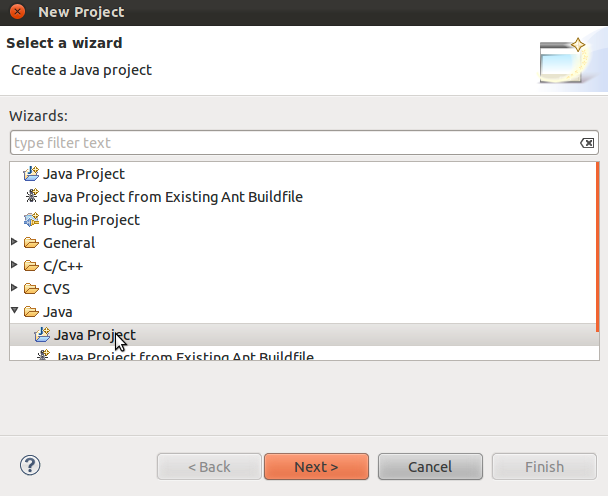
To bring this code into Eclipse we need to create an Eclipse Project. Go to File : New : Project and select Java Project from the list. This will bring you to the "New Java Project" window. Give the project a name (any name without spaces will do, I chose "Gambler"). Please make sure that "Use an execution environment JRE" has "JavaSE-1.6" selected. You don't need to modify any of the other options.

If we were creating an empty project, you could just go ahead and click "Finish". However, we want to add some existing code. If you click on "Next", you will be given the option to add existing code to the project you're creating.


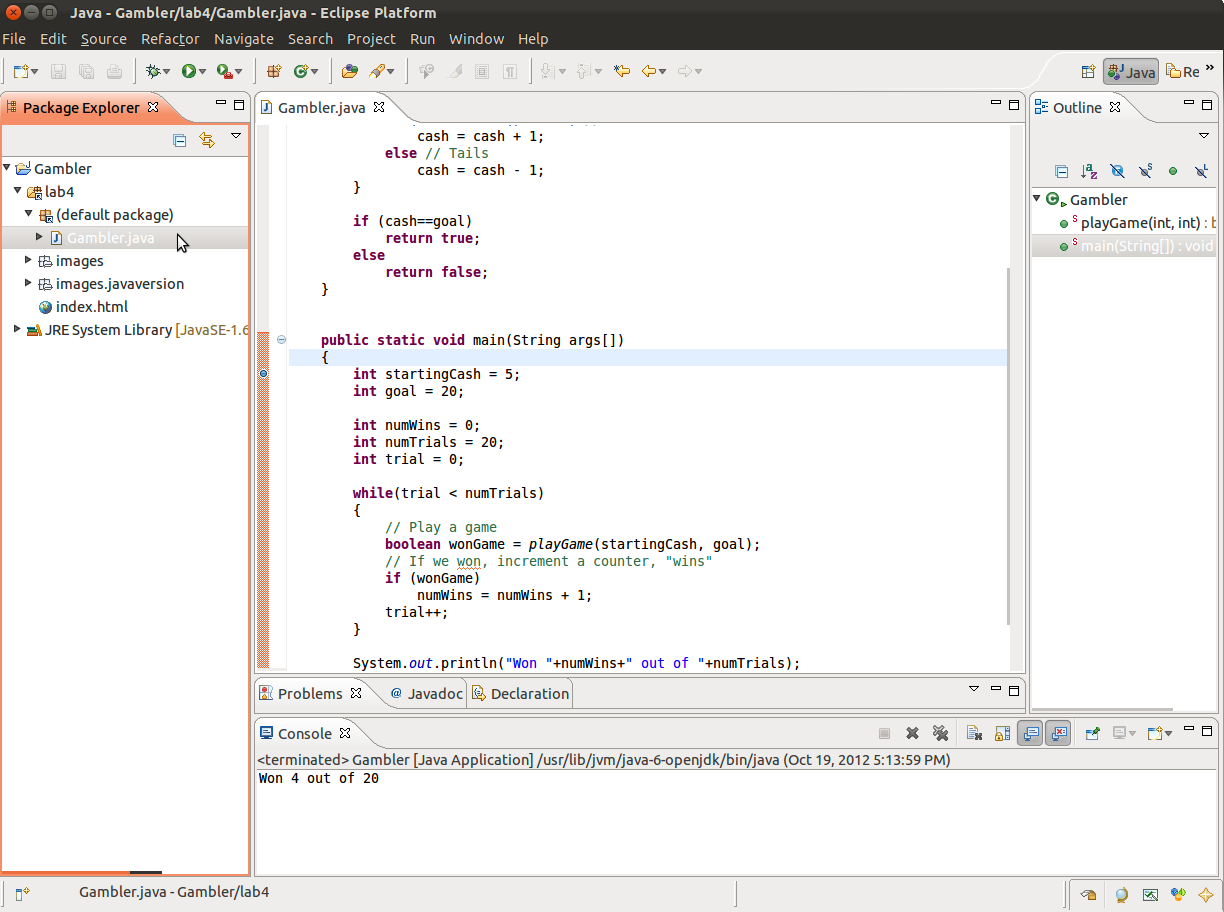
An Eclipse platform will open in the Java Perspective with the new Project. For now these tabs will be mostly empty until we expand on a project. The Package Explorer tab in the left panel shows the Java files in your project. The Outline tab displays details about the functions in a class. The bottom center will have a "Tasks" tab. This area will also hold the "Problems" and the "Console" tab when the program is compiling and then running. The center of the screen is the editor panel and will display the code in the project.
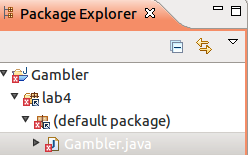
Go to the "Package Explorer" tab. View the code for this project by clicking on the small triangle to the left of your project's name and then again on the (default package) icon that appears. Double click on the Gambler.java icon that appears to open the file in the center editor panel.

Notice in the Outline tab that the methods playGame and main are listed. The method parameters inside the parentheses and the return type in a gold color.
If you try changing startingCash to for instance starterCash, you will see that Eclipse will underline that variable with a red line, indicating an error. Also note how the Gambler.java gets has a small red x in the lower left corner. This means that this file has some compile-time errors (the sort of errors that javac would tell you about.) In this case our file has one error, listed on the bottom of the window in the "Problems" tab, the "Location" suggests the line number in the code to go to. There is an icon next to that line in the code. Go ahead and restore it and hit save.
Once your code is correct, let's run this program from within Eclipse. Right click on the Gambler.java file icon on the left panel. Select Run As -> Java Application . Eclipse will compile and run the program and the results are displayed in the bottom of the window in the "Console" tab. This will just be like using the command java Gambler from the command line.

This program depends on random numbers so the output may change each time the program is run. Run the program a few more times to see this variation. After doing the "Run As :: Java Application" step once this is made the default. You can now run this program just by pressing the green Play button located at the upper left 
At this point in the lab we've covered all the functionality provided by a text editor, javac and java. It's helpful to play around a bit and become comfortable at this stage before moving on. Do the following tasks.
Up to this point, Eclipse may seem just like a glorified editor that allows you to do a few tasks faster (like compiling and running directly from the editor, instead of going to the command line). We're now going to see a powerful tool included with Eclipse (and many IDEs) that you would not find in a text editor: the debugger. It runs our program but lets us pause at any point to see the state of all the variables. It also allows us to walk through the program step by step. We no longer have to guess how a program will act; now we can watch it directly.
Before we can start please fix any errors you generated in the last section so that we can run the program.
We will start by setting a breakpoint in a specific line of our code. A breakpoint is a very common debugging tool, and it simply instructs the debugger that we want the program to pause when it reaches that line. Usually, you don't want to step through the entire code line by line and, instead just want to see what happens at a specific line (e.g., at a point in your code where your program throws an exception). Once the debugger reaches a breakpoint, you will be able to inspect the values of variables inside statements and loops.
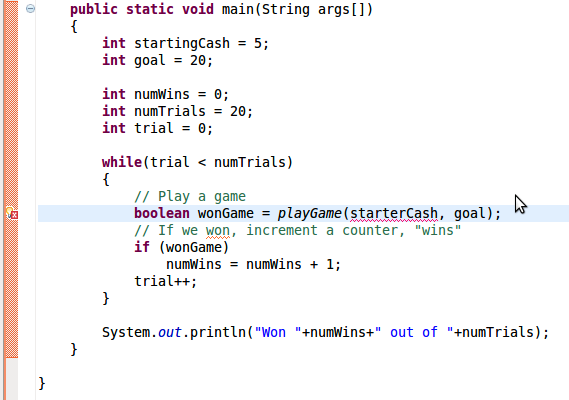
Set a breakpoint at the first line in main (just after public static void main...). Do this by double clicking just to the left of the code on the grey marker bar. A small blue dot should appear. The location of this dot (and where you need to double click) is in the image below.

Now we start the debugger just how we started the Run process. Right click on Gambler.java, select Debug As :: Java Application. The following window will pop up. Eclipse wants to confirm that we are switching from the Java Perspective to the Debug Perspective. Check the "Remember my decision" checkbox and click Yes.

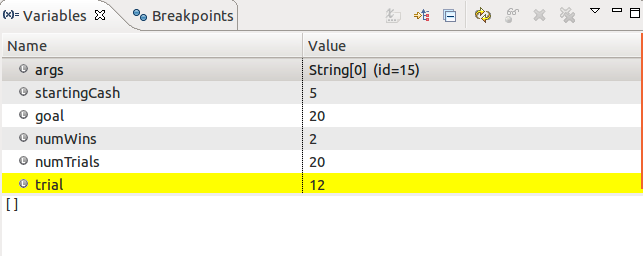
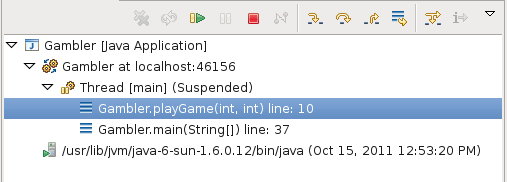
We are now in the Debug Perspective. Your view should look similar to the image below. The tabs on upper right hand side will show a list of variables. This list will change as our program executes step by step. There is also a tab for the breakpoints. We have only placed one breakpoint in the code so far. The left hand panel ("Debug") shows what program is being debugged, and what function is currently being executed (at the start of the program, this will just be main but, as we continue to debug the program, we'll see more functions appear in this panel).

The program is now running and is paused where we set our breakpoint (this should be at the very beginning of main for this example). The next line to be executed should be highlighted in green.


Eclipse is waiting for us to tell it to execute this line. Do this by pressing the F6 key once. This will execute the green line and move the execution forward one step. You should notice that the next line is now highlighted. Take a minute also to look at the upper right panel, "Variables". This panel displays the active variables in the program. Press F6 a few more times and notice how, as we declare and initialize new variables they appear in the variables tab.
Continue past the while loop but stop before you run the following line:

This line calls the function playGame with the values startingCash and goal as the first and second arguments. What are the current values of these variables? You can see the values either by looking in the Variables panel or by hovering your mouse over their names in the editor.
If we press F6 again, the debugger will simply run that line, including the function call, and will skip to the next line of main. When you are on a line that includes a function call, you can instruct the debugger to step into the function so you can run that function line by line too. You can do this by pressing F5 (step into) instead of F6 (step over). Your screen should look something like the following:

Lots of things just changed.
We have moved into a function call and will stay in this function until we encounter a return statement at which point we will jump back to the line that called us. Step through this function by pressing F6 repeatedly. Notice the action of the while loop and the if statements. Also notice how the cash variable increases and decreases as the the computer plays the coin toss game.
This game may take a while to play, if you'd like to skip to the end, right-click on the line if(cash==goal) and select "Run to Line" (this might not work if you don't left-click the line first, so that it is selected, and then right-click it). Did you win? Press F6 once more and see which return statement Java chooses based on the condition cash==goal. Given your knowledge of Java what is the next thing that should happen after the return statement? Press F6 to find out.
After you return to the calling line in main. Press F6 again and verify that the value returned from playGame was correctly stored in the wonGame variable. Also notice how the playGame line was removed from the stack and that all the variables have been replaced again with those we originally declared in main.
Some notes:
 is the debug button (notice that it looks like a bug). It is a more convenient alternative to the Right click :: Debug as :: Java Application step.
Other useful Eclipse notes:
Great, now we can practice our debugging skills on another file.


Now that we've seen how to use Eclipse to write, compile, run, and debug code let's use it to develop some new code. In class, you've been learning about objects. A common example we've seen has been simple geometric shapes like points, lines, circles, etc.... We'll continue with this theme and build a Triangle class.
Create a new project in Eclipse called "Geometry" and add the provided Point.java file to the project. You add the file, not by linking another source directory as we did for partA, but by opening the file and saving it into the Geometry/src/ folder (as you did for primes.java). This file contains the Point class we've covered in lecture.
Add a distanceTo method to the Point class that computes the distance from this point to another Point.
Create a new class and in the main method create two points and find the distance between them. I.e. the following code should print 1.414... the square root of two.
Point A = new Point(0,0);
Point B = new Point(1,1);
double distance = A.distanceTo(B);
System.out.println("Distance from A to B is "+distance);
To compute this distance you will need to compare the x and y instance variables of the two points. One of the points will be the Point which is calling the method ('A' in the above code) and one will be the Point which is given as an input to the method ('B' in the above code).
After this is done points can compute the distances between each other. To use a function in the Point class from another class use Object_name.method_name(parameters). For instance in A.distanceTo(B), the method used in Object A is distanceTo using the parameter B.

We are now going to add a new Triangle class to the Geometry project. Do this by right clicking on the Geometry project icon in the left panel, select New :: Class . Name it Triangle and check the "public static void main" checkbox to automatically generate a skeleton for a main function.
We can describe any Triangle using three Points. Declare these as public instance variables in the Triangle class definition (I named mine Point A, B and C). Create a constructor which takes in three points as inputs (such as Point a, b and c) and assigns these to the instance variables. This is the bare minimum to create a class.
We don't want just the bare minimum though, we want our Triangle objects to be able to do things. To this end we're going to teach them how to compute their own perimeter. We'll accomplish this by writing a perimeter method for the Triangle class.
Create a method to compute the perimeter of the triangle. It should not need any external inputs. What type of variable should it return? By using the distanceTo method of the Point class you should be able to write this function in one line.
Test your work! In your main function, make three Points. Use these points to create a Triangle. Compute the perimeter of this triangle.
Next, create a Circle class. What instance variables should the class have? Add a
public boolean inCircle(Point p)method and use your distanceTo method in the Point class to make your job easier.
If you've gotten to this point in the lab, congratulations. You should probably go home. If you are really excited about writing more code though you could try to write a general Polygon class. It should be similar to the Triangle class but allow for an arbitrary number of vertices.