Class Meeting 10: Forward & Inverse Kinematics
Today's Class Meeting
- Learning about forward and inverse kinematics (here's a link to the slides)
- Getting introduced to the MoveIt ROS package to control the Turtlebot3 OpenMANIPULATOR
What You'll Need for Today's Class
- Some scratch paper to work through some of today's class exercises
- Your Ubuntu 20.04 programming environment
Class Exercise #1: Computing Forward Kinematics for 3DOF Robot Manipulator in 3 Dimensions
For this exercise, work independently to compute \([x, y, z]\) of the robot's end effector in terms of the lengths of the robot's two linkages \((l_1, l_2)\) and the angles of rotation of the two revolute joints \( (q_1, q_2) \). If it's useful to you, feel free to reference the slides we just went over in class.
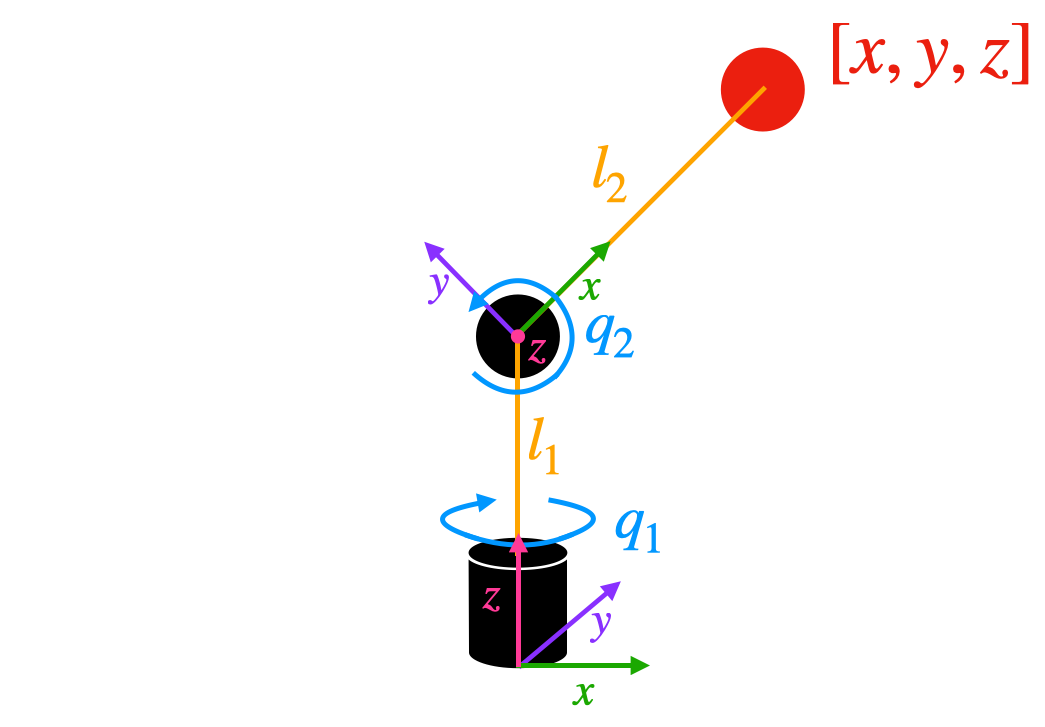
Once you've finished computing \([x, y, z]\), please wait for others to finish. We'll go over the solution together as a class.
Class Exercise #2: Basics of Robot Arm Control
Please work individually on your own computer for this exercise, however, we do encourage you to talk with your neighbors to troubleshoot or discuss progres.
In this class exercise, you will 1) learn the basics of turtlebot's arms though GUIs, 2) learn how to manipulate the arm through code.
Let's go over the Turtlebot3 tools that allows you to control the robot arm with a GUI. First, run the following commands, which starts ROS, Bringup on the Pi, and the OpenMANIPULATOR Bringup on the PC.
Terminal 1:
$ roscoreTerminal 2:
$ roslaunch turtlebot3_manipulation_gazebo turtlebot3_manipulation_gazebo.launchROS_MASTER_URI and ROS_HOSTNAME environment variables are set to http://localhost:11311 and localhost respectively (or your current IP address).
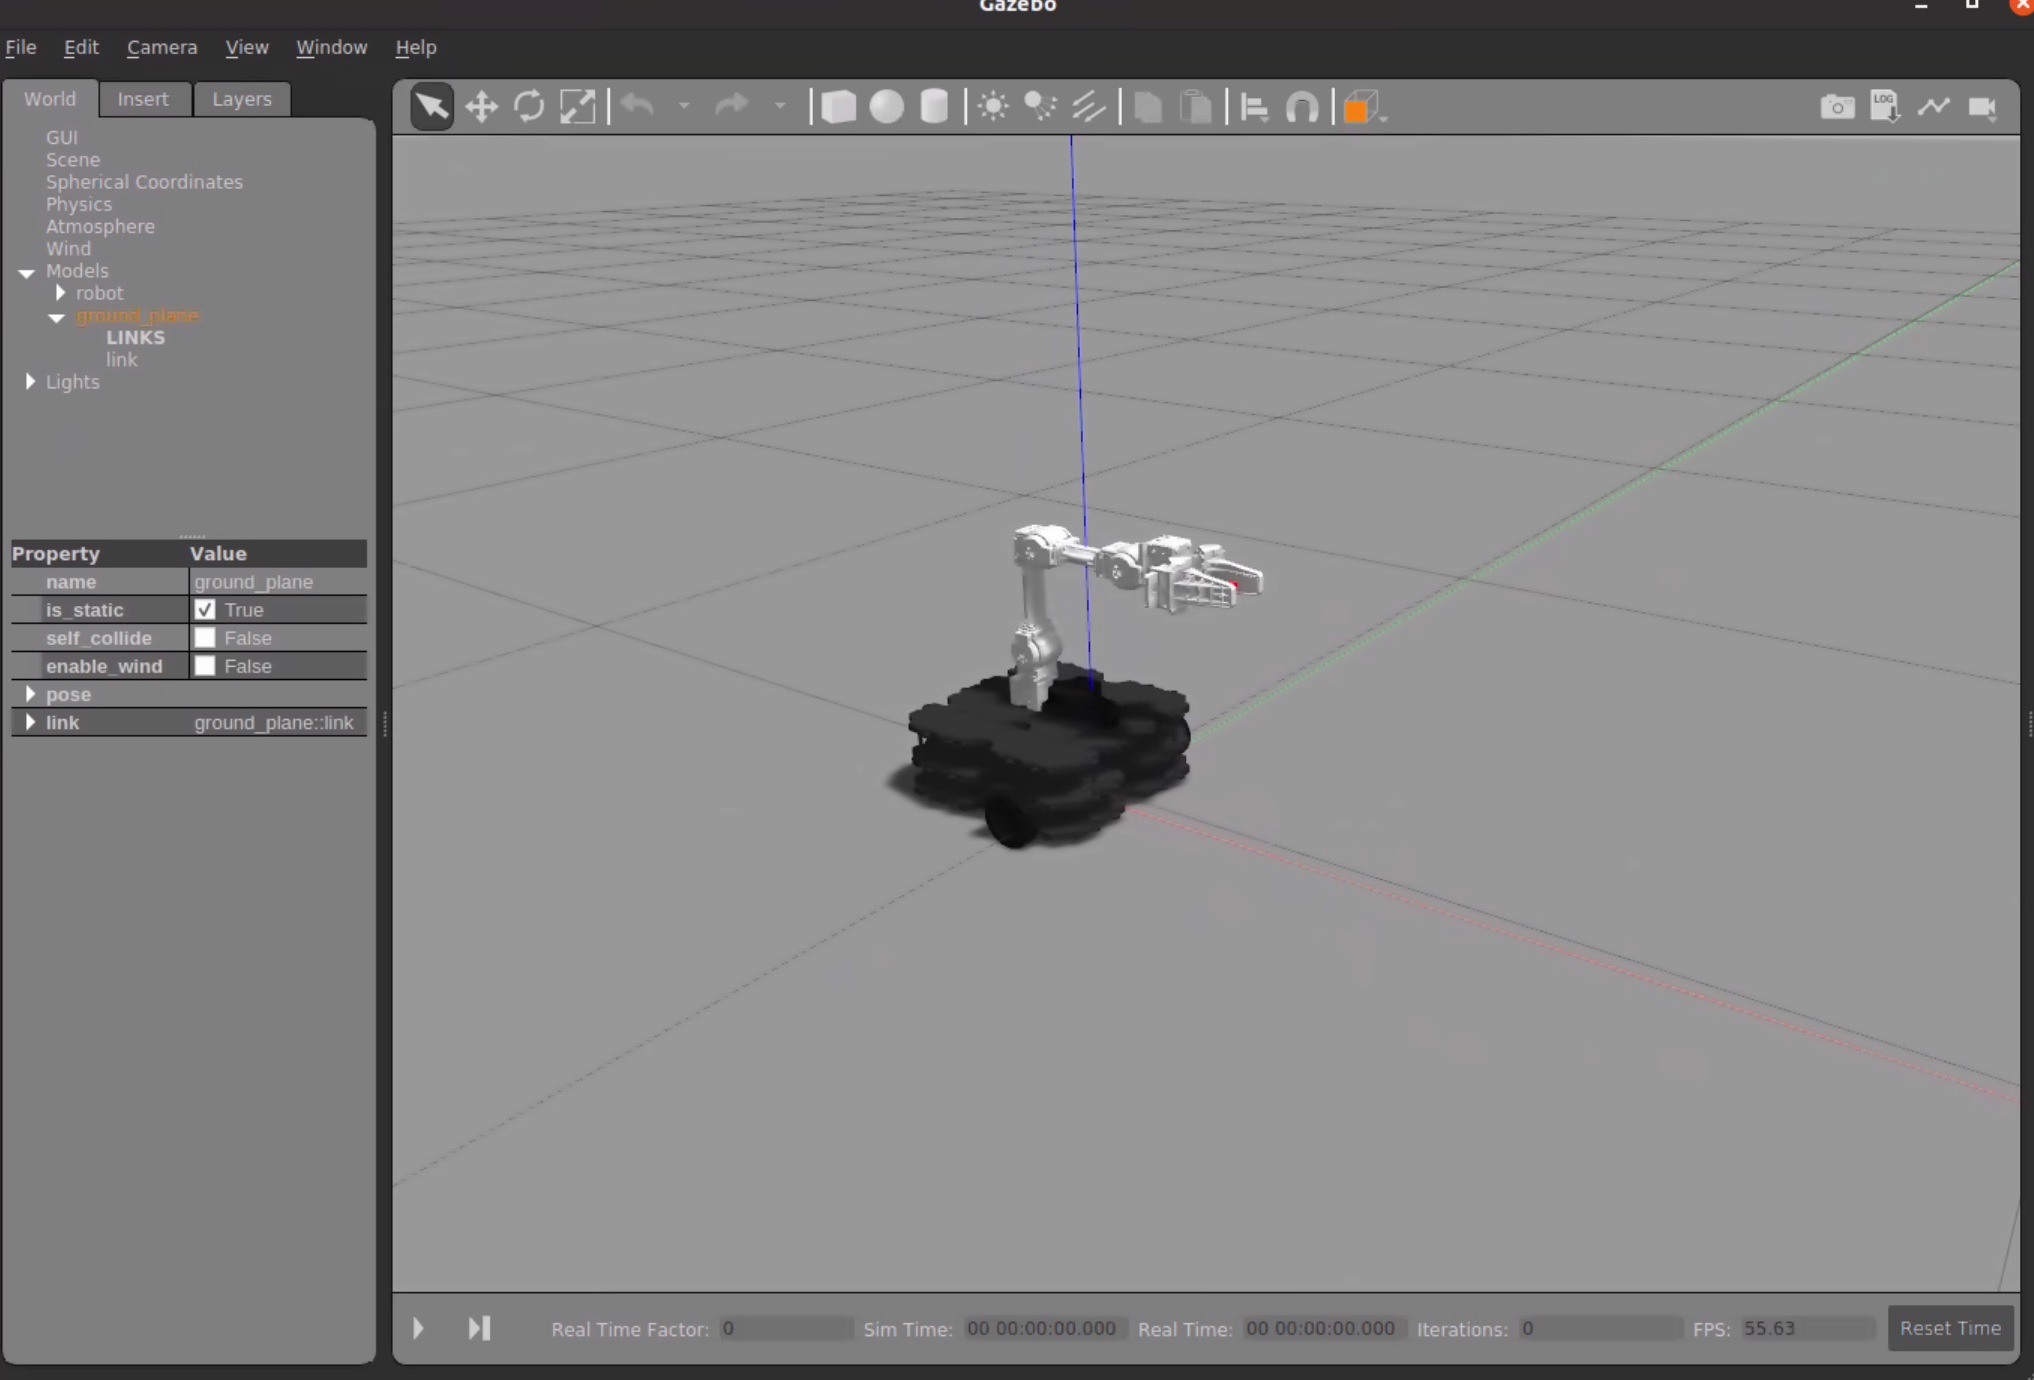
Next, you need MoveIt to manipulate the arm. Launch the following in a new (third) terminal. You should soon see a
message that says, You can start planning now! in the terminal running the move_group node.
$ roslaunch turtlebot3_manipulation_moveit_config move_group.launchFinally, you need some GUI to control the robot arm. Both RViz and the ROBOTIS GUI provide you with an interface that allows control of the robot arm. We recommend using RViz, because it visualizes the robot arm's position and allows you to preview joint and gripper angles.
Arm Control Through RViz
Run the following command to launch RViz:
$ roslaunch turtlebot3_manipulation_moveit_config moveit_rviz.launchIf launched successfully, you should see something like the following screen:

MoveIt! RViz visualizes the position of the arm on the Turtlebot3, regardless of its orientation relative to the body of the robot. That's why only the arm is highlighted in orange.
The blue sphere surrounding the gripper allows you to click and drag on it in order to simulate repositioning the arm.
The settings in the bottom left corner of the window allow you to control various settings of the robot's
movement, notably planning and execution of the joint angles and gripper position.
The two tabs you'll be using the most are Planning and Joints (you may have to click the
right arrow to see Joints).
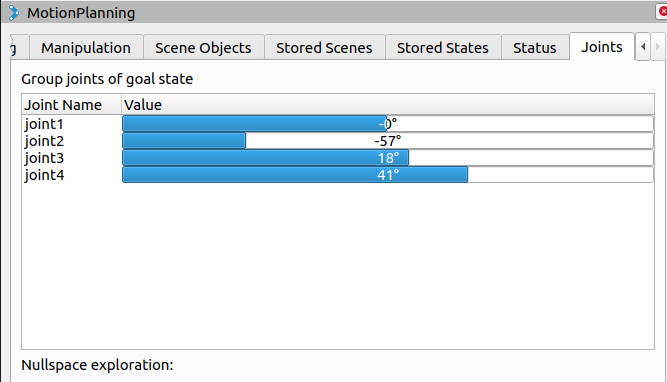
You can set the joint angles in RViz to visualize them before executing them on the physical robot. To do this,
go to Joints and slide the bars for each joint to the desired angle:
The gripper width can also be individually modified. To set the gripper width, first go to Planning
and select "gripper" under the "Planning Group" dropdown. Your screen should look like the following:
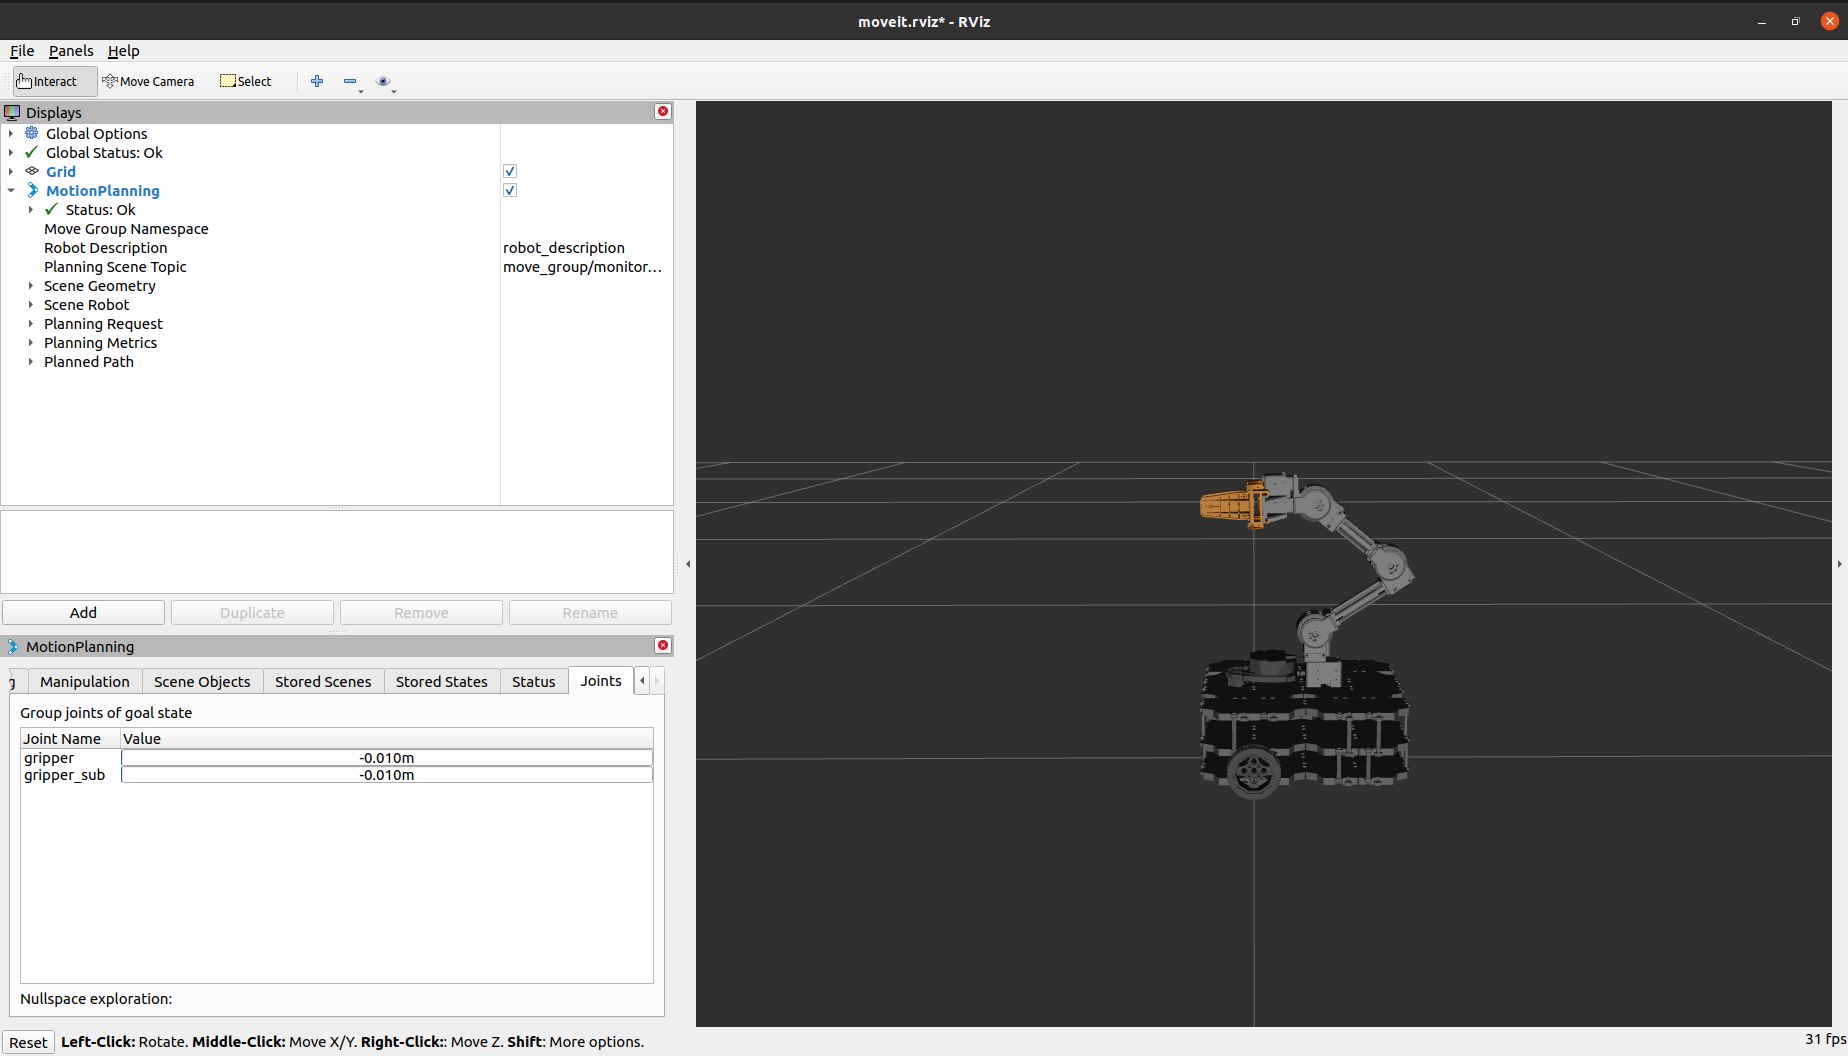
Now under Joints, you will see sliders to set the gripper width. (Both sliders move simultaneously,
so just move the one labeled "gripper".)
Once you've selected your desired joint angles and/or gripper width (and previewed what they look like), you can
now execute these position on the physical Turtlebot in RViz.
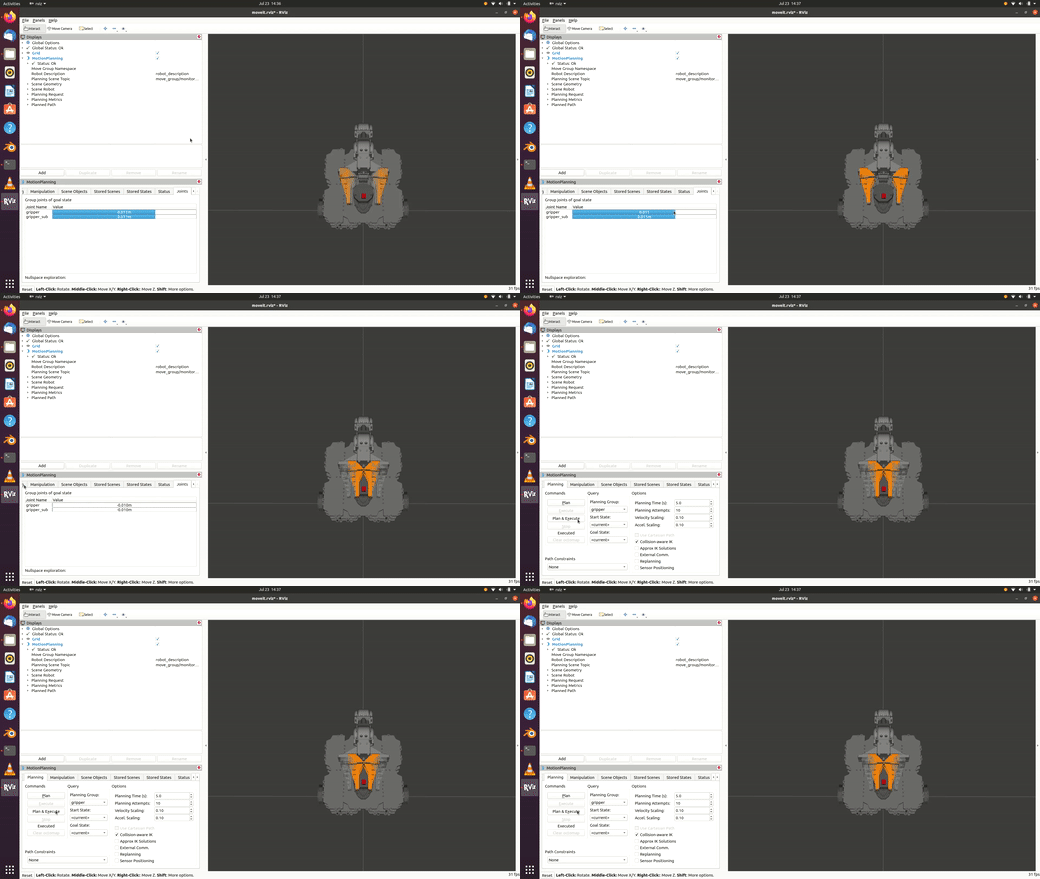
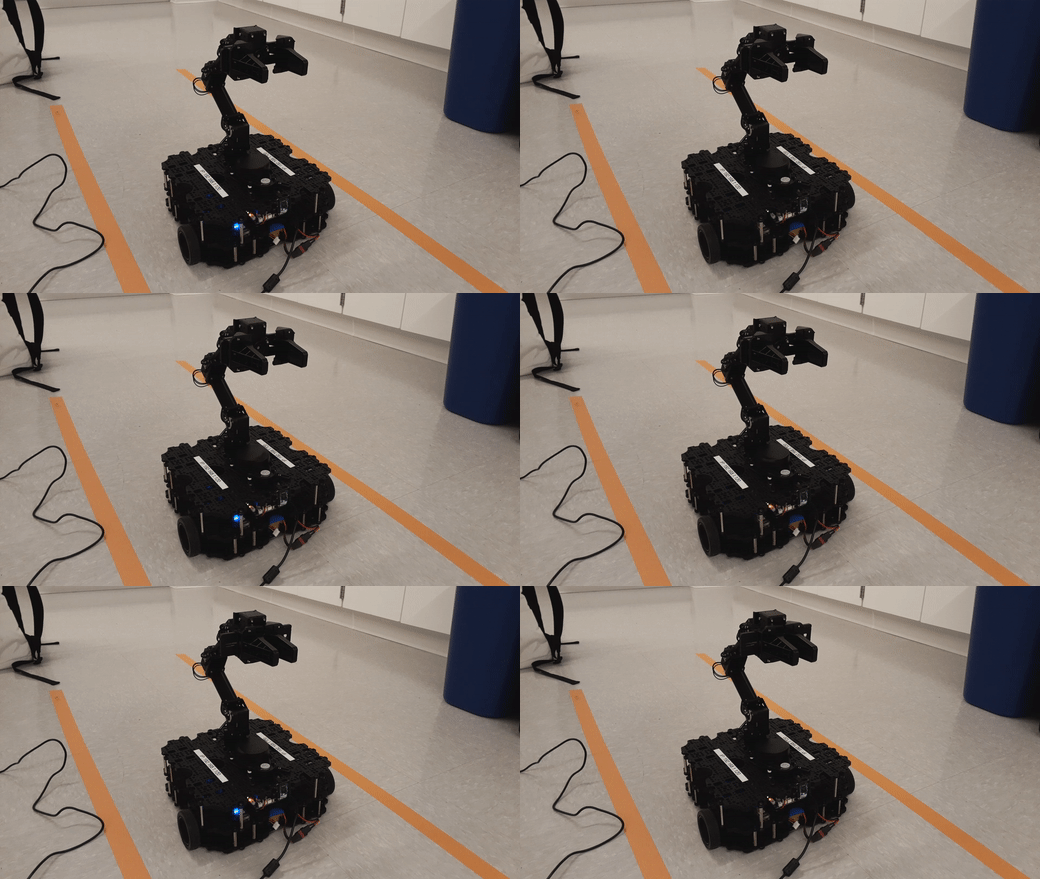
Under Planning, hit the Plan & Execute button. Your Turtlebot should move to the
specified position(s). This whole process should look like this:
Arm Control Through ROBOTIS GUI
Now, run the following command to launch the ROBOTIS GUI:
$ roslaunch turtlebot3_manipulation_gui turtlebot3_manipulation_gui.launch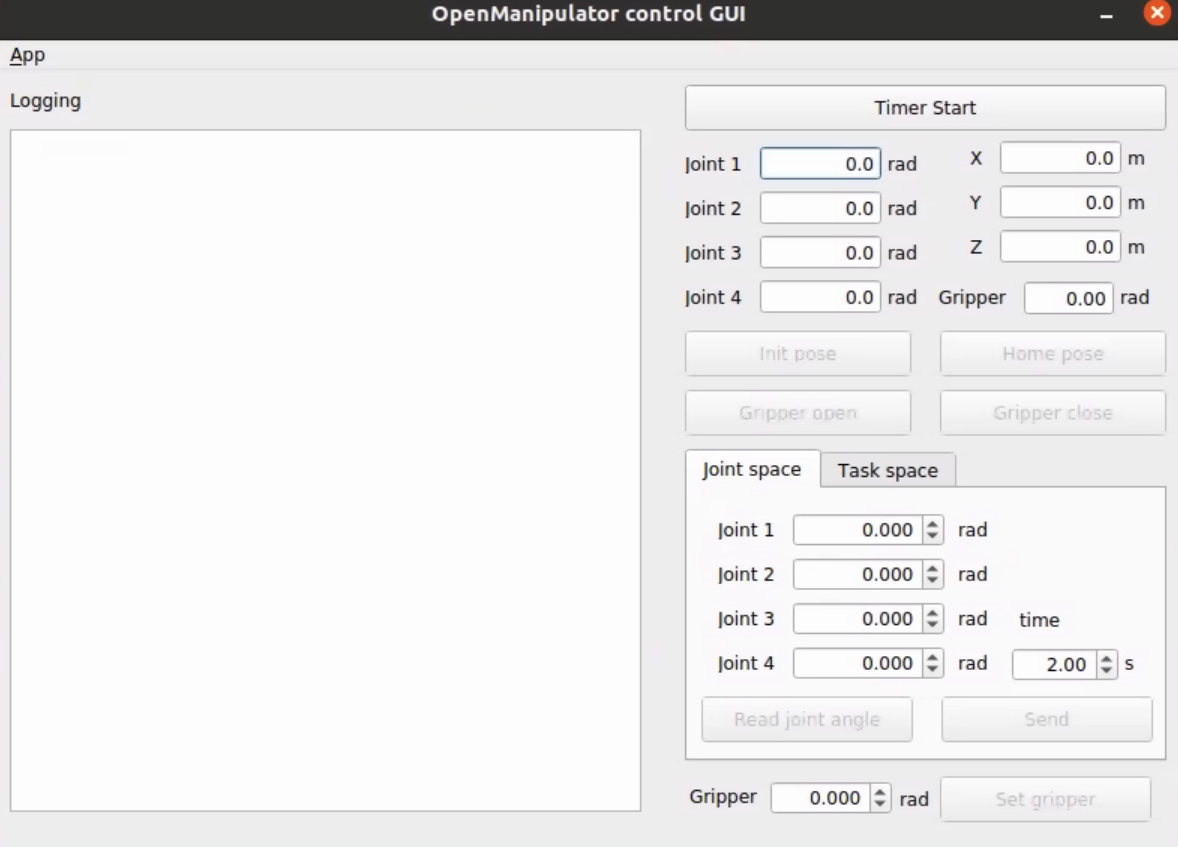
The GUI provides the following information,
- the current position of each of the joints,
- the XYZ position of the red square between the robot's gripper in the simulation,
- the position of the gripper.
Let's make sure your simulation robot can move its arm. Press Time Start and then click on Home Pose. You should see your robot arm move to a new position in the simulation. Pay close attention to how the new pose changes the joint and XYZ values.
Manual movement of the arm is possible through the options in the bottom right features of the GUI. There are two options available for this purpose,
Task Space Control: Sets the position of the red square between the robot's grippers to a certain XYZ.Joint Space Control: Sets the position of each single join.
The window with an s next to it is for selecting how fast you want the the transformation to occur. Once you are done with your manual selection, send your desired positions to the robot and watch the arm move.
Think about the following questions while you experiment with the GUI,
- How does each joint impact the arm's position?
- What seems to be the plausible range of motions for each joint?
- Can you anticipate how changing a joint's value will affect the XYZ value?
- What is the relationship between what we learned today in class (forward and inverse kinematics) and the two options available for controlling the robot's arm?
Arm Control Through Code with the MoveIt Package
The MoveIt ROS package provides a simple, yet powerful interface to control the OpenMANIPULATOR arm on our Turtlebot3. This section outlines the general interface. There is no need to implement anything in the section. Just make sure that you understand the basics of the interface.
First, we setup the interface for controlling the gripper and the arm in the object initialization.
#!/usr/bin/env python3

import rospy
# import the moveit_commander, which allows us to control the arms
import moveit_commander


class Robot(object):

  def __init__(self):

      # initialize this node
      rospy.init_node('turtlebot3_dance')

      # the interface to the group of joints making up the turtlebot3
      # openmanipulator arm
      self.move_group_arm = moveit_commander.MoveGroupCommander("arm")

      # the interface to the group of joints making up the turtlebot3
      # openmanipulator gripper
      self.move_group_gripper = moveit_commander.MoveGroupCommander("gripper")
With this starter code, moving the arm or the gripper using joint angles is fairly simple. Let's try moving the arm,
  def run(self):
      ...
      ...
      # We can use the following function to move the arm
      # self.move_group_arm.go(arm_joint_goal, wait=True)

      # arm_joint_goal is a list of 4 radian values, 1 for each joint
      # wait=True ensures that the movement is synchronous

      # Let's move the arm based on what we have learned

      # First determine at what angle each joint should be.
      # You can use the GUI to find appropriate values based on your need.
      arm_joint_goal = [
        0.0,
        math.radians(5.0),
        math.radians(10.0),
        math.radians(-20.0)
      ]

      # Move the arm
      self.move_group_arm.go(arm_joint_goal, wait=True)

      # The above should finish once the arm has fully moved.
      # However, to prevent any residual movement,we call the following as well.
      self.move_group_arm.stop()
Moving the gripper is very similar.
       # We can use the following function to move the gripper
       # self.move_group_gripper.go(gripper_joint_goal, wait=True)

       # gripper_joint_goal is a list of 2 values in meters, 1 for the left gripper and one for the right
       # wait=True ensures that the movement is synchronous

       # Let's move the gripper based on what we have learned

       # First determine what how far the grippers should be from the base position.
       # You can use the GUI to find appropriate values based on your need.
       gripper_joint_goal = [0.009,0.0009]

       # Move the gripper
       self.move_group_gripper.go(gripper_joint_goal, wait=True)

       # The above should finish once the arm has fully moved.
       # However, to prevent any residual movement,we call the following as well.
       self.move_group_gripper.stop()
Acknowledgments
I want to thank Woolfrey for their helpful Youtube videos on forward and inverse kinematics for helping to inform the content for today's class.