Working with Physical Turtlebots
These are instructions for running ROS code on a physical Turtlebot3 in the John Crerar Library.
Handy Links
- Turtlebot Hardware Status Spreadsheet: This spreadsheet contains the IP addresses of each Turtlebot as well as the current hardware status of the Turtlebots, OpenManipulator arms, and Turtlebot batteries. If any of the class hardware is not working or acting funny, please make a note of it in this spreadsheet.
Overview
Each Turtlebot uses a Raspberry Pi 3B+ and an OpenCR 1.0 module to communicate with its peripherals. To run your ROS programs on a physical Turtlebot, you will need to establish a connection to your robot of choice.
The Raspberry Pi 3B+ is a
tiny computer running its own Linux distribution, Raspbian. When the robot is powered on, the Pi can
interface with each of the robot's peripherals (wheel/arm motors, LiDAR, and camera) through bringup
nodes that you will need to run when executing your programs. Bringup nodes will publish and subscribe to
ROS topics that are used with the Turtlebot, namely /cmd_vel, /odom,
/scan, and others. Thus, a robot running a bringup node is effectively connected to the ROS
network; it will respond to messages published to certain topics and send sensor data over others.
Connecting to Turtlebot3
First, you will need to connect to the intro-robo wifi network (please ask us for the
password).
Next, you'll have to setup some environment variables to establish
communication between your PC and the robot: ROS_MASTER_URI and ROS_HOSTNAME. Both
ROS_MASTER_URI and ROS_HOSTNAME should be set to the IP address of the PC you are
working from.
-
Make sure your PC is connected to the same wi-fi network that the Turtlebot is on
(
intro-robo) and obtain the PC's IPv4 IP address for that network. If you're using a VM, you'll want to use the VM's IP address instead. The commandhostname -Iorifconfigmay be helpful here. -
Update your
.bashrcfile with the command below. (nanocould be replaced with any other editor.)$ nano ~/.bashrc -
To the end of the file, add the following lines:
$ export ROS_MASTER_URI=http://IP_OF_YOUR_PC:11311
$ export ROS_HOSTNAME=IP_OF_YOUR_PC -
Once those lines are appended, source the
.bashrcfile.$ source ~/.bashrc
ROS_MASTER_URI
and ROS_HOSTNAME environment variables are either undefined or set to
http://localhost:11311 and localhost respectively. This will
ensure that the ROS environment you are launching is independent of whatever
network you are connected to.
For further details on configuring the variables on your PC, refer to Section 3.1.6 of the Turtlebot3 manual.
Next, you will need to set the environment variable on the robot's Raspberry Pi,
ROS_MASTER_URI, that will inform the robot which computer it should be connecting to (your
computer).
-
Connect to the Raspberry Pi of the robot you want to control using its IP address. The IP address can be
found in this
spreadsheet. The password is
turtlebot.$ ssh pi@IP_OF_TURTLEBOT -
Set the
ROS_MASTER_URIenvironment variable on the robot so that it knows to connect with your computer:
To save time, we've also defined an alias for this command ($ export ROS_MASTER_URI=http://IP_OF_YOUR_PC:11311set_ip) that you can use instead. The IP addresses assigned by the router only differ in their last three digits, so the command simply takes a three-digit number corresponding to the last three digits of your IP address.$ set_ip LAST_THREE_DIGITS
For further details on configuring the variables on your PC, refer to Section 3.1.6 of the Turtlebot3 manual.
If you want to connect to a different Turtlebot or use a different computer to launch ROS, you will need to repeat this process and change the IP addresses accordingly.Running code on Turtlebot3
The procedure for running code on a physical Turtlebot3 differs slightly from that of the Gazebo simulator. You will need to manage a couple of terminals running on the PC, as well as one terminal running on the Pi.
-
In one terminal on the PC, run
$ roscore -
In a second terminal, SSH into the Raspberry Pi of the robot you want to connect to (remember the
password is
turtlebot), and set theROS_MASTER_URIenvironment variable to your computer's IP address (if you useset_ipenter the last 3 digits of your IP address):
This will now be the "Pi terminal" from which$ ssh pi@IP_OF_TURTLEBOT $ set_ip LAST_THREE_DIGITSbringupwill be run. -
In the Pi terminal, once you've connected successfully to the robot's Pi, run
or use the handy alias$ roslaunch turtlebot3_bringup turtlebot3_robot.launchbringupto do the same thing:$ bringup -
In a third terminal on the PC, run
where$ rosrun [package-name] [file-name.py][package-name]is the name of the ROS package the file is located in, and[file-name.py]is the name of the file to be run.
roscore and bringup only need to be run once, even if you are running
multiple ROS nodes.
To stop the robot, quit bringup and run in the Pi terminal:
$ stop_botbringup will not stop
the robot's movement!
You must run stop_bot in the Pi terminal to explicitly tell the robot to stop moving.
bringup and stop_botare aliases for ROS commands
that launch Bringup and publish an empty Twist message, respectively, on the Pi.
The full commands for both aliases are below.
Aliases
To make it easier to run common commands on the Turtlebot3, several aliases have been defined in each
Raspberry Pi's ~/.bashrc file.
| alias | command |
bringup |
roslaunch turtlebot3_bringup turtlebot3_robot.launch |
bringup_named [ROBOT_NAME] |
roslaunch turtlebot3_bringup turtlebot3_named_robot.launch [multi_robot_arg:=ROBOT_NAME]
|
bringup_cam |
roslaunch turtlebot3_bringup turtlebot3_rpicamera.launch |
bringup_cam_named [ROBOT_NAME] |
roslaunch turtlebot3_bringup turtlebot3_named_rpicamera.launch [multi_robot_arg:=ROBOT_NAME]
|
set_ip REMOTE_PC_IP_LAST_3_DIGITS |
export ROS_MASTER_URI=http://192.168.0.REMOTE_PC_IP_LAST_3_DIGITS:11311
|
stop_bot |
rostopic pub -1 /cmd_vel geometry_msgs/Twist '{linear: {x: 0.0, y: 0.0, z: 0.0}, angular: {x: 0.0, y: 0.0, z: 0.0}}'
|
Using the named commands will run variants of the usual bringup nodes that allow you to specify
a prefix,
which will change the names of all the topics used by bringup. For example, using the prefix
tb01
will result in the TurtleBot publishing to the topic tb01/scan and listening to the topic
tb01/cmd_vel.
Launching the named bringup nodes without a default argument will give the topics default
prefixes corresponding to the TurtleBot
that the node is being launched from (e.g. tb01 for TurtleBot 01).
This can be useful if you are working on a project that requires you to control multiple TurtleBots at the
same time from a single machine.
Limitations of Turtlebot3
The Turtlebot3 has various physical limitations and constraints that differ from the Gazebo simulator.
- Power: The Turtlebot uses a 11.1V LiPo battery as its power supply. Keep an eye on the OpenCR board for a red LED, which indicates that battery power is running low. If the voltage falls below the threshold required to power the Turtlebot's servo motors, you will hear a loud beeping noise; if the OpenManipulator arm is attached, the arm will lose power and fall (possibly onto the LiDAR). Swap out the battery for a fresh one before this happens to avoid damaging the robot.
- Velocities: The maximum linear velocity is 0.26 m/s, while the maximum angular velocity is 1.82 m/s. Do not exceed these speeds when operating the Turtlebot3 to ensure the robot behaves properly.
-
LiDAR: The maximum LiDAR distance is approximately 4.1m (as opposed to 3m in Gazebo).
When this distance is exceeded, the LiDAR returns 0 (as opposed to
infin Gazebo). - The front of the robot on the LiDAR is 0, and increases counterclockwise (left of the LiDAR is 90, right is 270).
-
Odometry: The robot's odometry is initialized to 0 when
bringupis launched, not when the power is turned on/off. - Camera: The Turtlebot3's Raspberry Pi camera
- Network connection: Be aware that the WiFi connection tends not to work well through walls, and it fails if the Turtlebot travels too far from the router. This is important to remember for projects where the Turtlebot3 is in close contact with walls and objects.
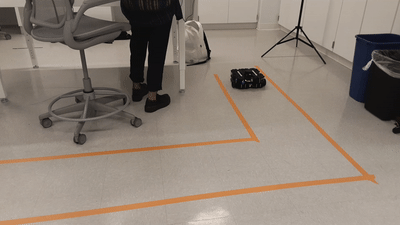
Teleoperation of Turtlebot3
Now that you've connected to your Turtlebot3, you can teleoperate the robot via your PC. This is a good way to check that you're properly connected to the Turtlebot.
-
In one terminal on the PC, run
$ roscore -
In a second terminal, SSH into the Raspberry Pi of the robot you want to connect to:
This will now be the "Pi terminal" from which$ ssh pi@IP_OF_TURTLEBOT $ set_ip LAST_THREE_DIGITSbringupwill be run. -
In the Pi terminal, once you've connected successfully to the robot's Pi, run the
bringupalias, which runsroslaunch turtlebot3_bringup turtlebot3_robot.launch$ bringup -
In a third terminal on the PC, run
$ roslaunch turtlebot3_teleop turtlebot3_teleop_key.launch
Things to keep in mind when teleoperating the robot:
- On the PC keyboard, the W/A/D/X keys are used to move up/left/right/down, and the S key stops the robot's motion entirely.
- You must have the terminal running the teleoperation open in order for the keypresses to register. If you switch terminals or click to another application on your desktop, the robot will not move when you press the keys.
- Make sure the Turtlebot has adequate space to move around if you are teleoperating the robot!
If you've launched teleoperation successfully, you should be able to move around your robot similar to the following:

Working with the Raspberry Pi Camera
The Turtlebot3 uses a separate bringup node to handle image data captured with the on-board Raspberry Pi
camera. Due to the large size of these images, they are sent over the network in a compressed format via the
raspicam_node/compressed topic; this behavior is notably different from the Gazebo simulator,
which publishes raw images to the camera/rgb/image_raw topic. Therefore, you will either need
to decompress the images directly in your code or run an image_transport node on your own
machine. We highly recommend using an image_transport node since it will republish the
decompressed images on a topic of your choice; by publishing to the camera/rgb/image_raw topic,
this will save you from having to modify your code every time you want to switch between a real Turtlebot
and the simulator.
-
In one terminal on the PC, run
$ roscore -
Next, you will need to run both
bringupandbringup_cam(an alias forroslaunch turtlebot3_bringup turtlebot3_rpicamera.launch) on the Pi at the same time. You can either do this in two terminals by connecting to the Pi twice, or you can do this in a single terminal by running the nodes in the background using&:$ ssh pi@IP_OF_TURTLEBOT $ set_ip LAST_THREE_DIGITS $ bringup & $ bringup_cam & -
In a third terminal on the PC, run
If you are decompressing the images in your code, you can skip this command.$ rosrun image_transport republish compressed in:=raspicam_node/image raw out:=camera/rgb/image_raw -
In a fourth terminal on the PC, run
where$ rosrun [package-name] [file-name.py][package-name]is the name of the ROS package the file is located in, and[file-name.py]is the name of the file to be run.
fg [JOB_NUMBER]) or
stop the process (stop [JOB_NUMBER]).
Operating the OpenMANIPULATOR Arm

Much like with the actual Turtlebot, the OpenMANIPULATOR arm can also be operated via the remote PC, through the OpenMANIPULATOR GUI or by running code. The OpenMANIPULATOR arm has its own Bringup that must be run every time it is operated, in addition to MoveIt!. Follow the steps below:
-
Terminal 1 [PC]:
$ roscore -
Terminal 2 [Pi]:
$ ssh pi@IP_OF_TURTLEBOT $ set_ip LAST_THREE_DIGITS $ bringup -
Terminal 3 [PC]:
$ roslaunch turtlebot3_manipulation_bringup turtlebot3_manipulation_bringup.launch -
Terminal 4 [PC]:
$ roslaunch turtlebot3_manipulation_moveit_config move_group.launch -
Terminal 5 [PC]:
-
For RViz [recommended]:
$ roslaunch turtlebot3_manipulation_moveit_config moveit_rviz.launch -
For the ROBOTIS GUI:
$ roslaunch turtlebot3_manipulation_gui turtlebot3_manipulation_gui.launch -
For running code:
$ rosrun [package-name] [file-name]
-
For RViz [recommended]:
The gripper opens to a maximum width of 7cm and closes to a minimum width of 2.7cm, so ensure that the objects you want the arm to pick up are within this width range.