Class Meeting 01: Welcome & Introduction to Clicbot
Learning Goals
- You will start getting to know the course staff and your fellow students.
- You will learn about this course, its learning objectives, and what you can expect from class sessions.
- You will build and interact with ClicBot for the first time.
Introductions: Getting to Know the Course Staff and Your Fellow Students
We'll start off our first class with some introductions. You'll be asked to share with the class:
- Your name + preferred pronouns (e.g., she/her, he/him, they/them)
- Your favorite robot
- Your favorite Chicago summer activity
Introduction to the Course from Prof. Sarah Sebo
Here is a link to the presentation slides from today.
Course Entrance Survey
Please follow this link to take the Course Entrance Survey. The survey should take you about 10 minutes to complete.
The purpose of this survey is to understand your prior experience related to the course’s content, your interest in computing, and your expectations for the course. Your responses to this survey will inform the way we run this course this summer. Also, we expect that most of the students enrolled in this course will not have prior experience with either programming or robotics – this course is an opportunity to gain that exposure.
Groupwork
For all of our hands-on class activities, you'll be working in groups of 2-3 students. Our expectations for working in groups is as follows:
- Everyone is included and involved with what the group is working on.
- Group members change roles frequently so that everyone can have experience with each role.
- If someone doesn't get it or isn't following along, the group will stop to make sure everyone is on the same page before proceeding.
- If a group member doesn't understand something or has a question, they ask their team members. If the team doesn't know the answer, the group asks a course staff member.
Exercise #1: Getting Familiar with ClicBot
In this first exercise, you will get familiar with building ClicBots by constructing two predesigned ClicBot characters.
Bic
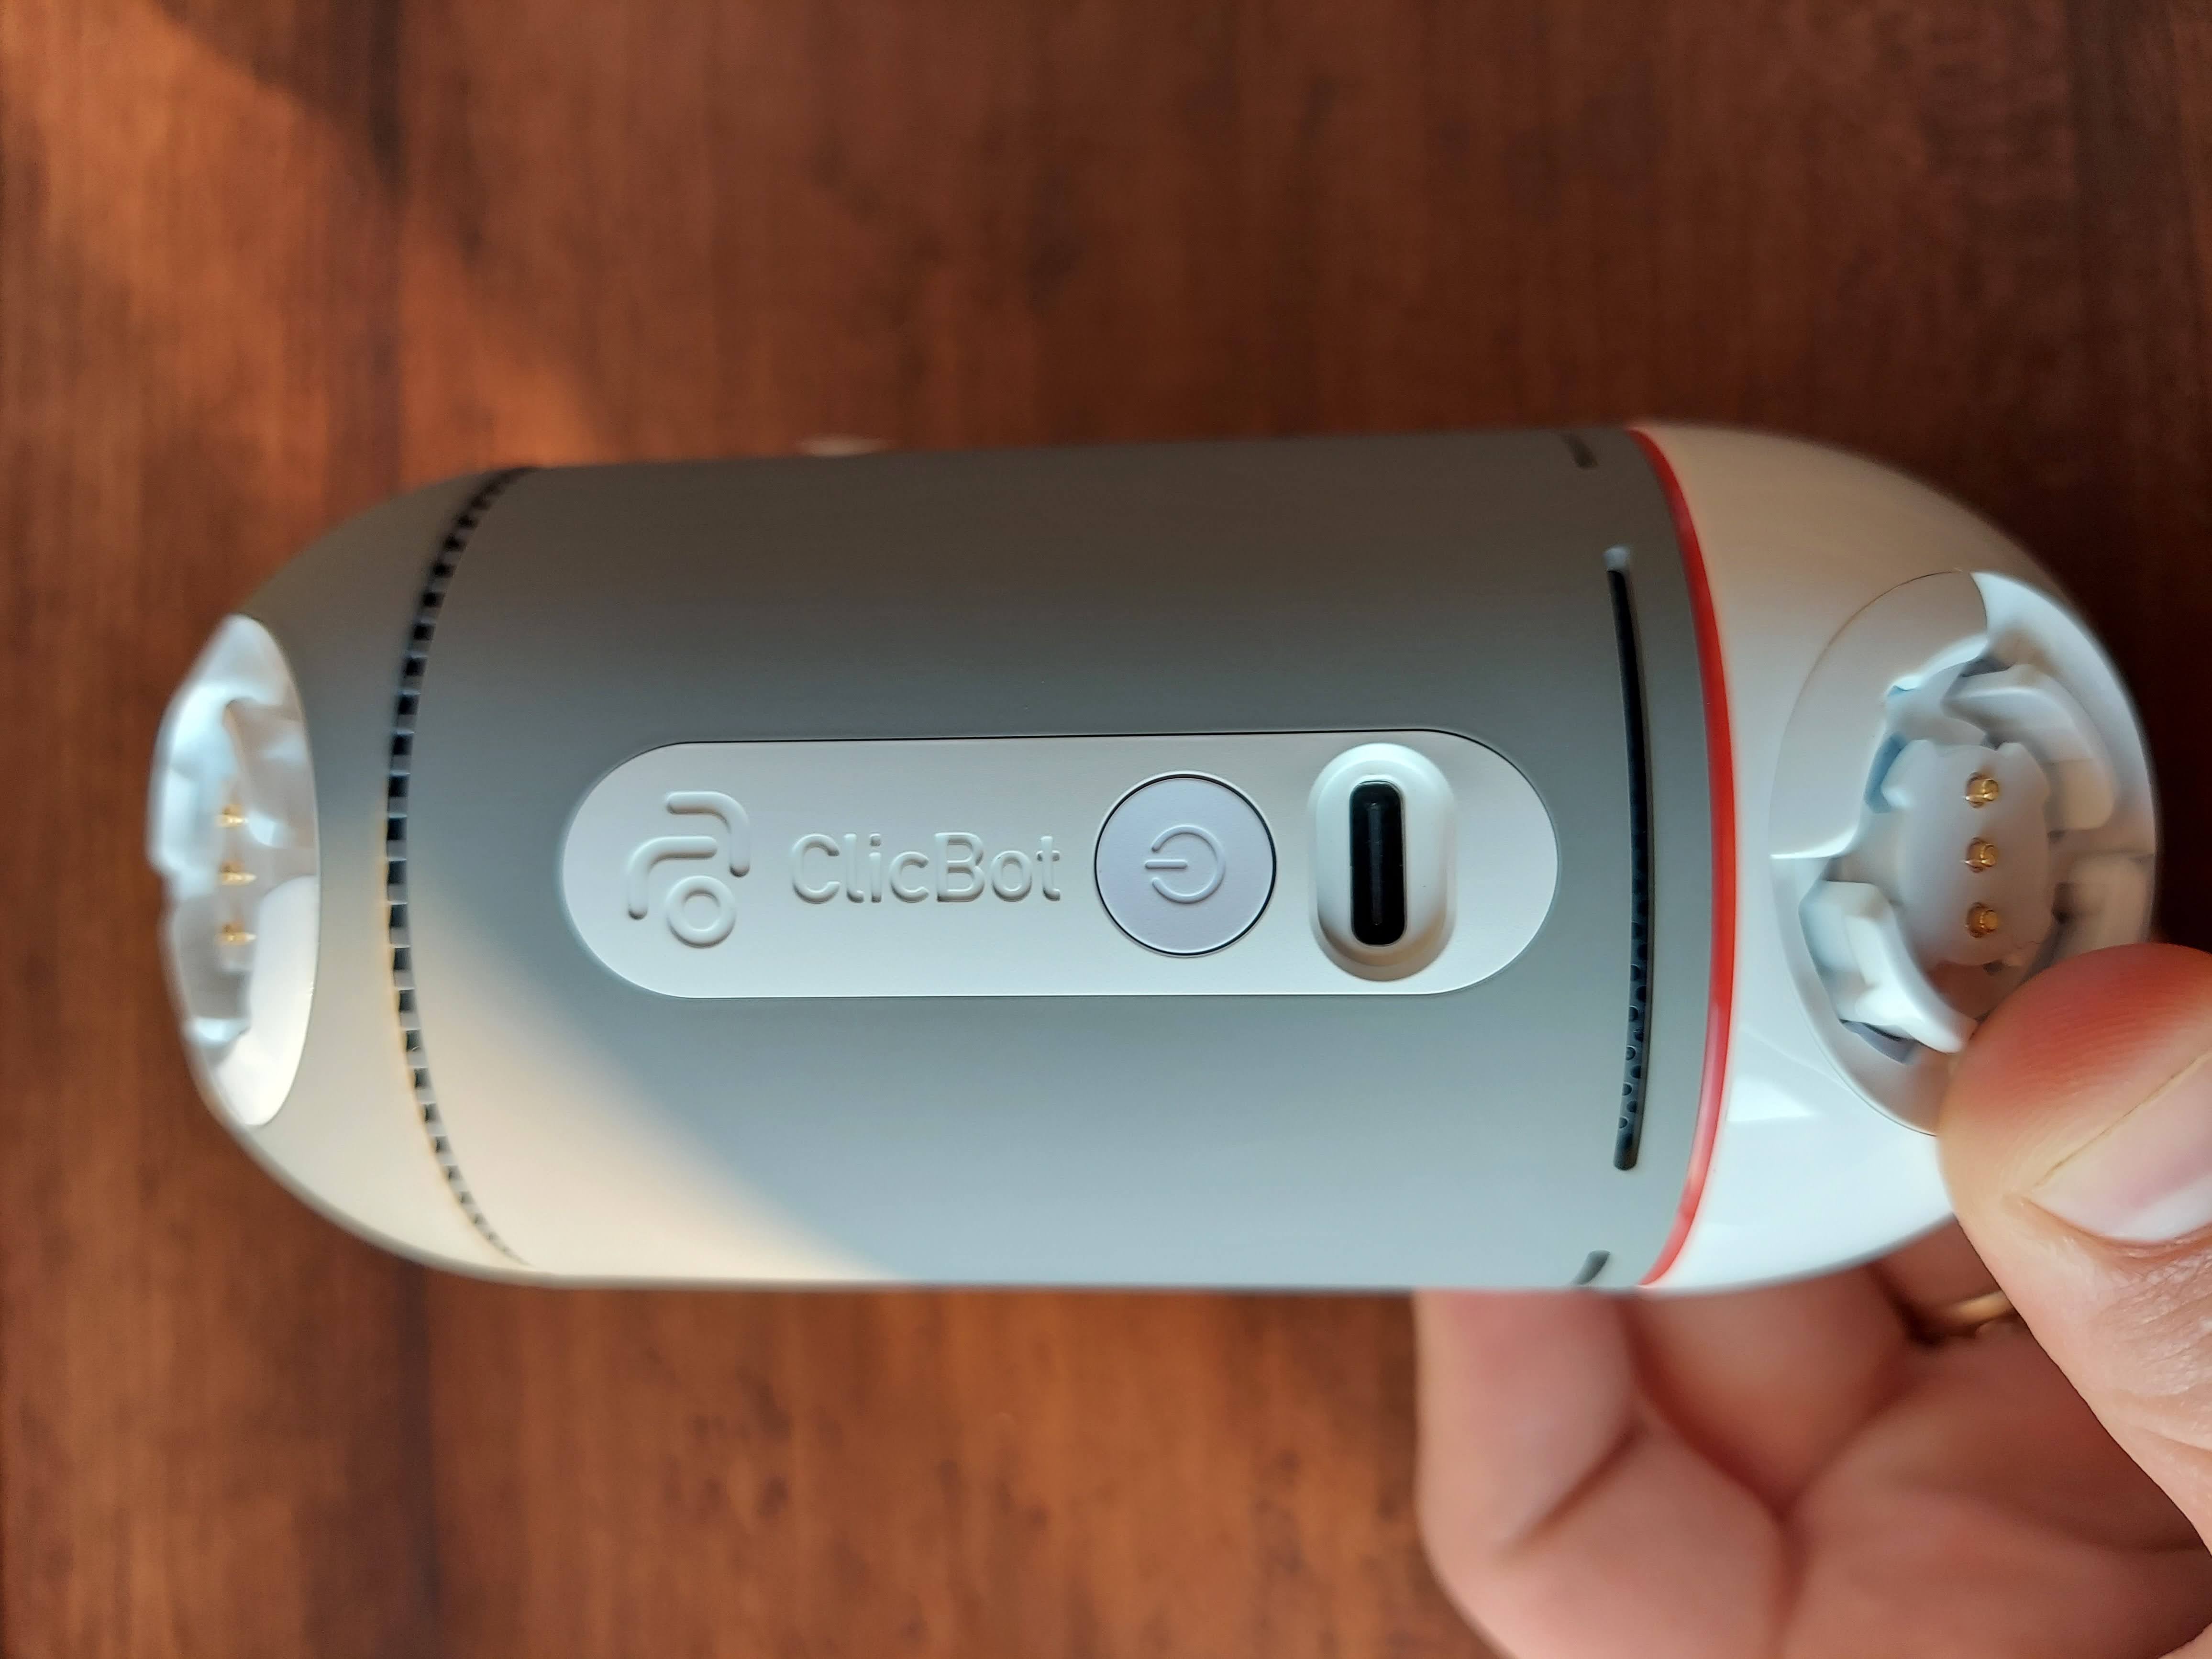
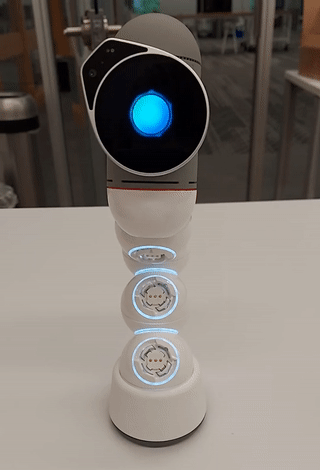
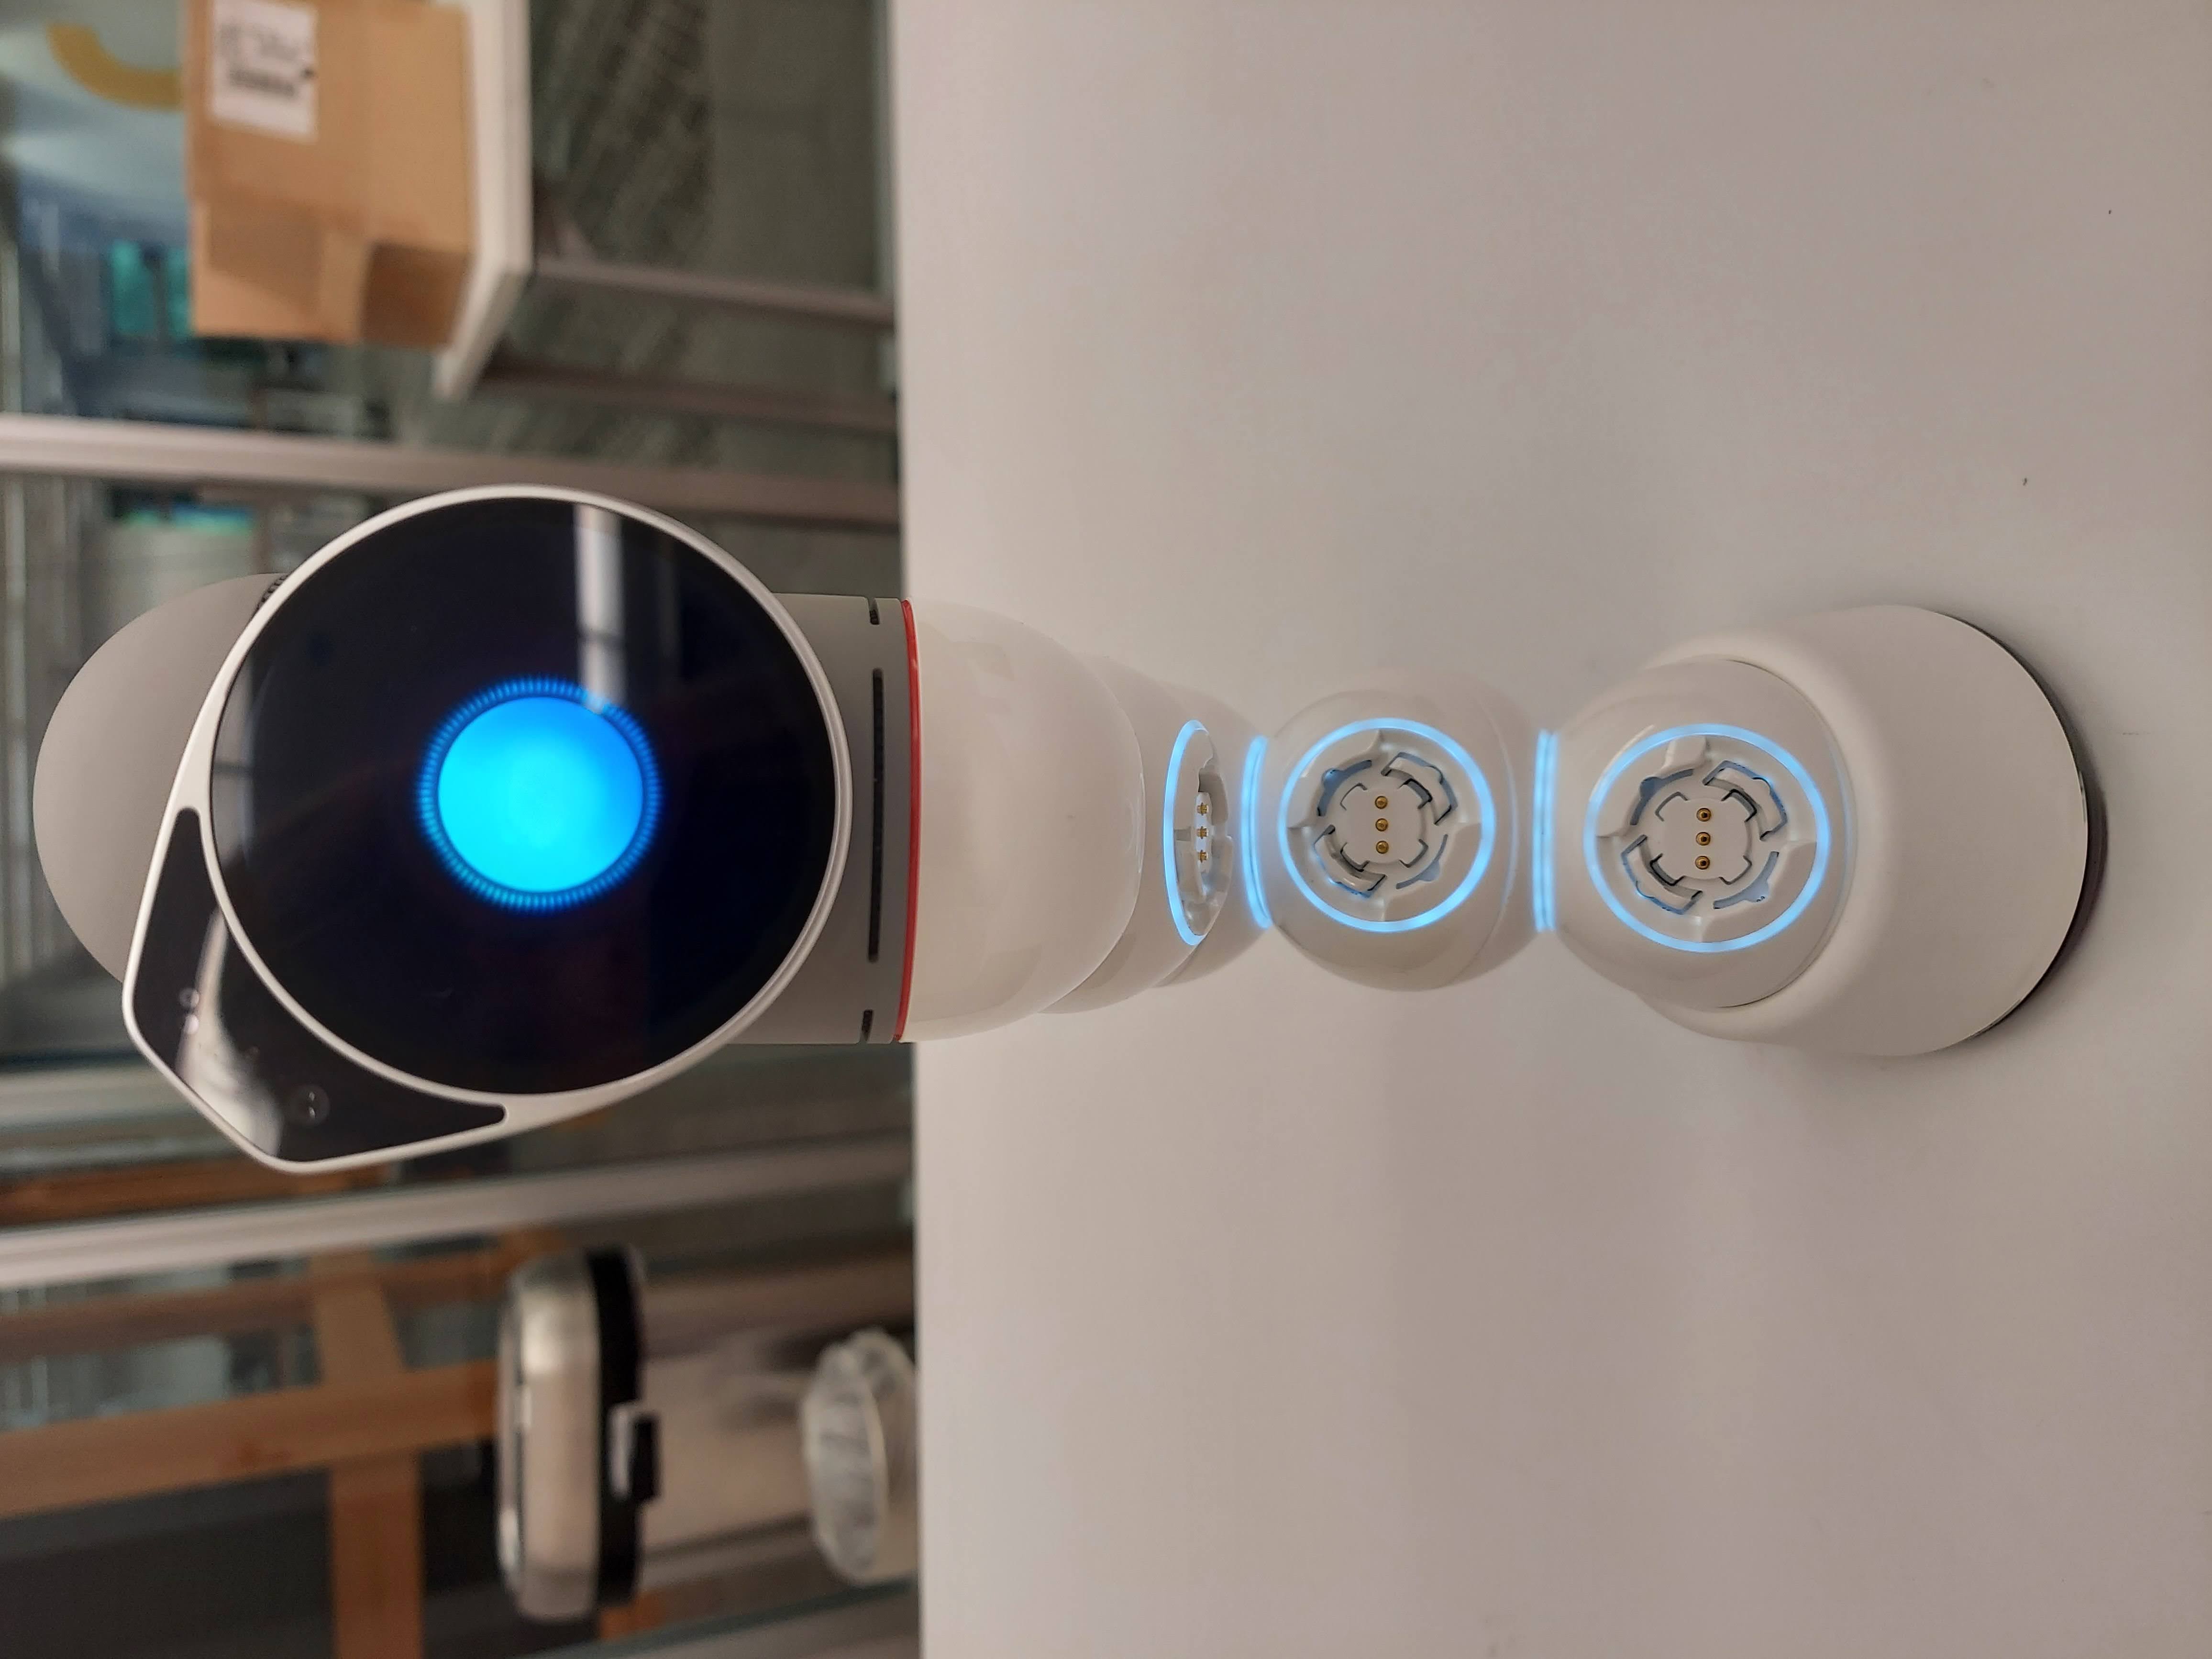
The first ClicBot character you'll build is alled Bac. To build this robot, turn your robot on by pressing the ON button on the back of the brain (see below).
Once your ClicBot has turned on, swipe up on the face screen and swipe right/left until you see the "Bac" character (see below).
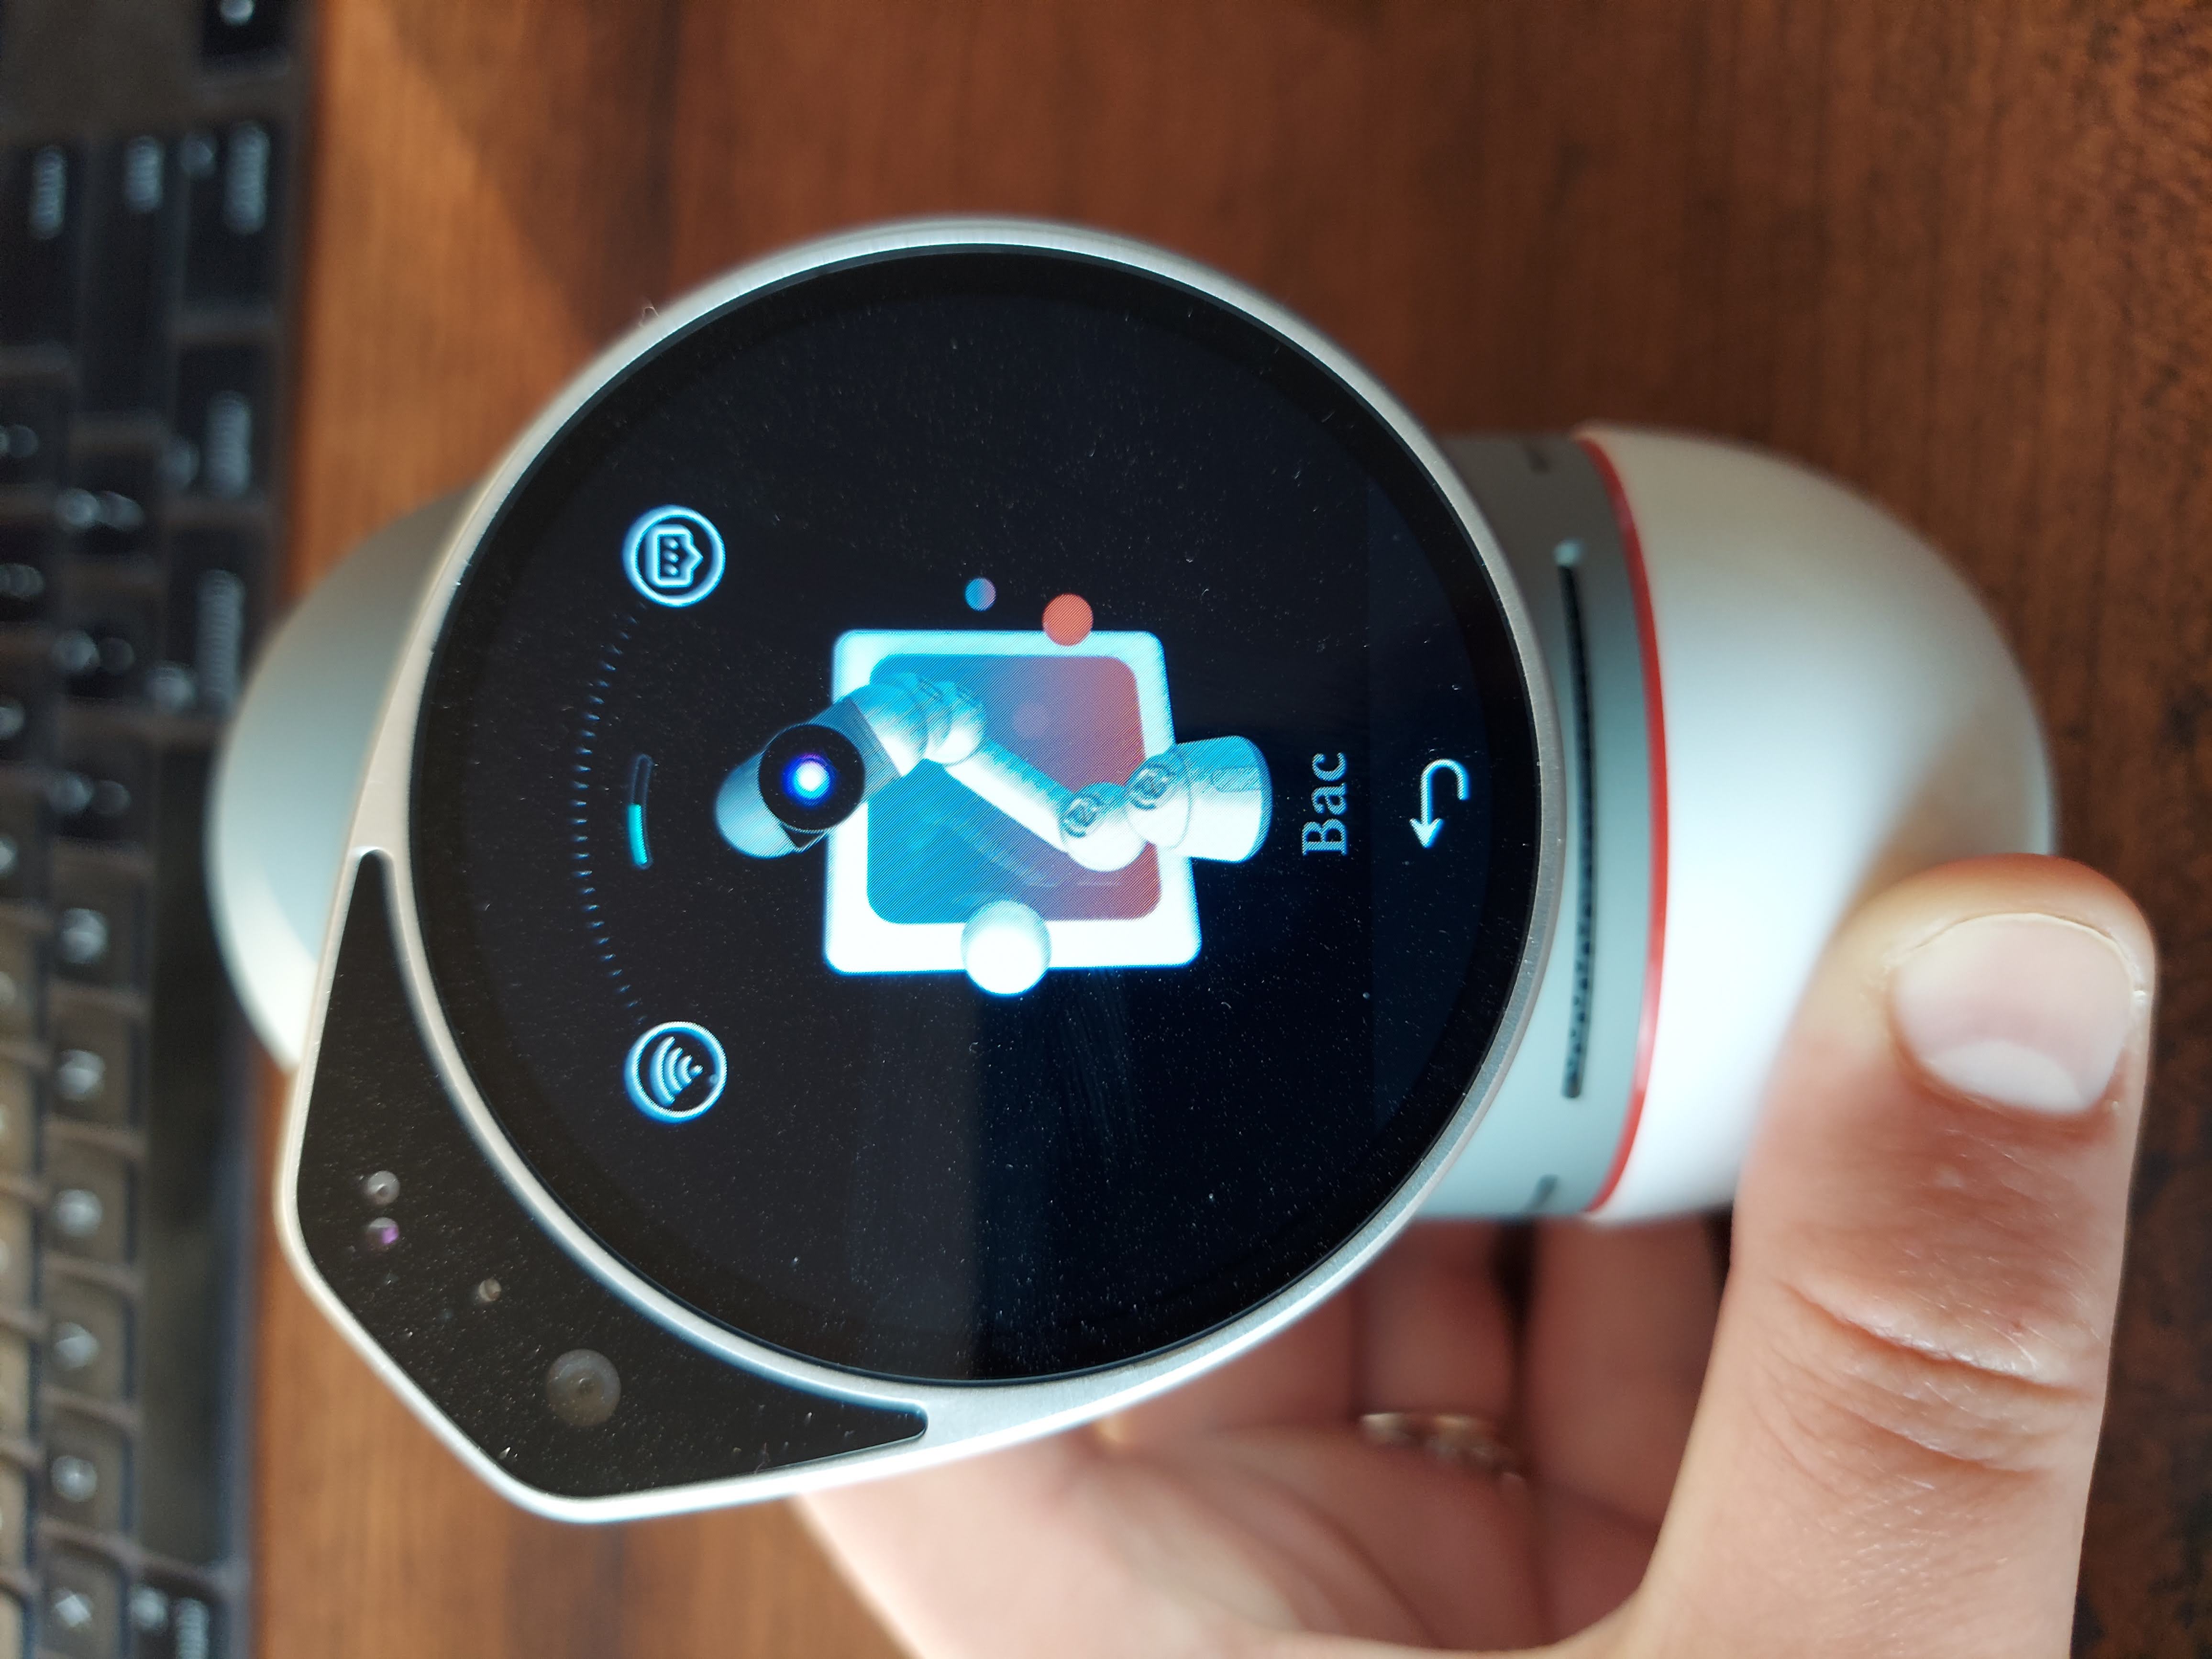
Select "Bac" by clicking on the screen. Then, follow the instructions that follow to construct the Bac robot. You might find the following video helpful when trying to connect or detach different ClicBot modules.
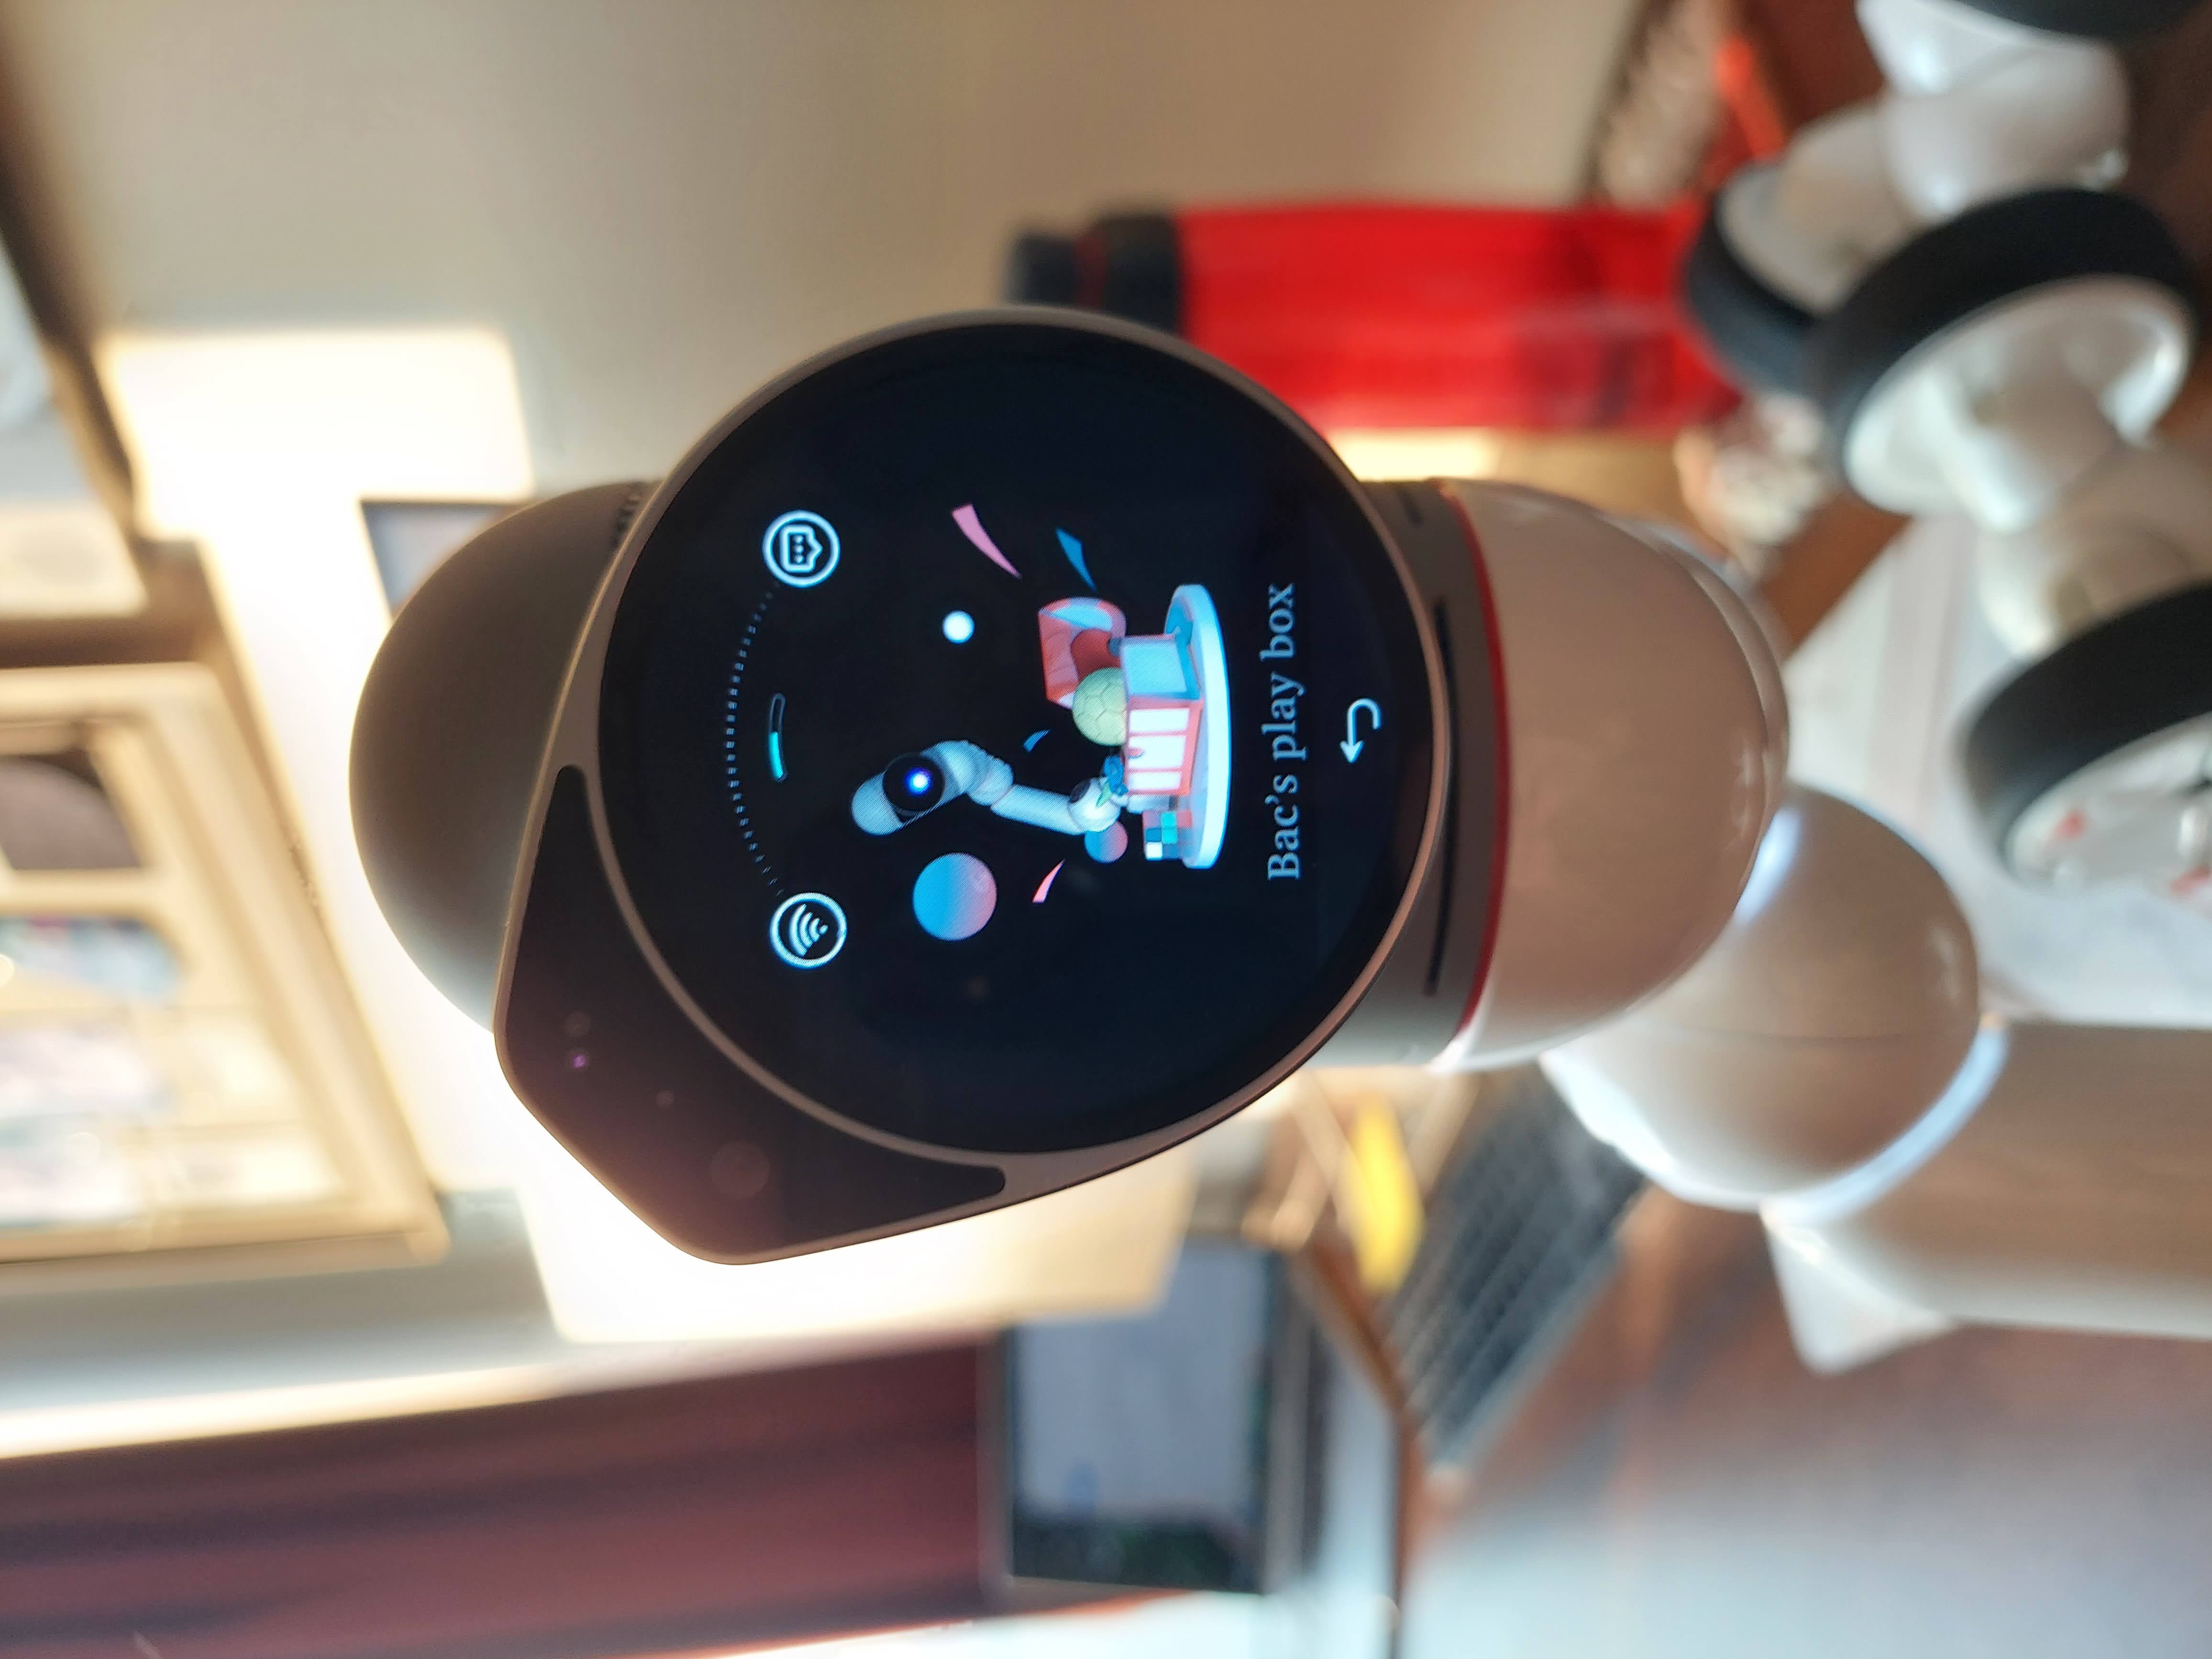
Once you've built Bac, enjoy the robot character come to life! One cool feature about Bac is that it comes with some built-in skills. You can explore these skills by swiping up on the face screen and selecting "Bac's play box" (see below). We especially enjoy Bac's dancing. Try several of them out to see what this robot is capable of doing!
Once you've explored what Bac can do, let's move onto the second character, Bic.
Bic
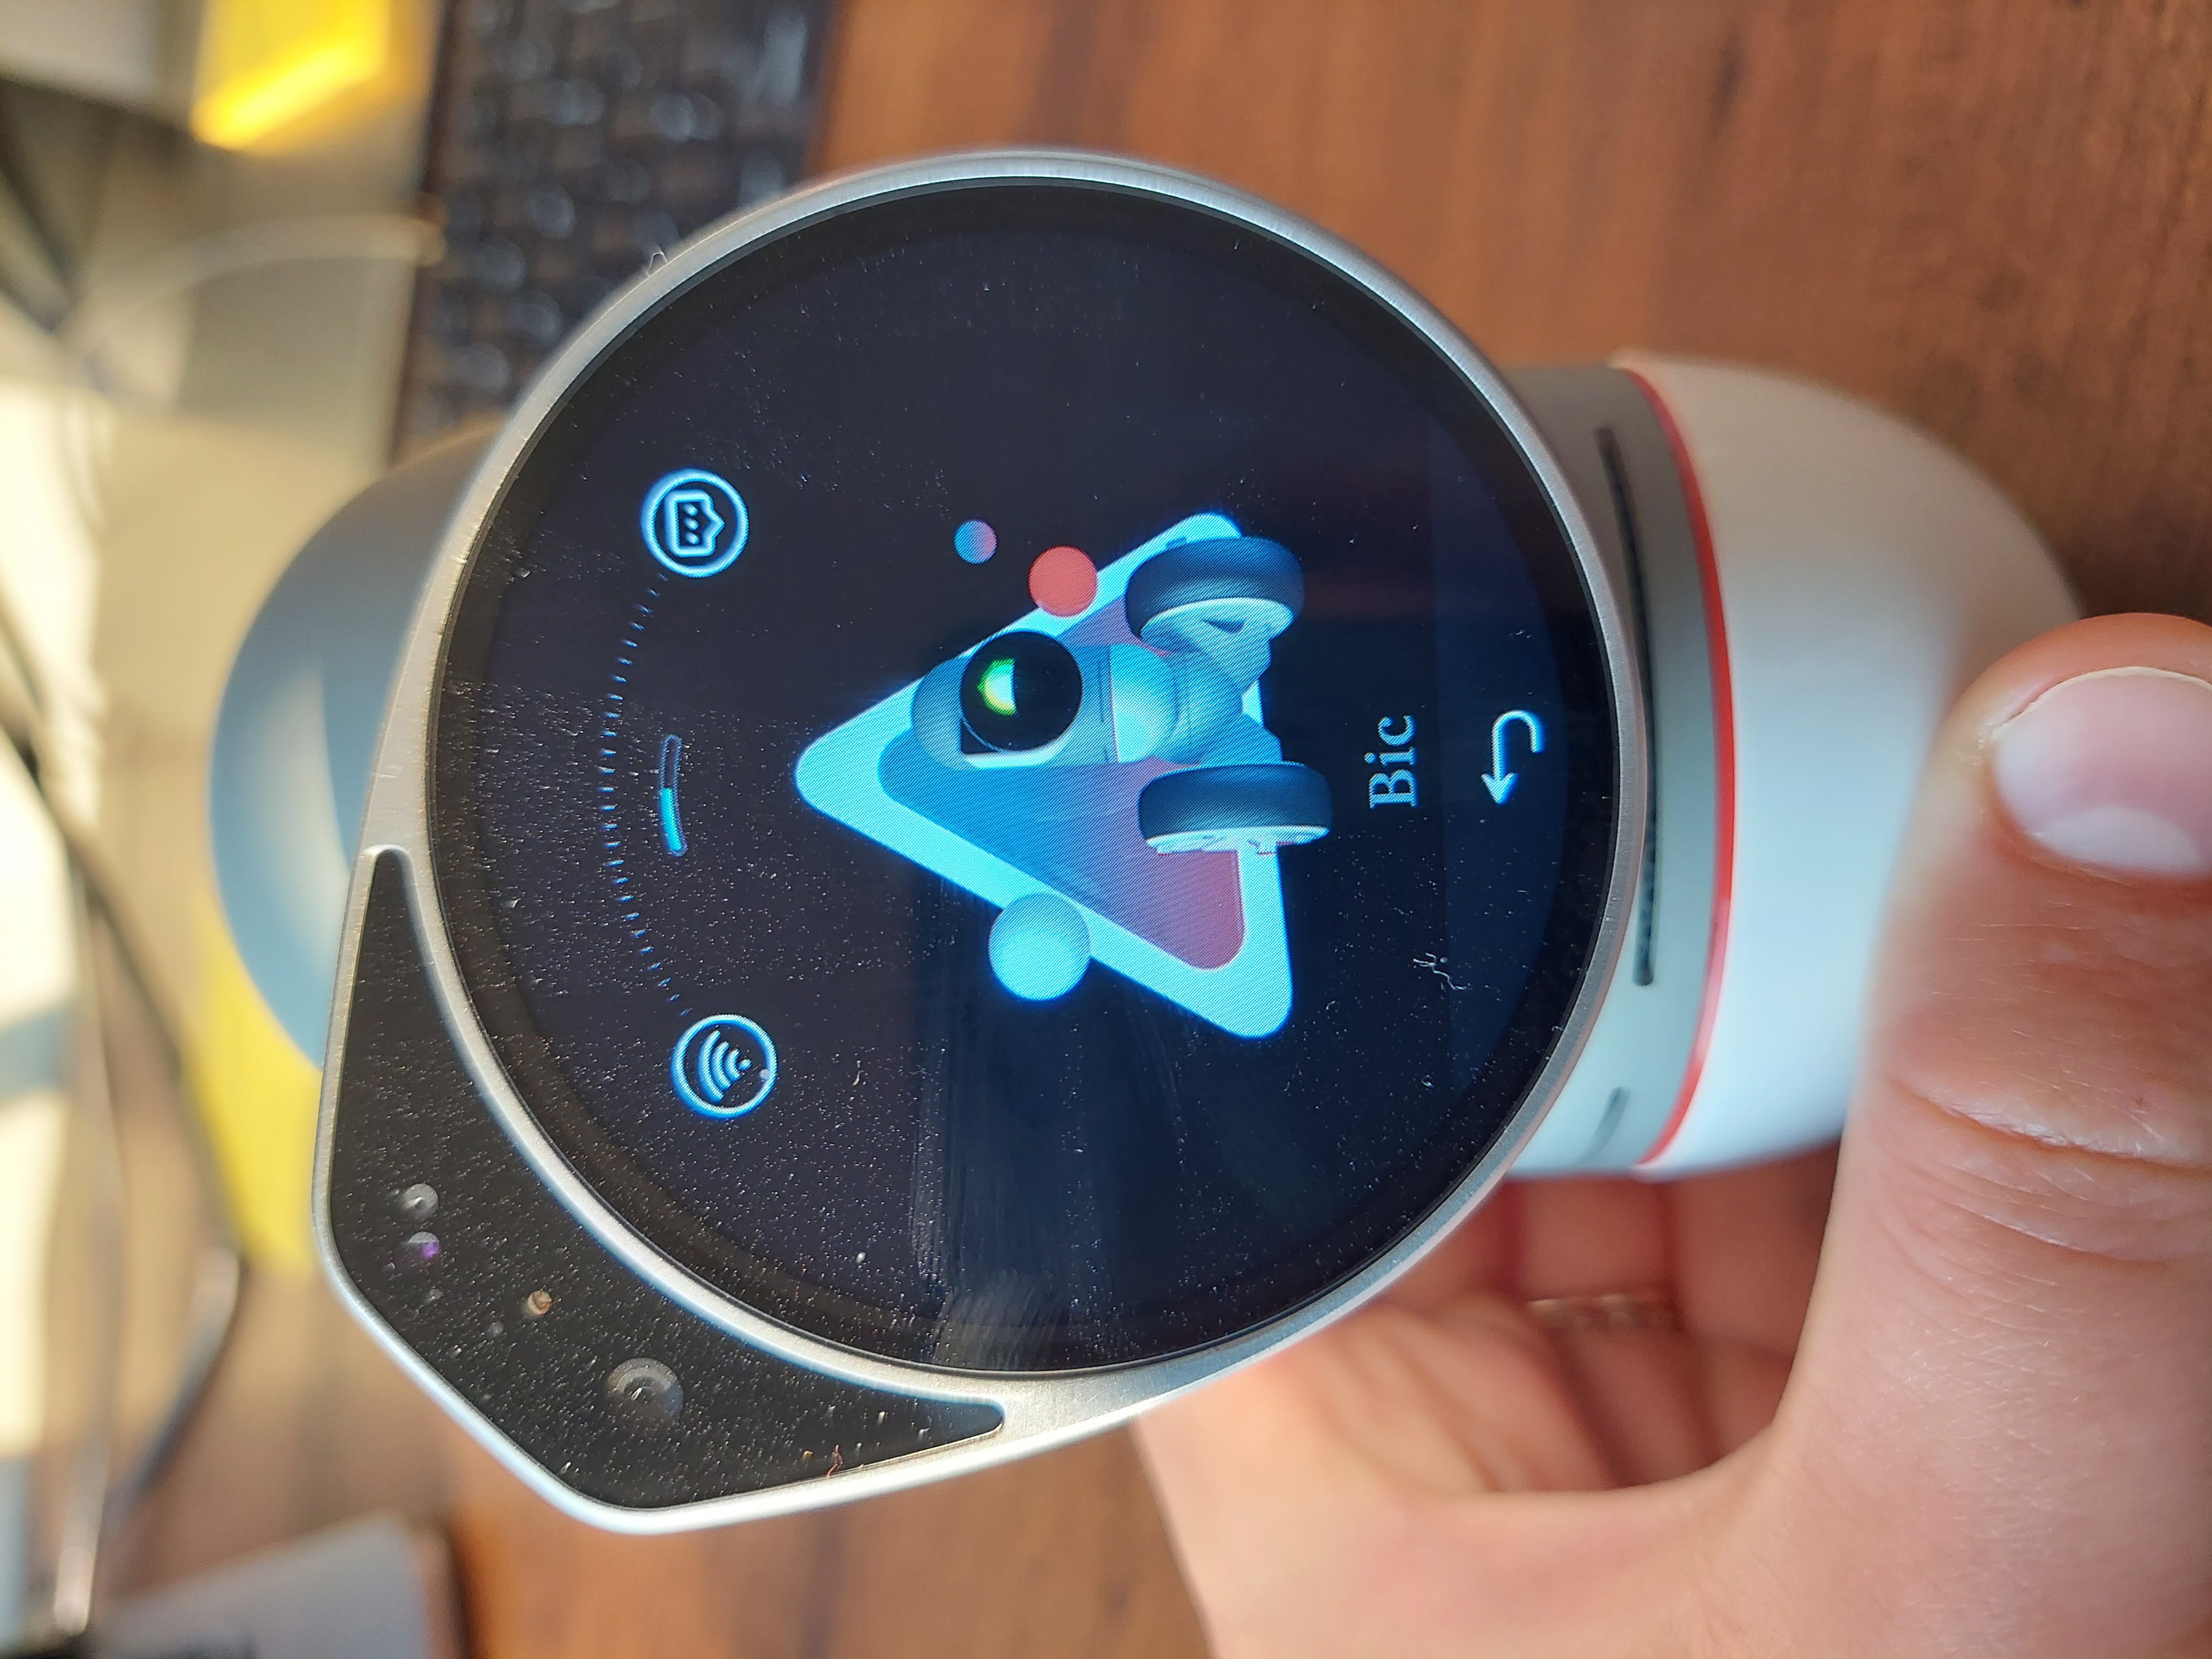
To start building Bic, swipe up on the ClicBot's face screen and swipe left/right until you find "Bic" (see below).
Select and build Bic. You'll want to place Bic on the floor so it doesn't drive off the table! Bic will self-balance and may try to play "hide and seek".
Once you have finished exploring both Bac and Bic, please move onto the next exercise.
Exercise #2: Designing a Custom ClicBot Robot and Robot Motion
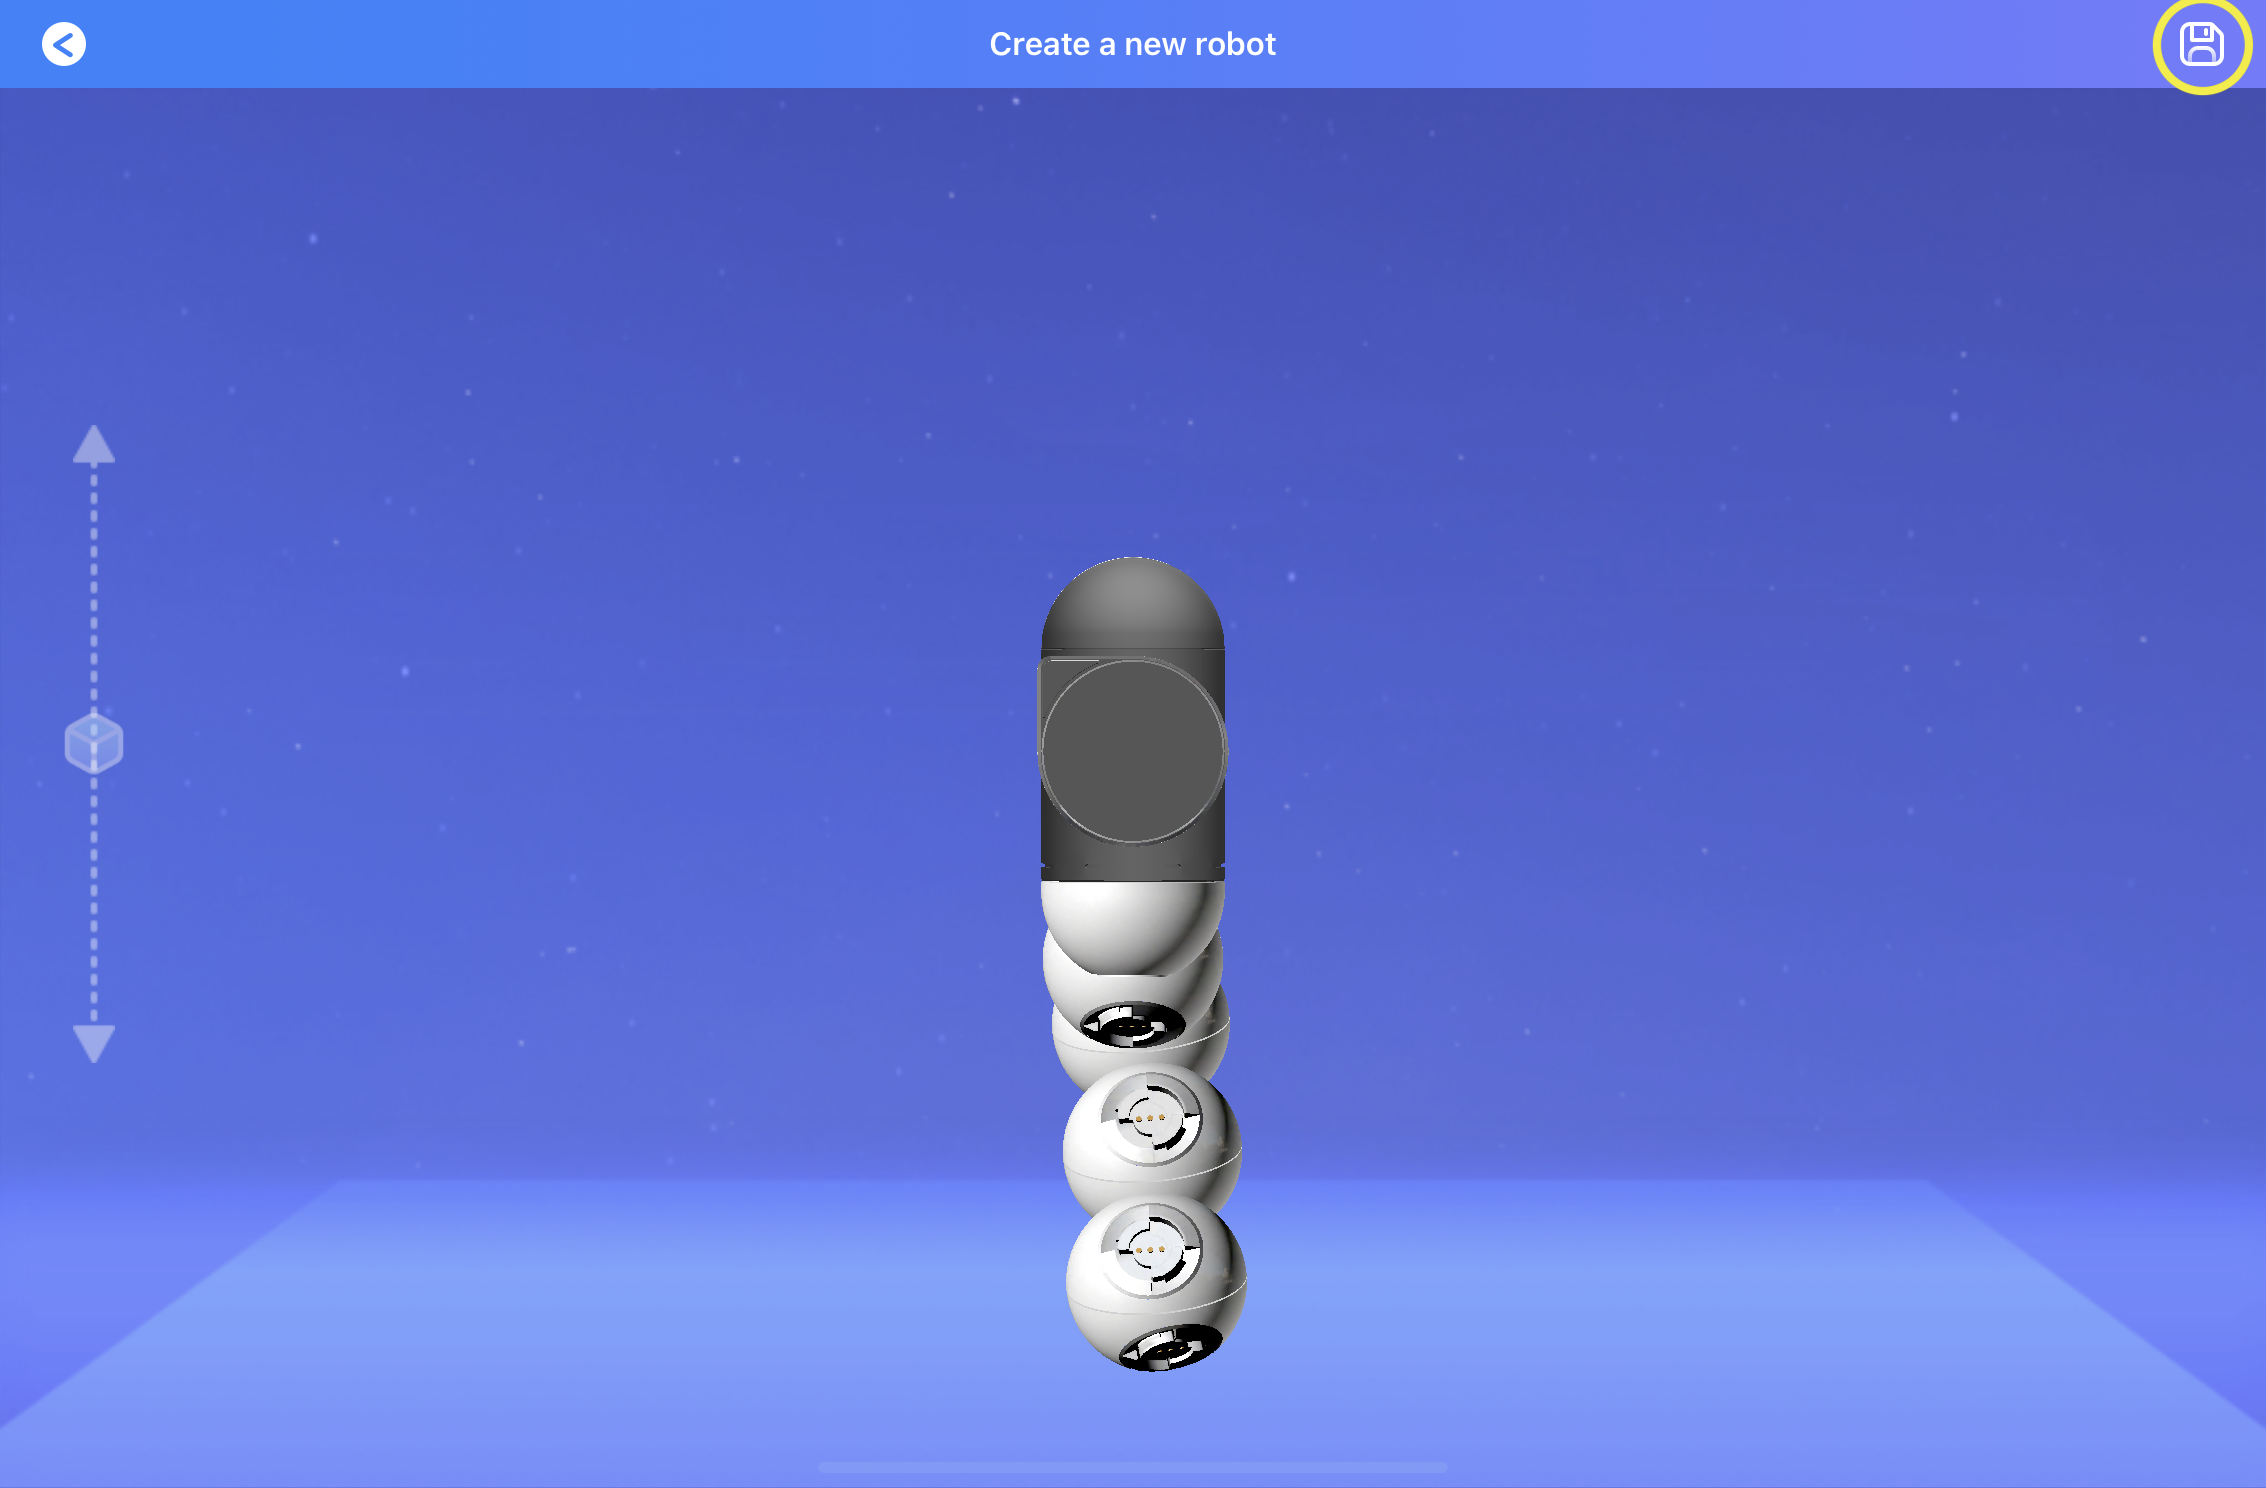
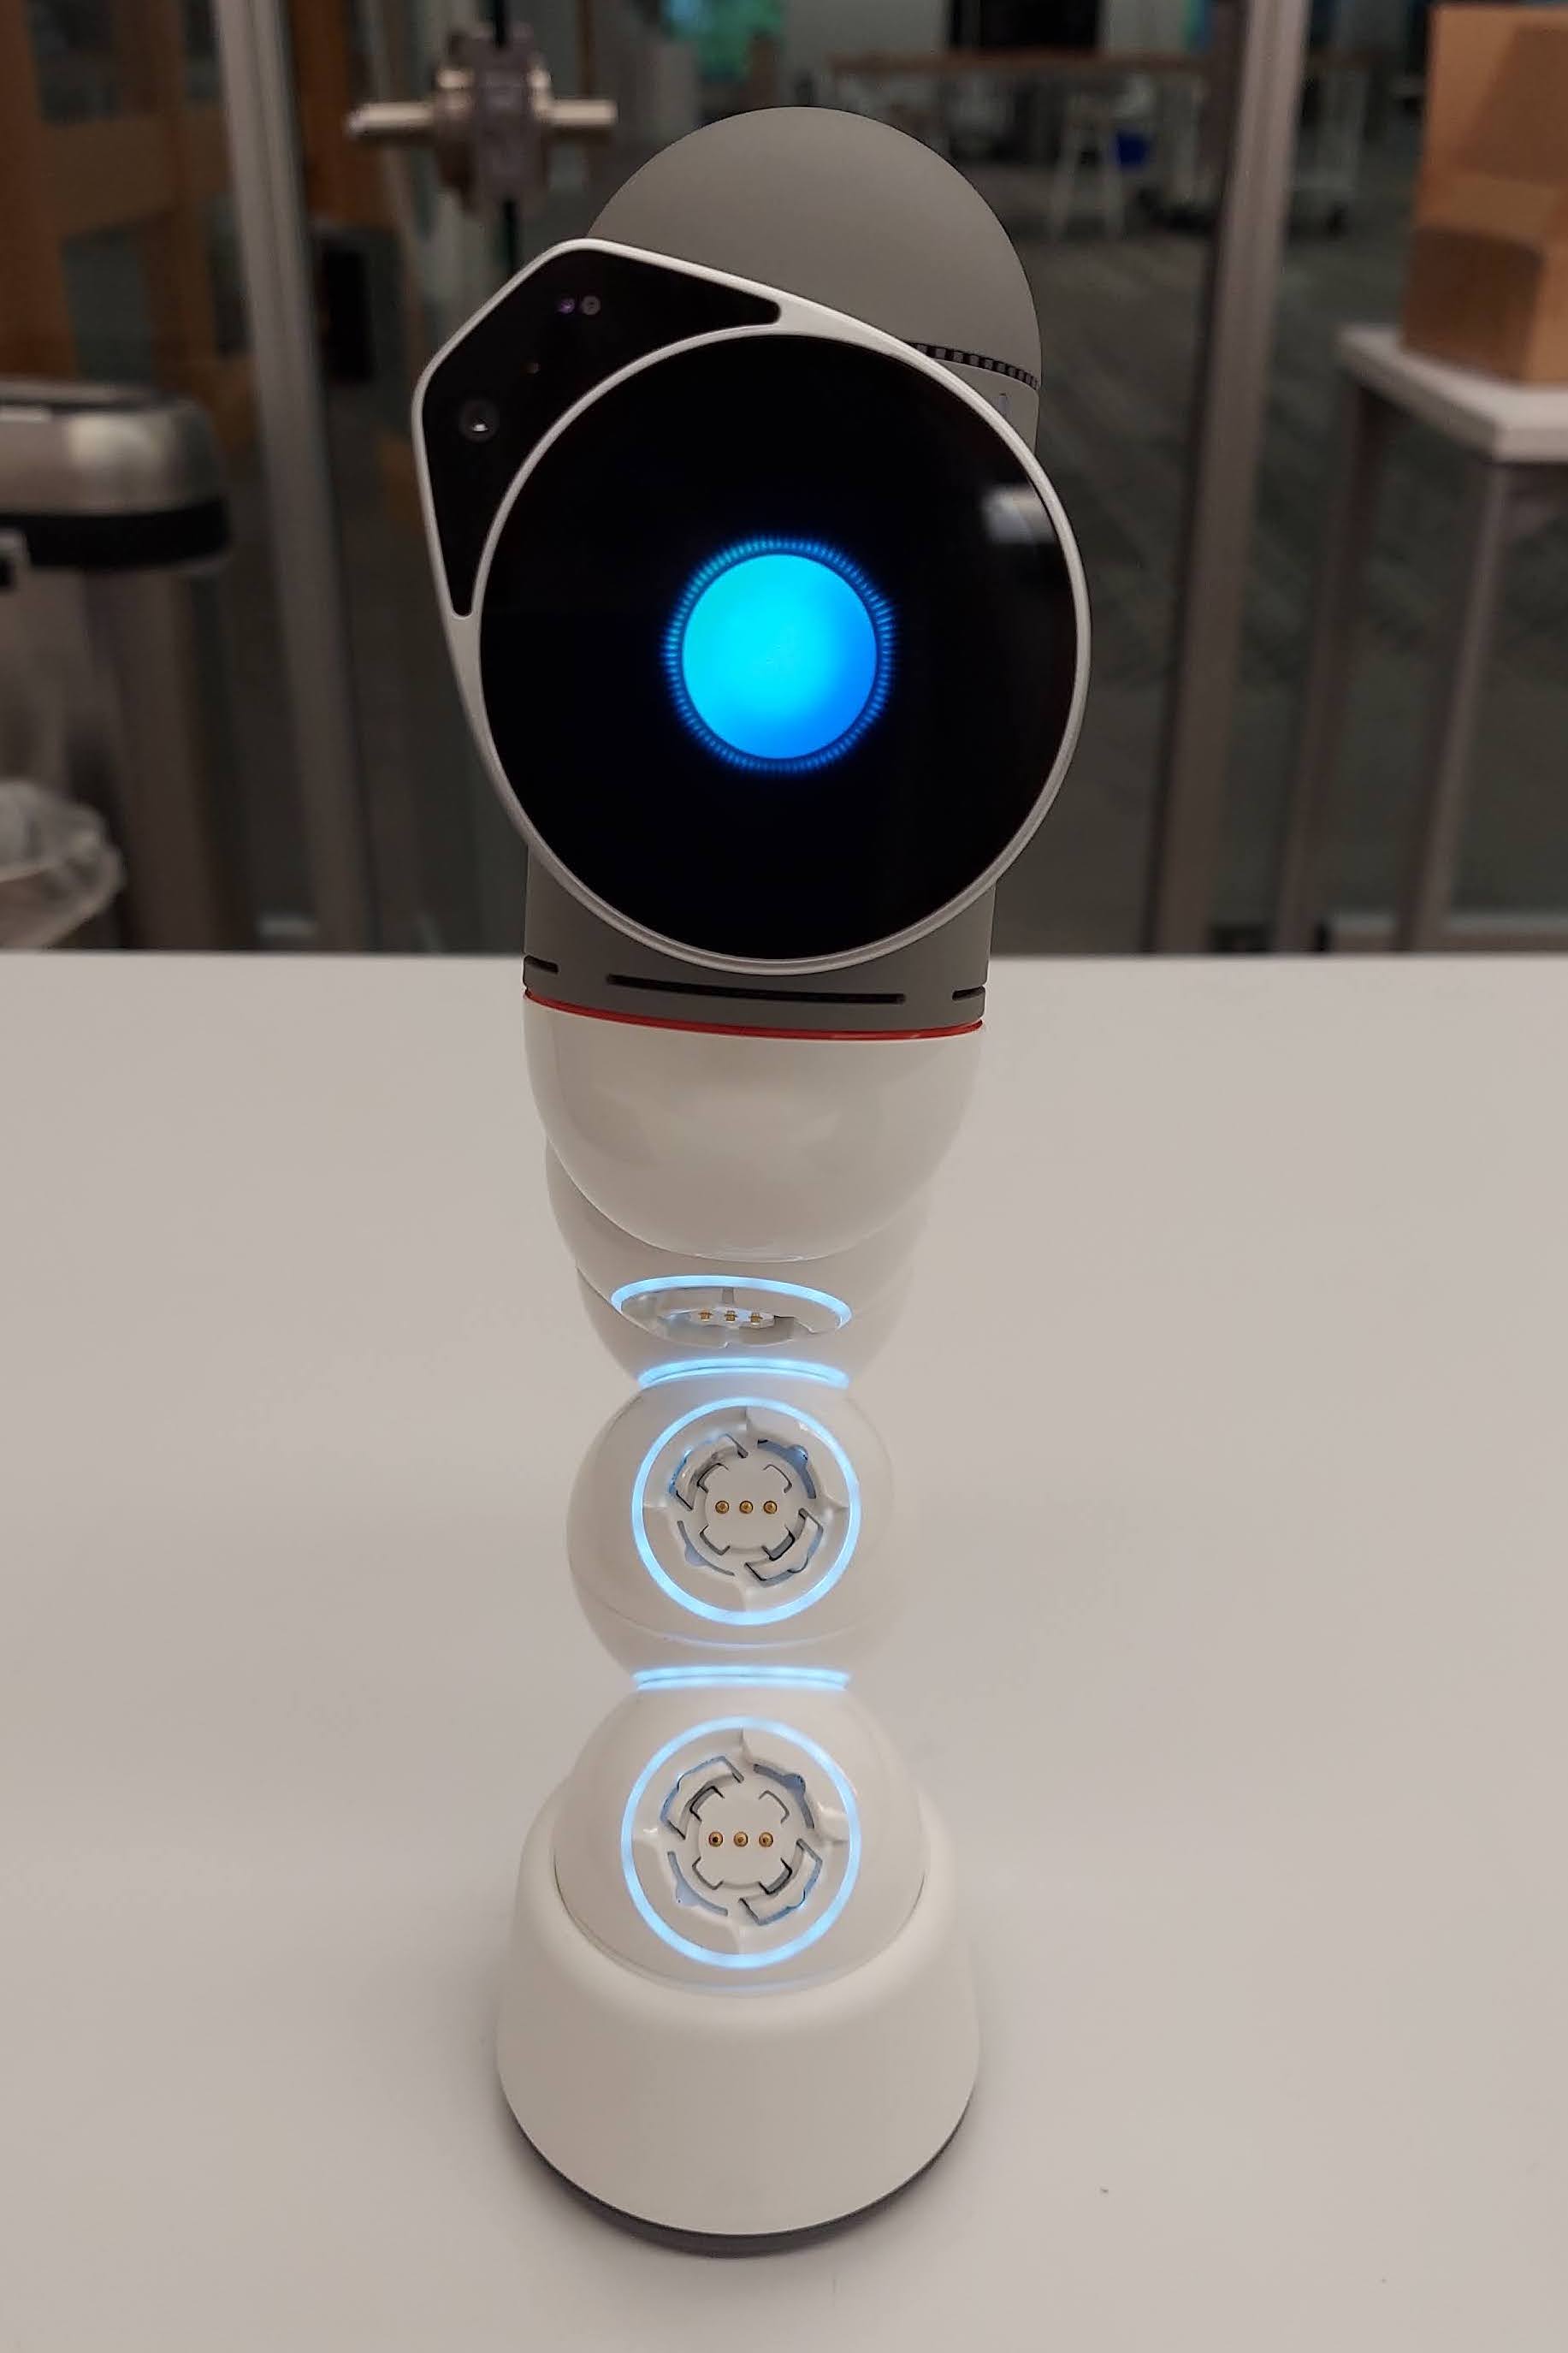
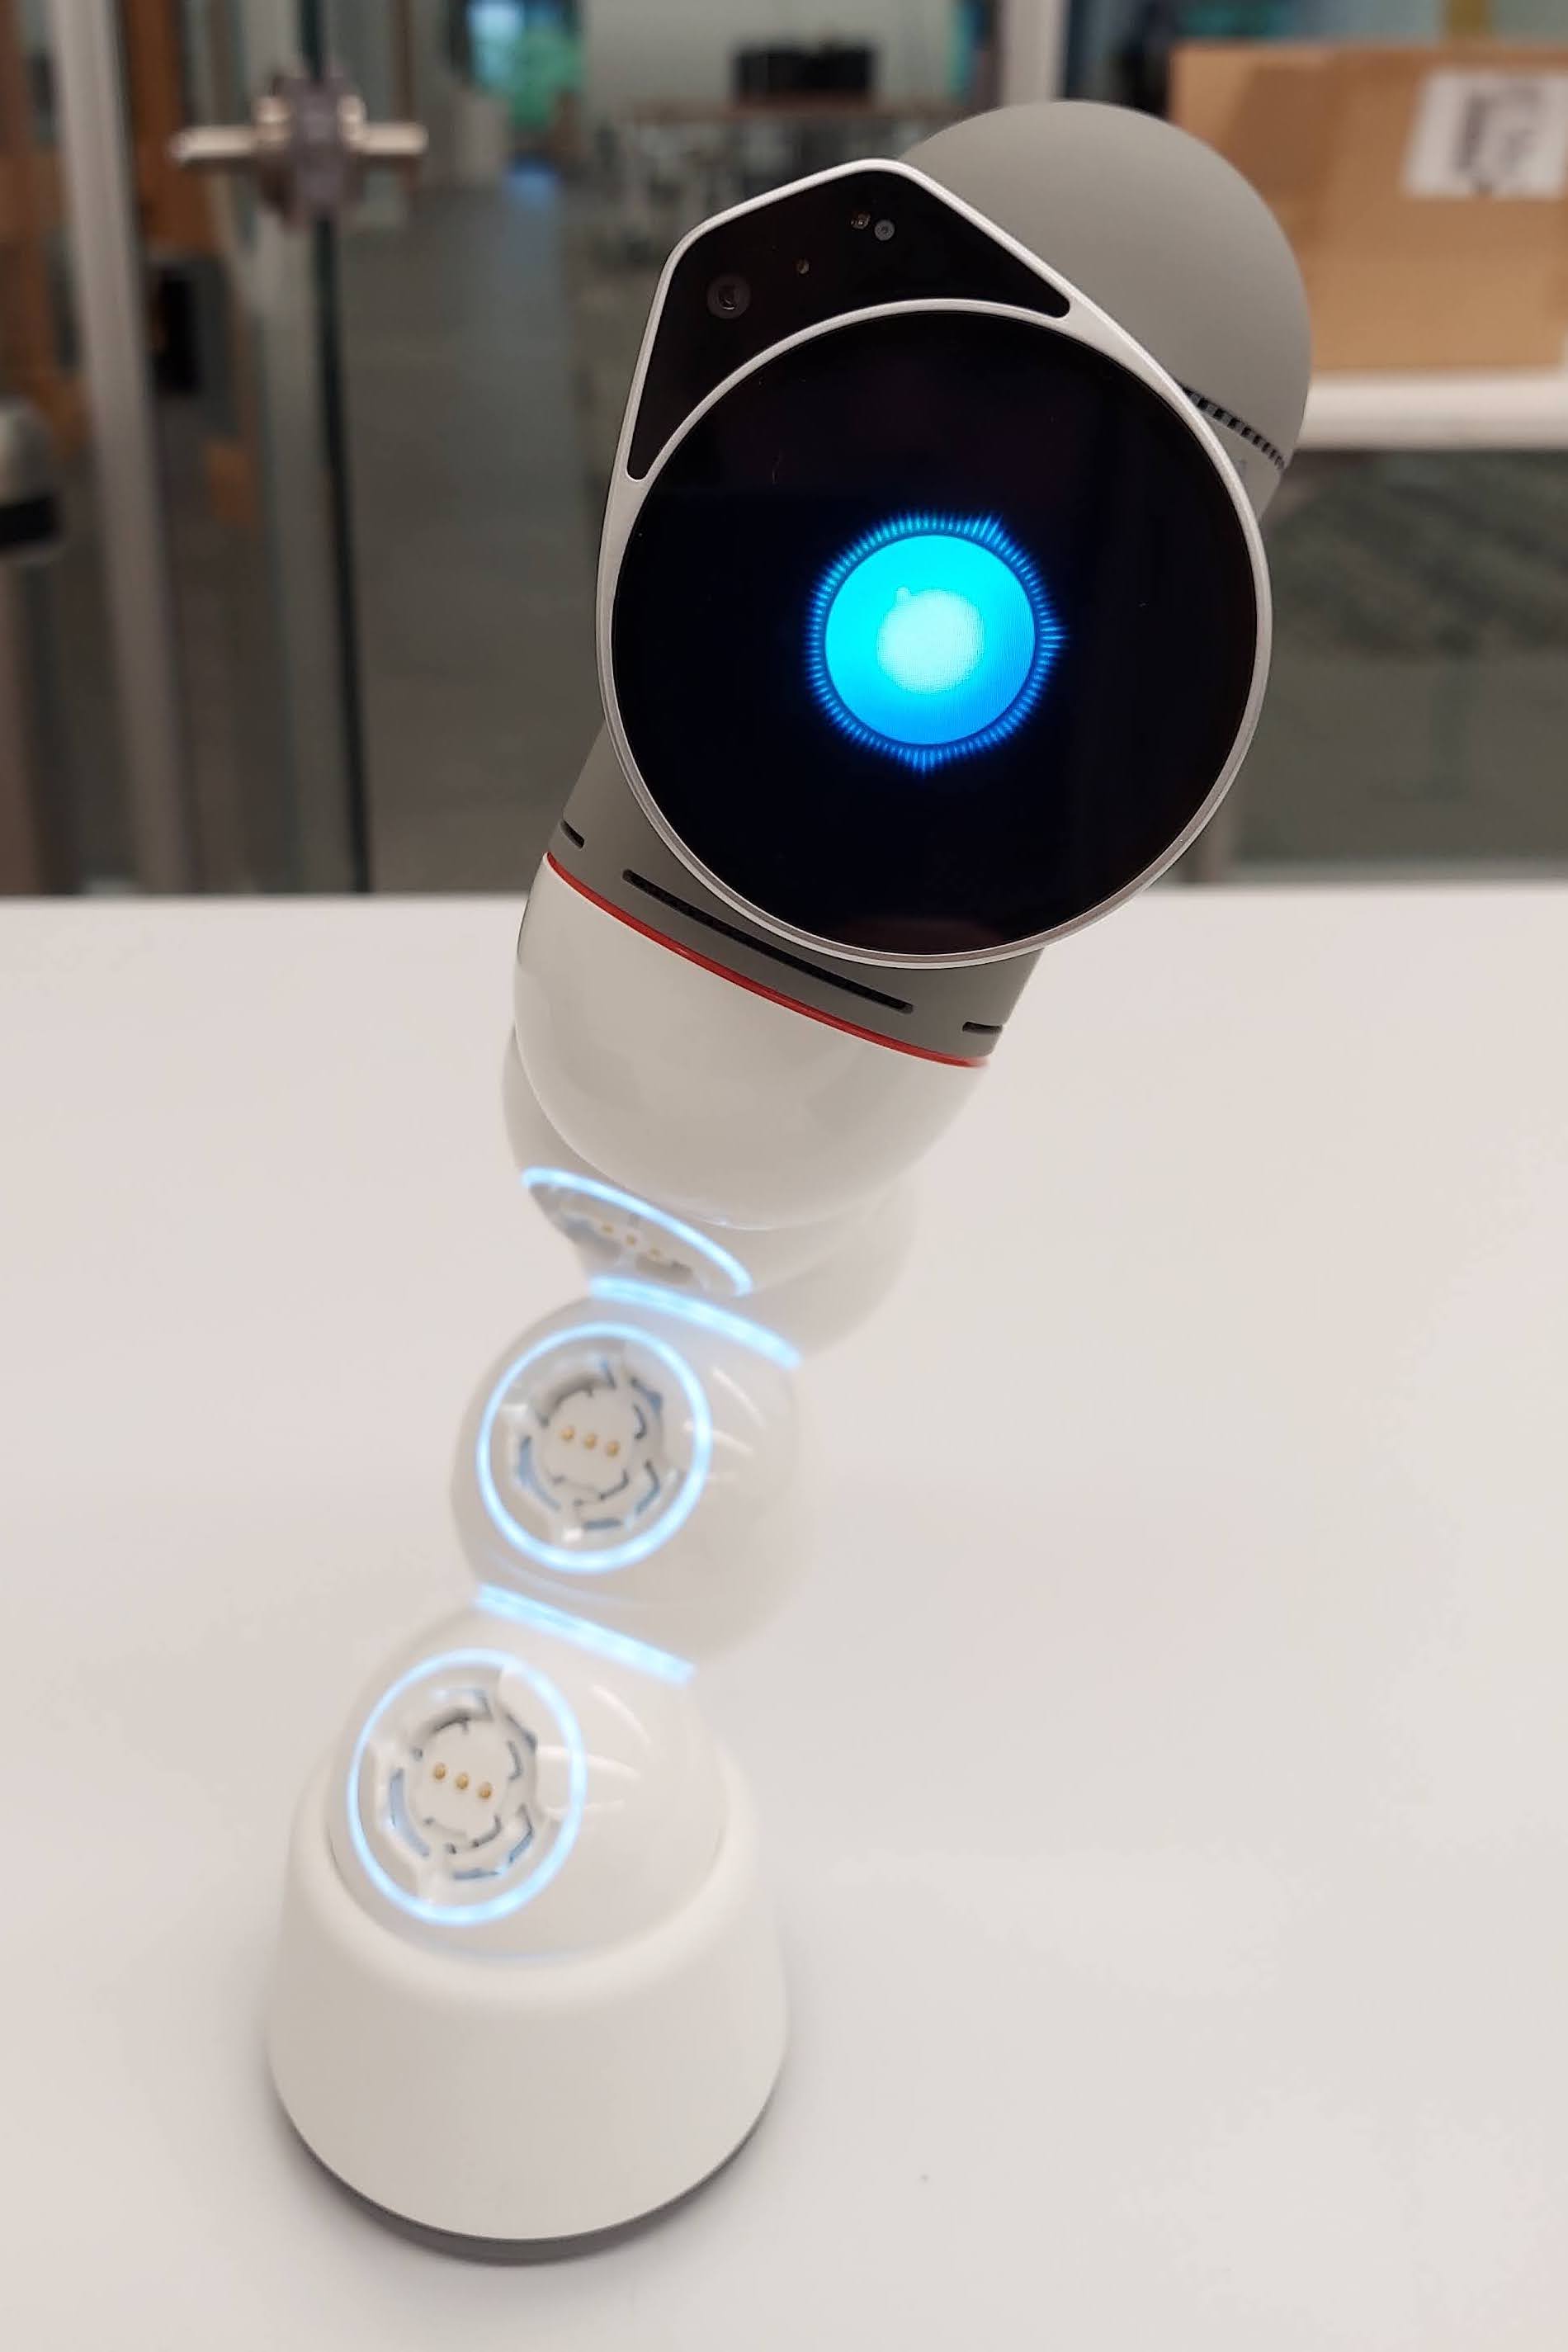
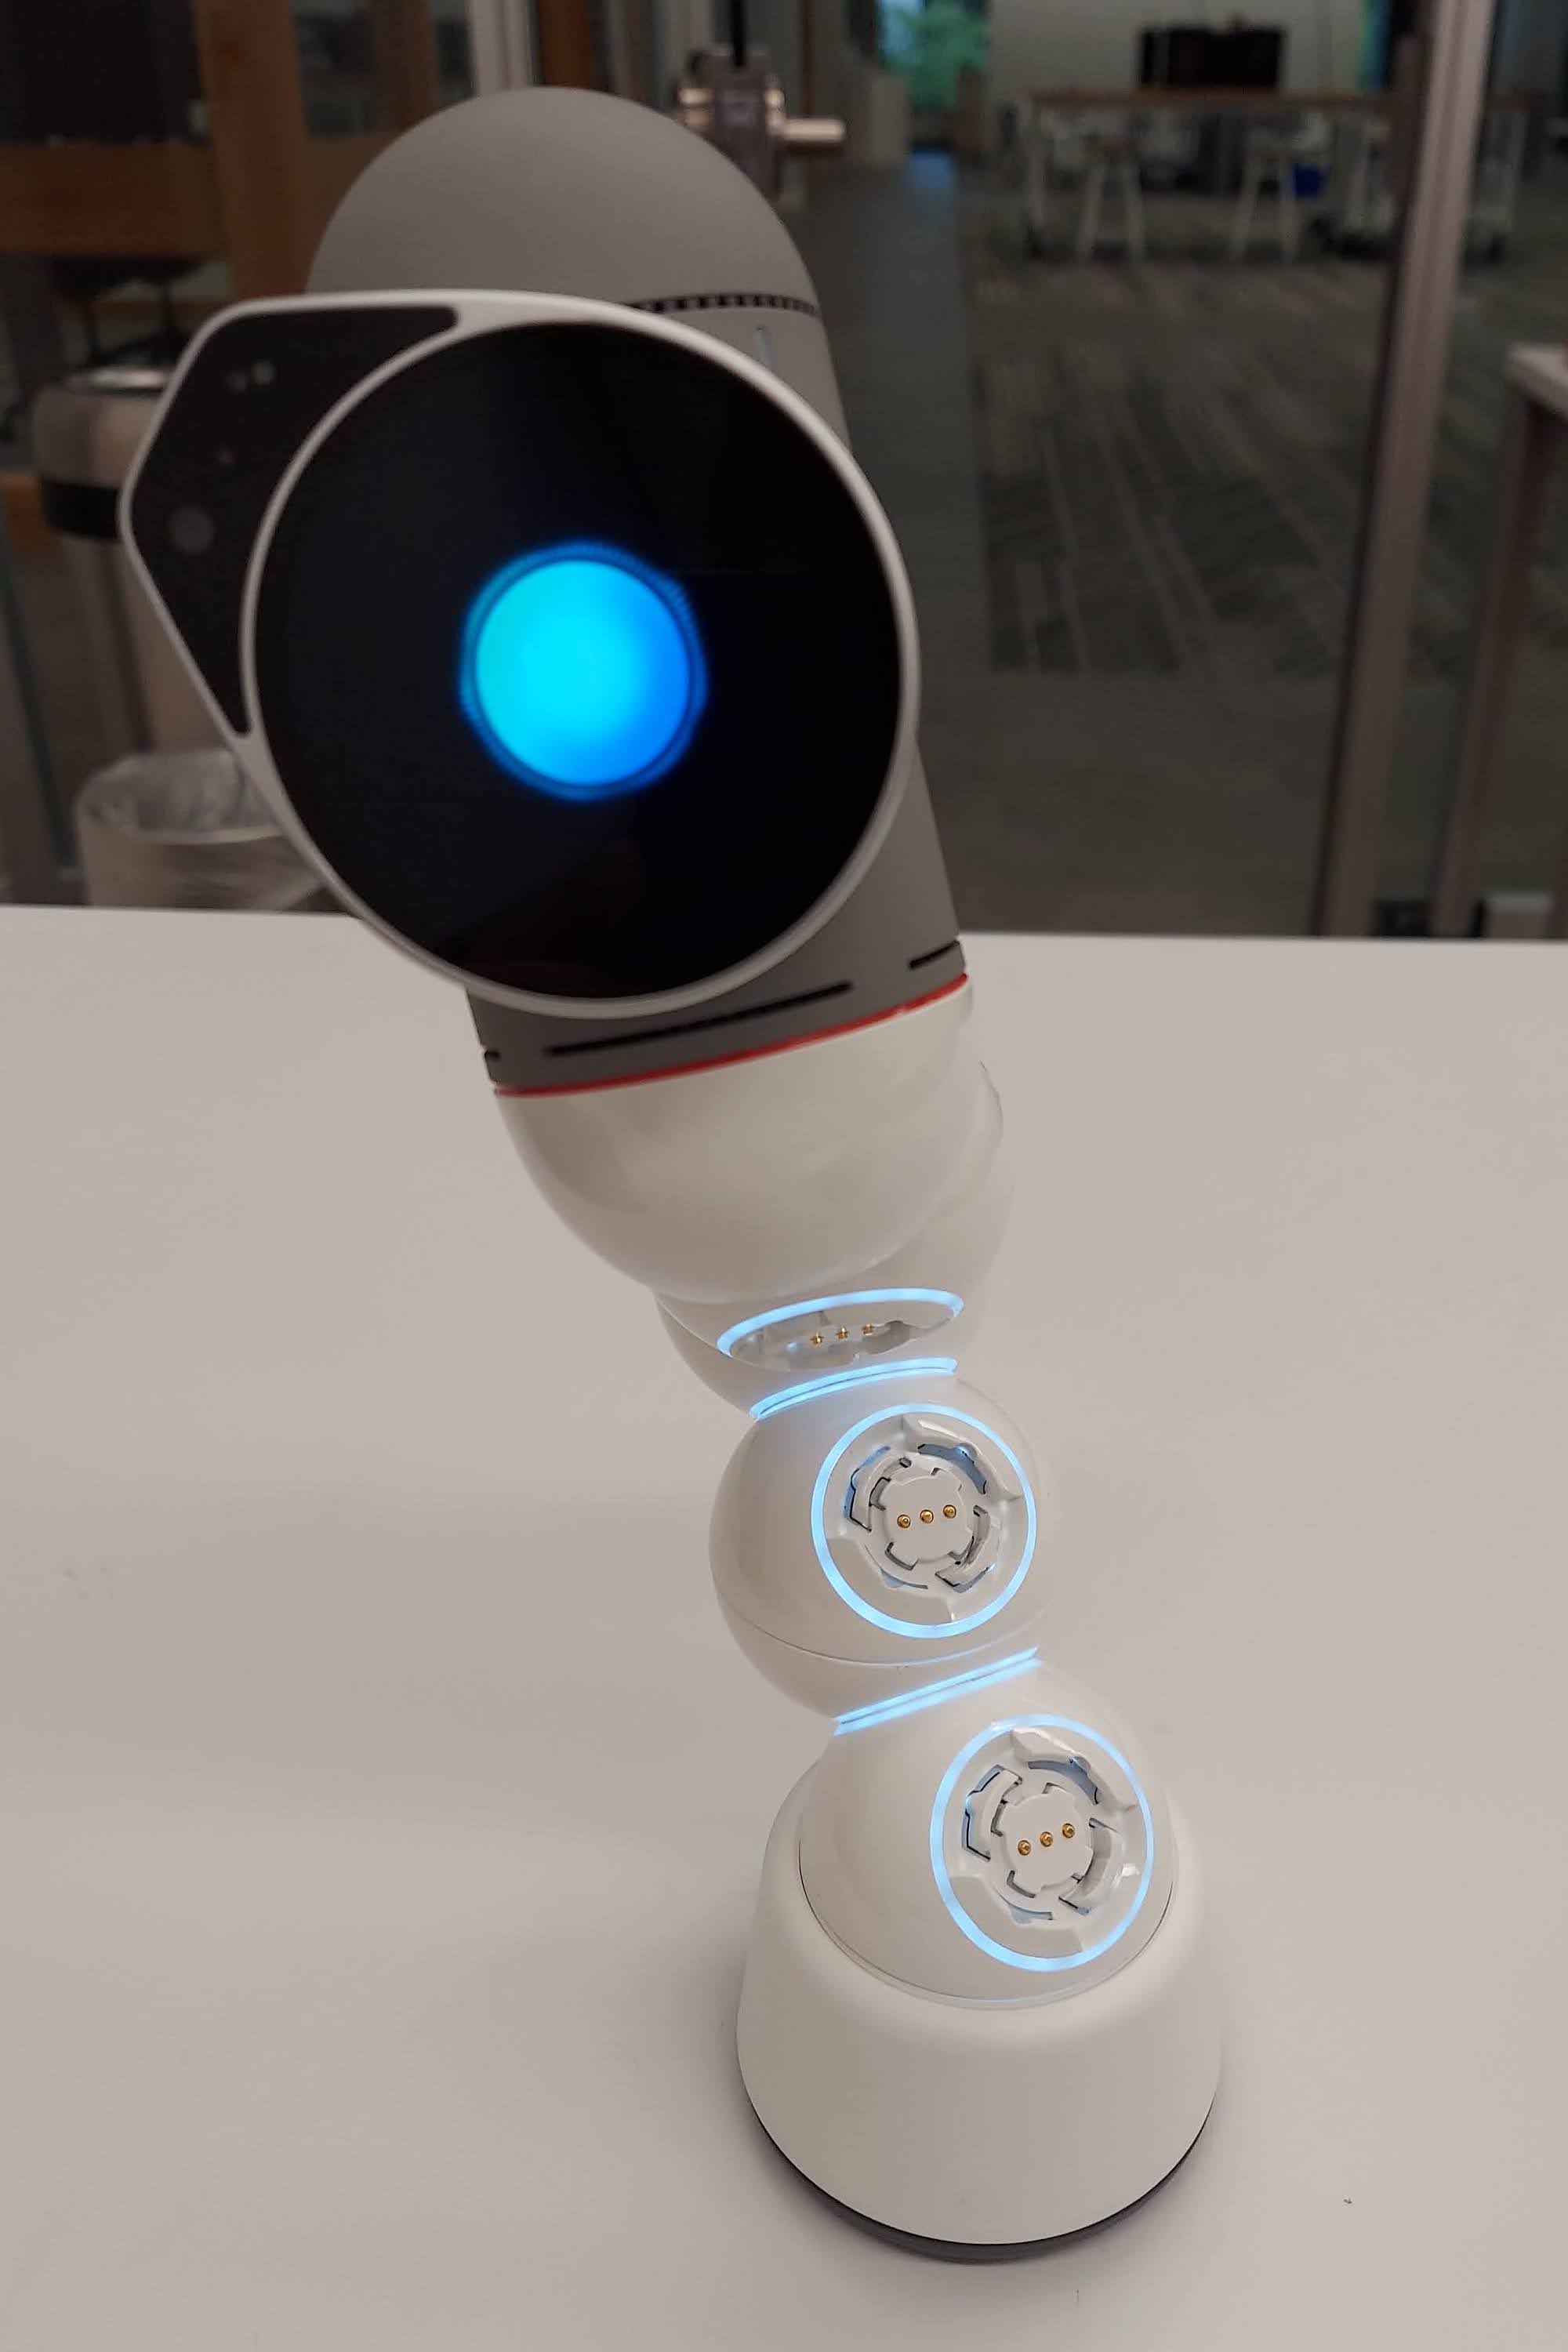
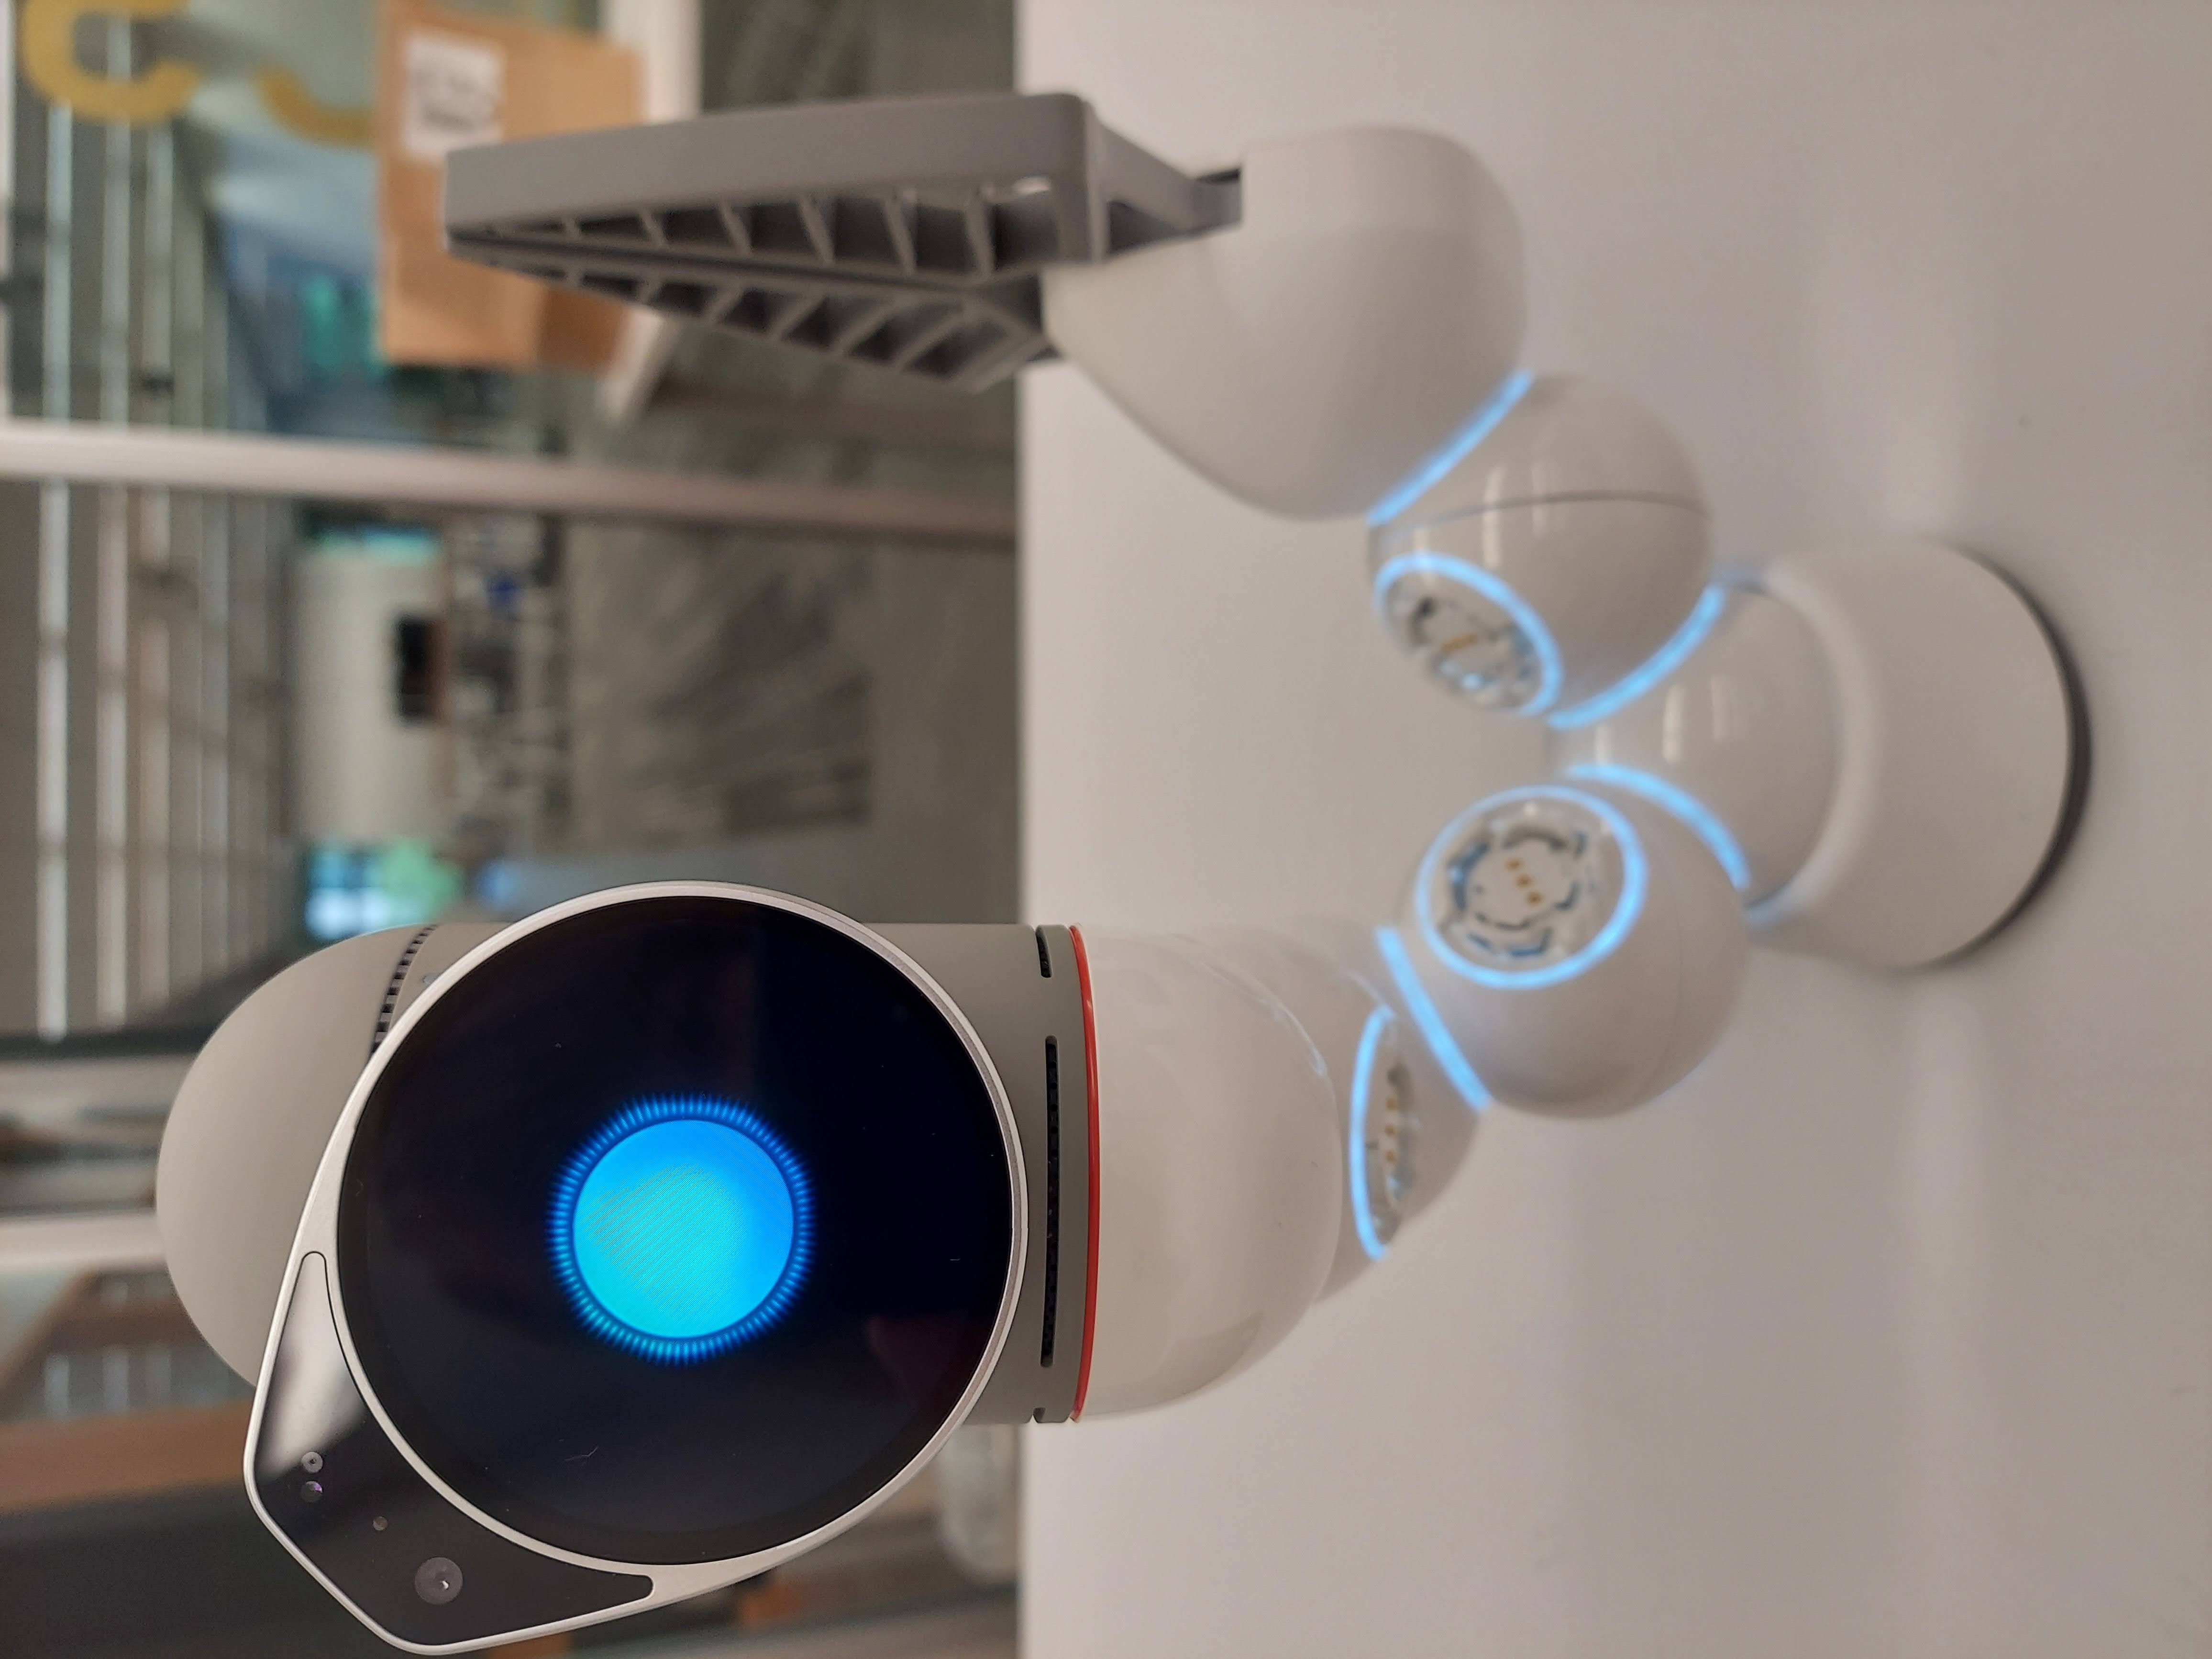
In this exercise, we'll design a simple dance for our ClicBot by making robot motions in the ClicBot app. First, constrct a ClicBot robot that looks like the picture below.

Now, we'll need to open up the ClicBot app on the tablet. Open the ClicBot app, then click the "Go create" button in the bottom right hand corner.

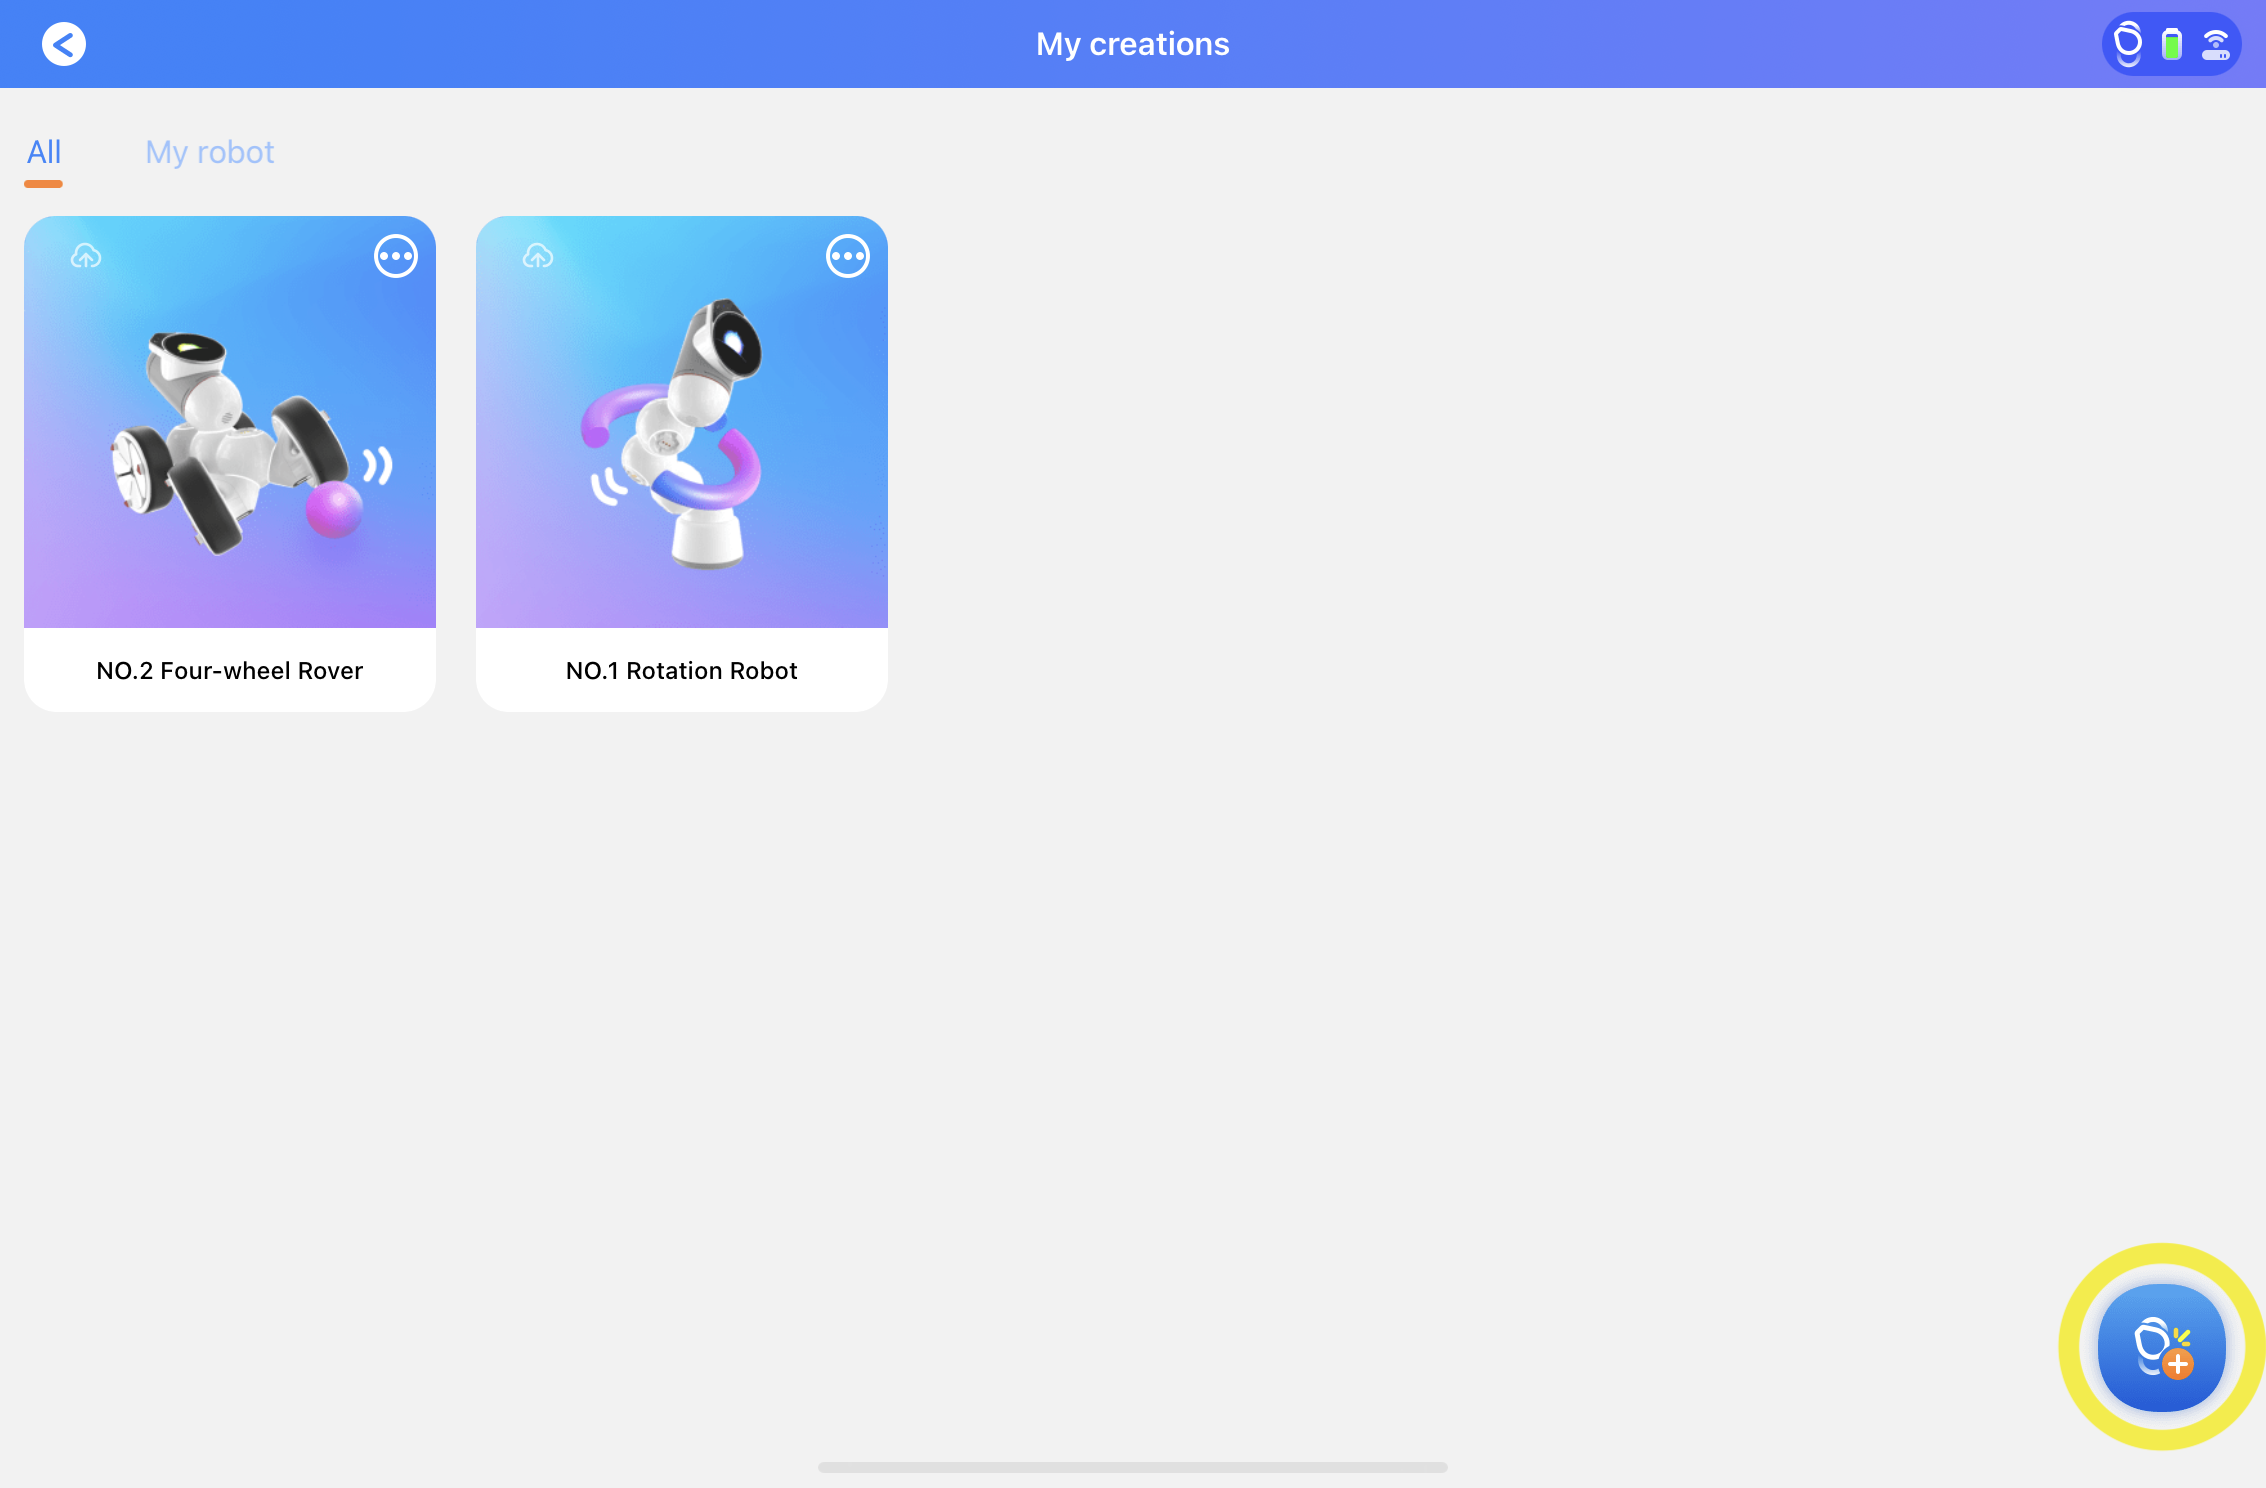
On this "My creations" page, click the button in the bottom right corner to create a new robot design.
You should now see a visualization of the ClicBot robot you've just built. From here, you can click the save button in the upper right.
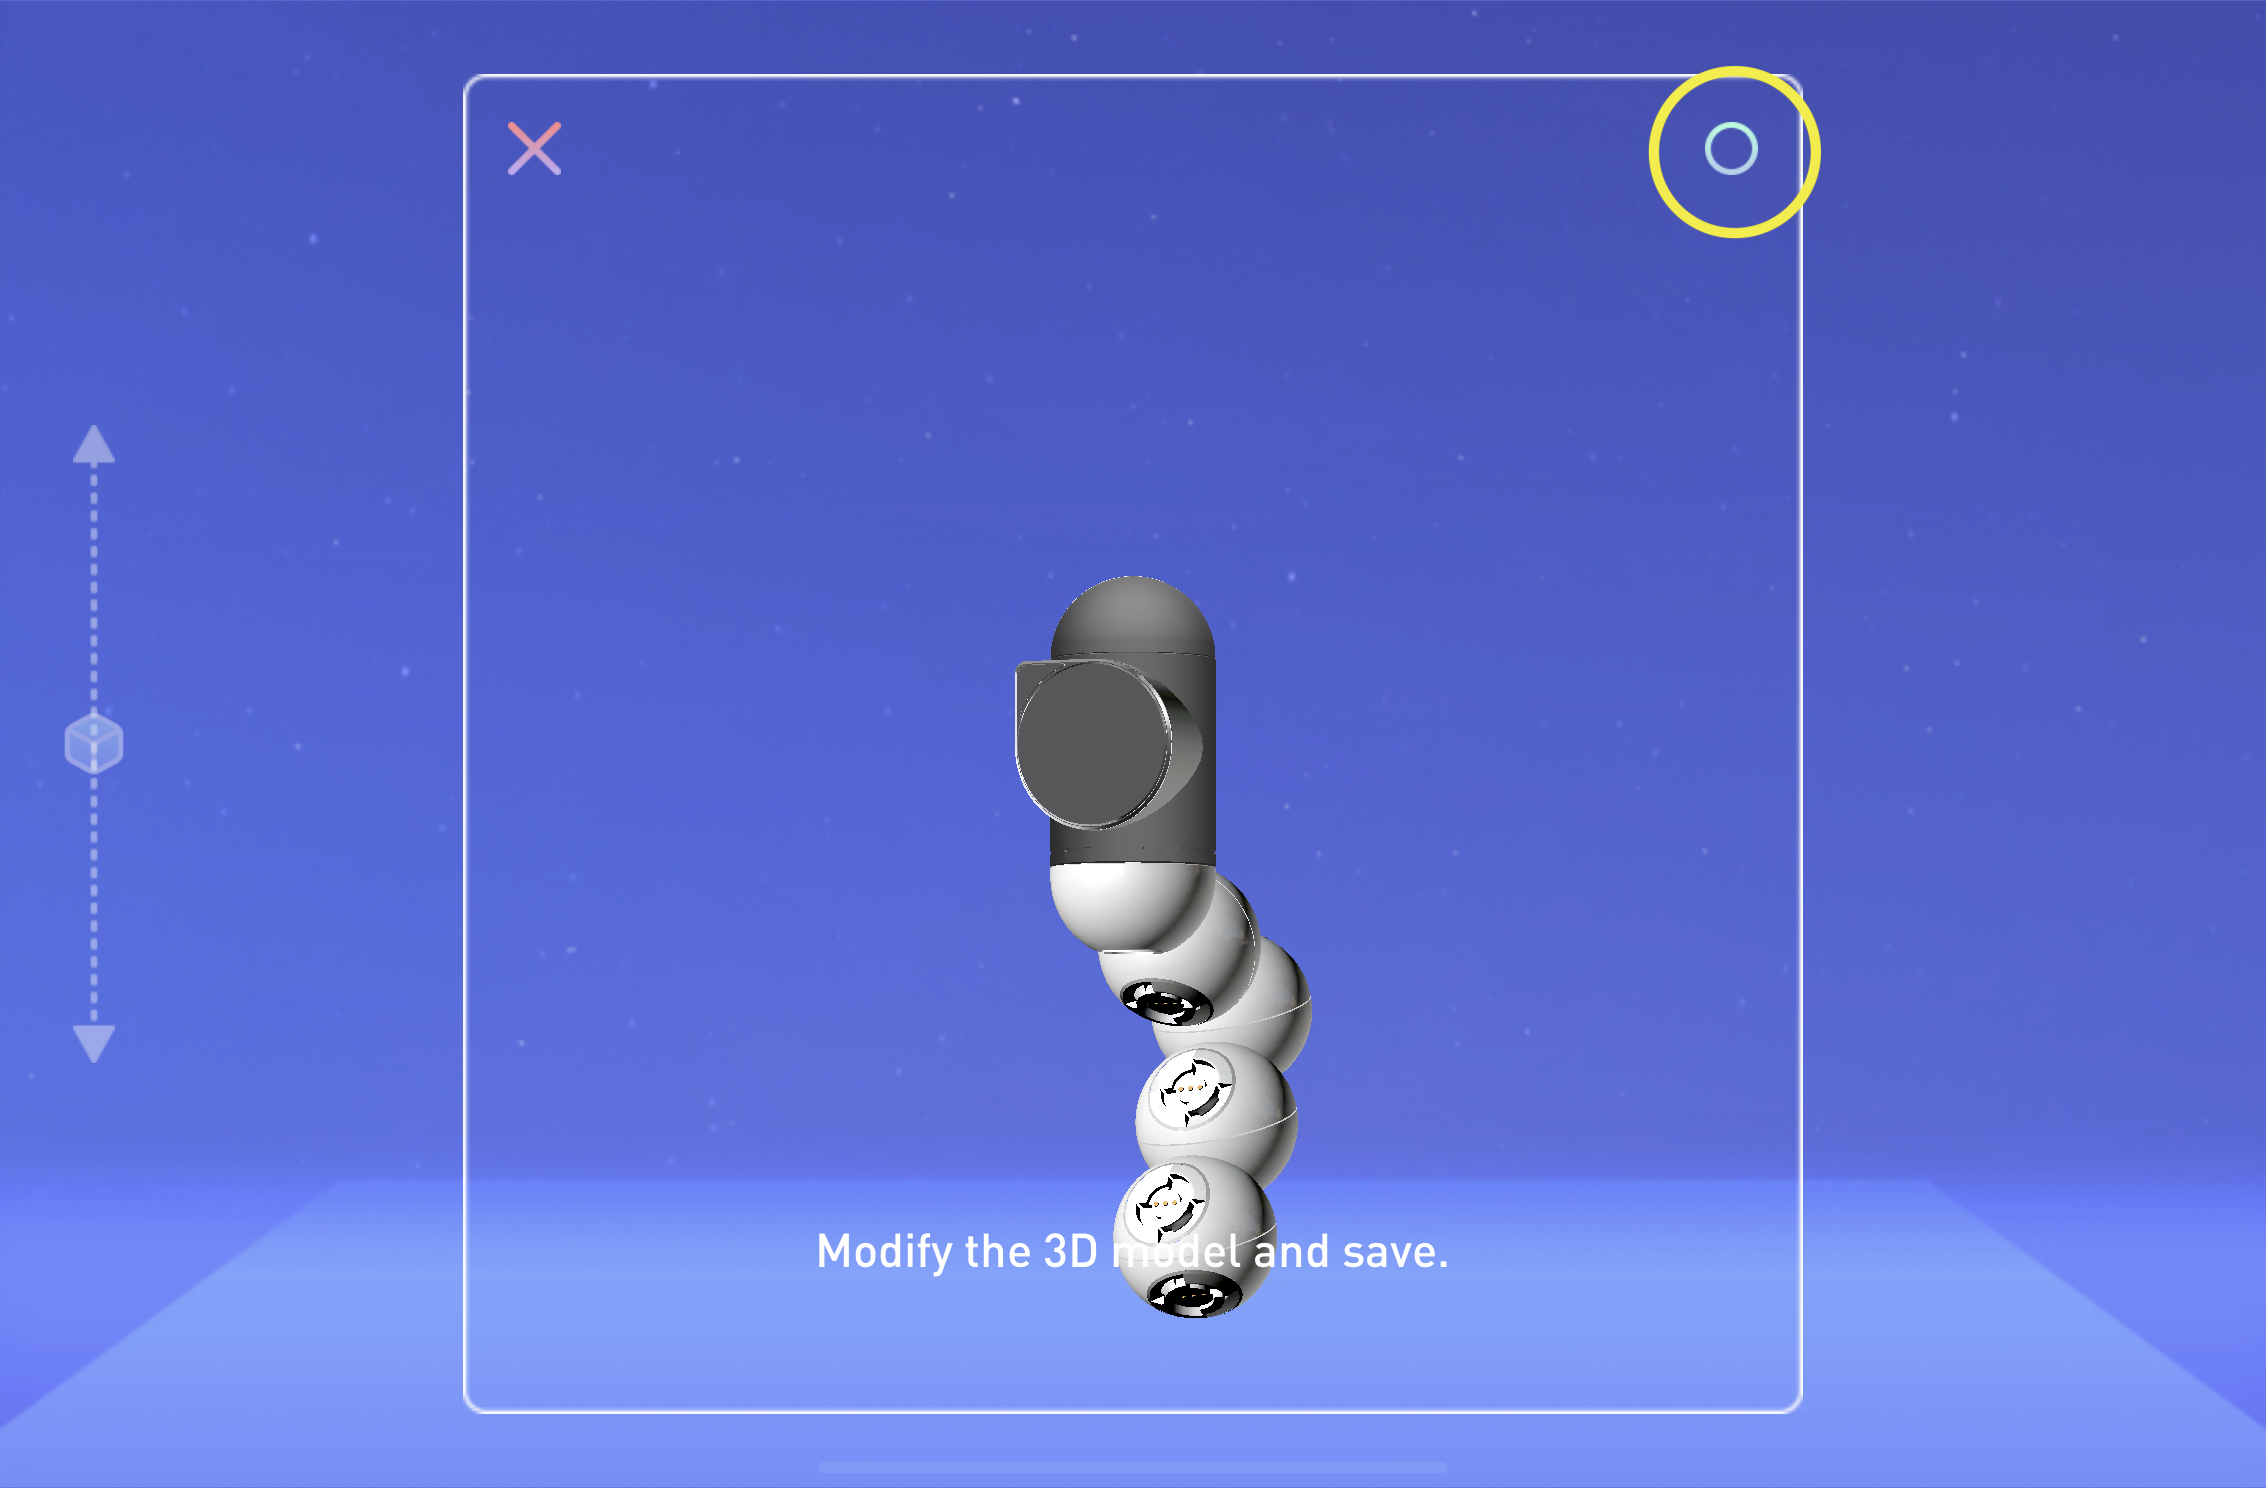
Adjust the view of the robot as you see fit and click the circle button to save it. I named my robot "4 Joint Dancer".
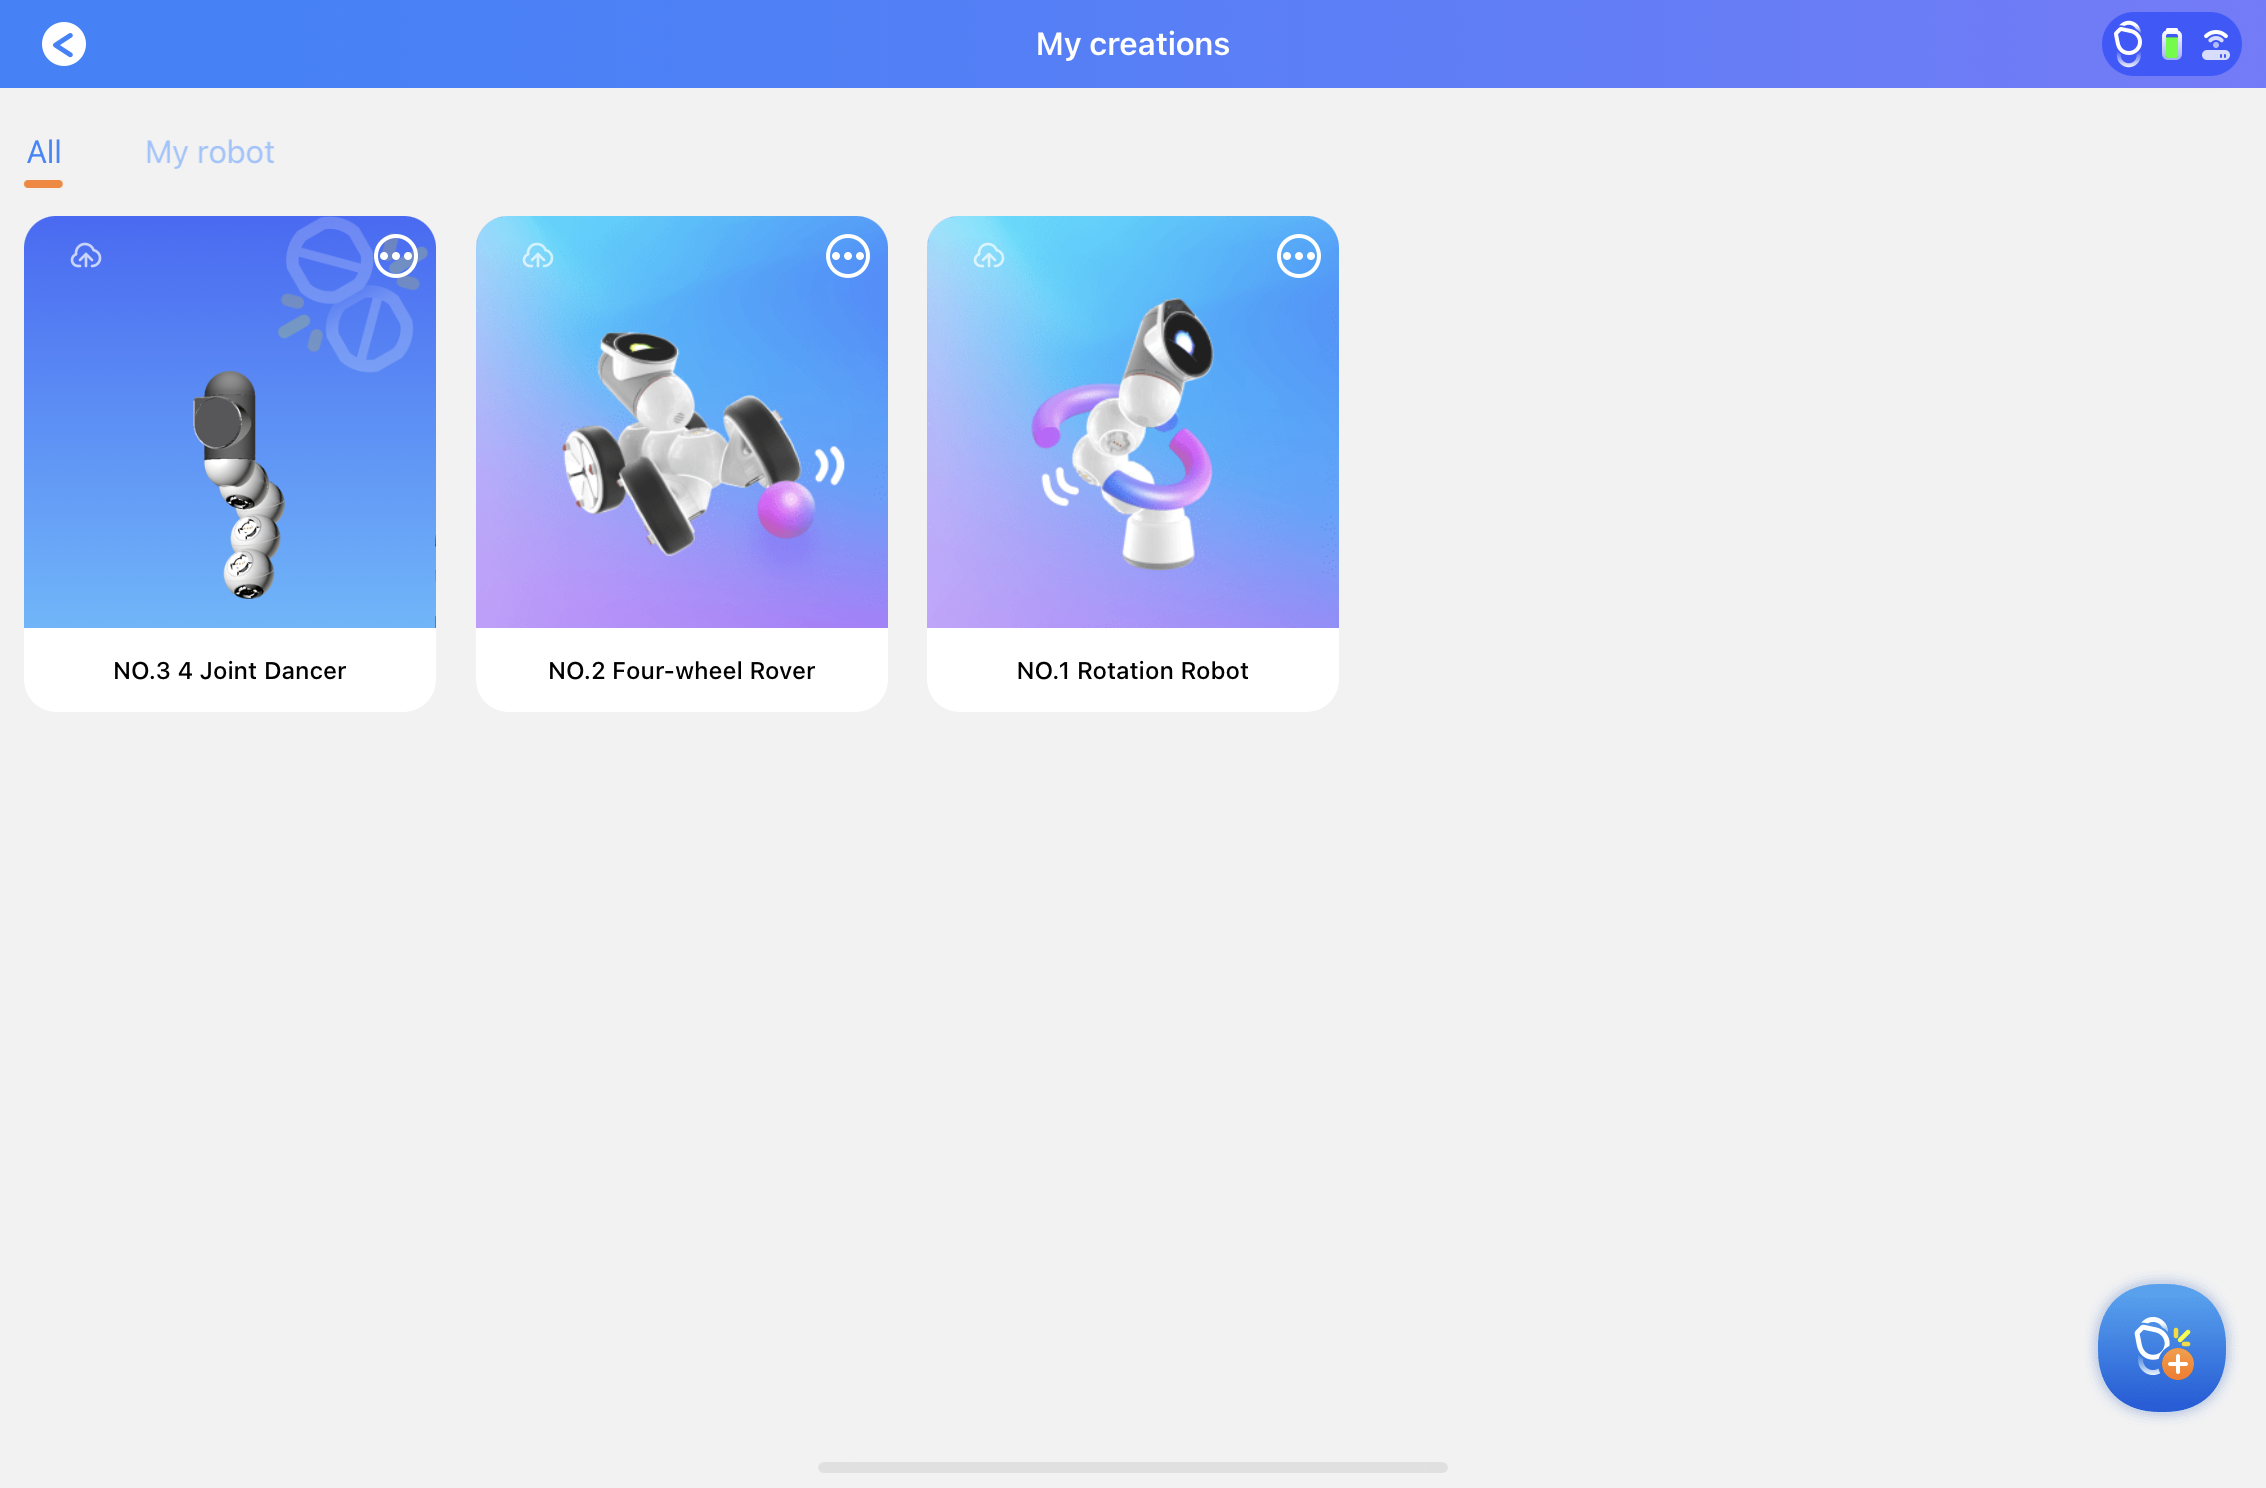
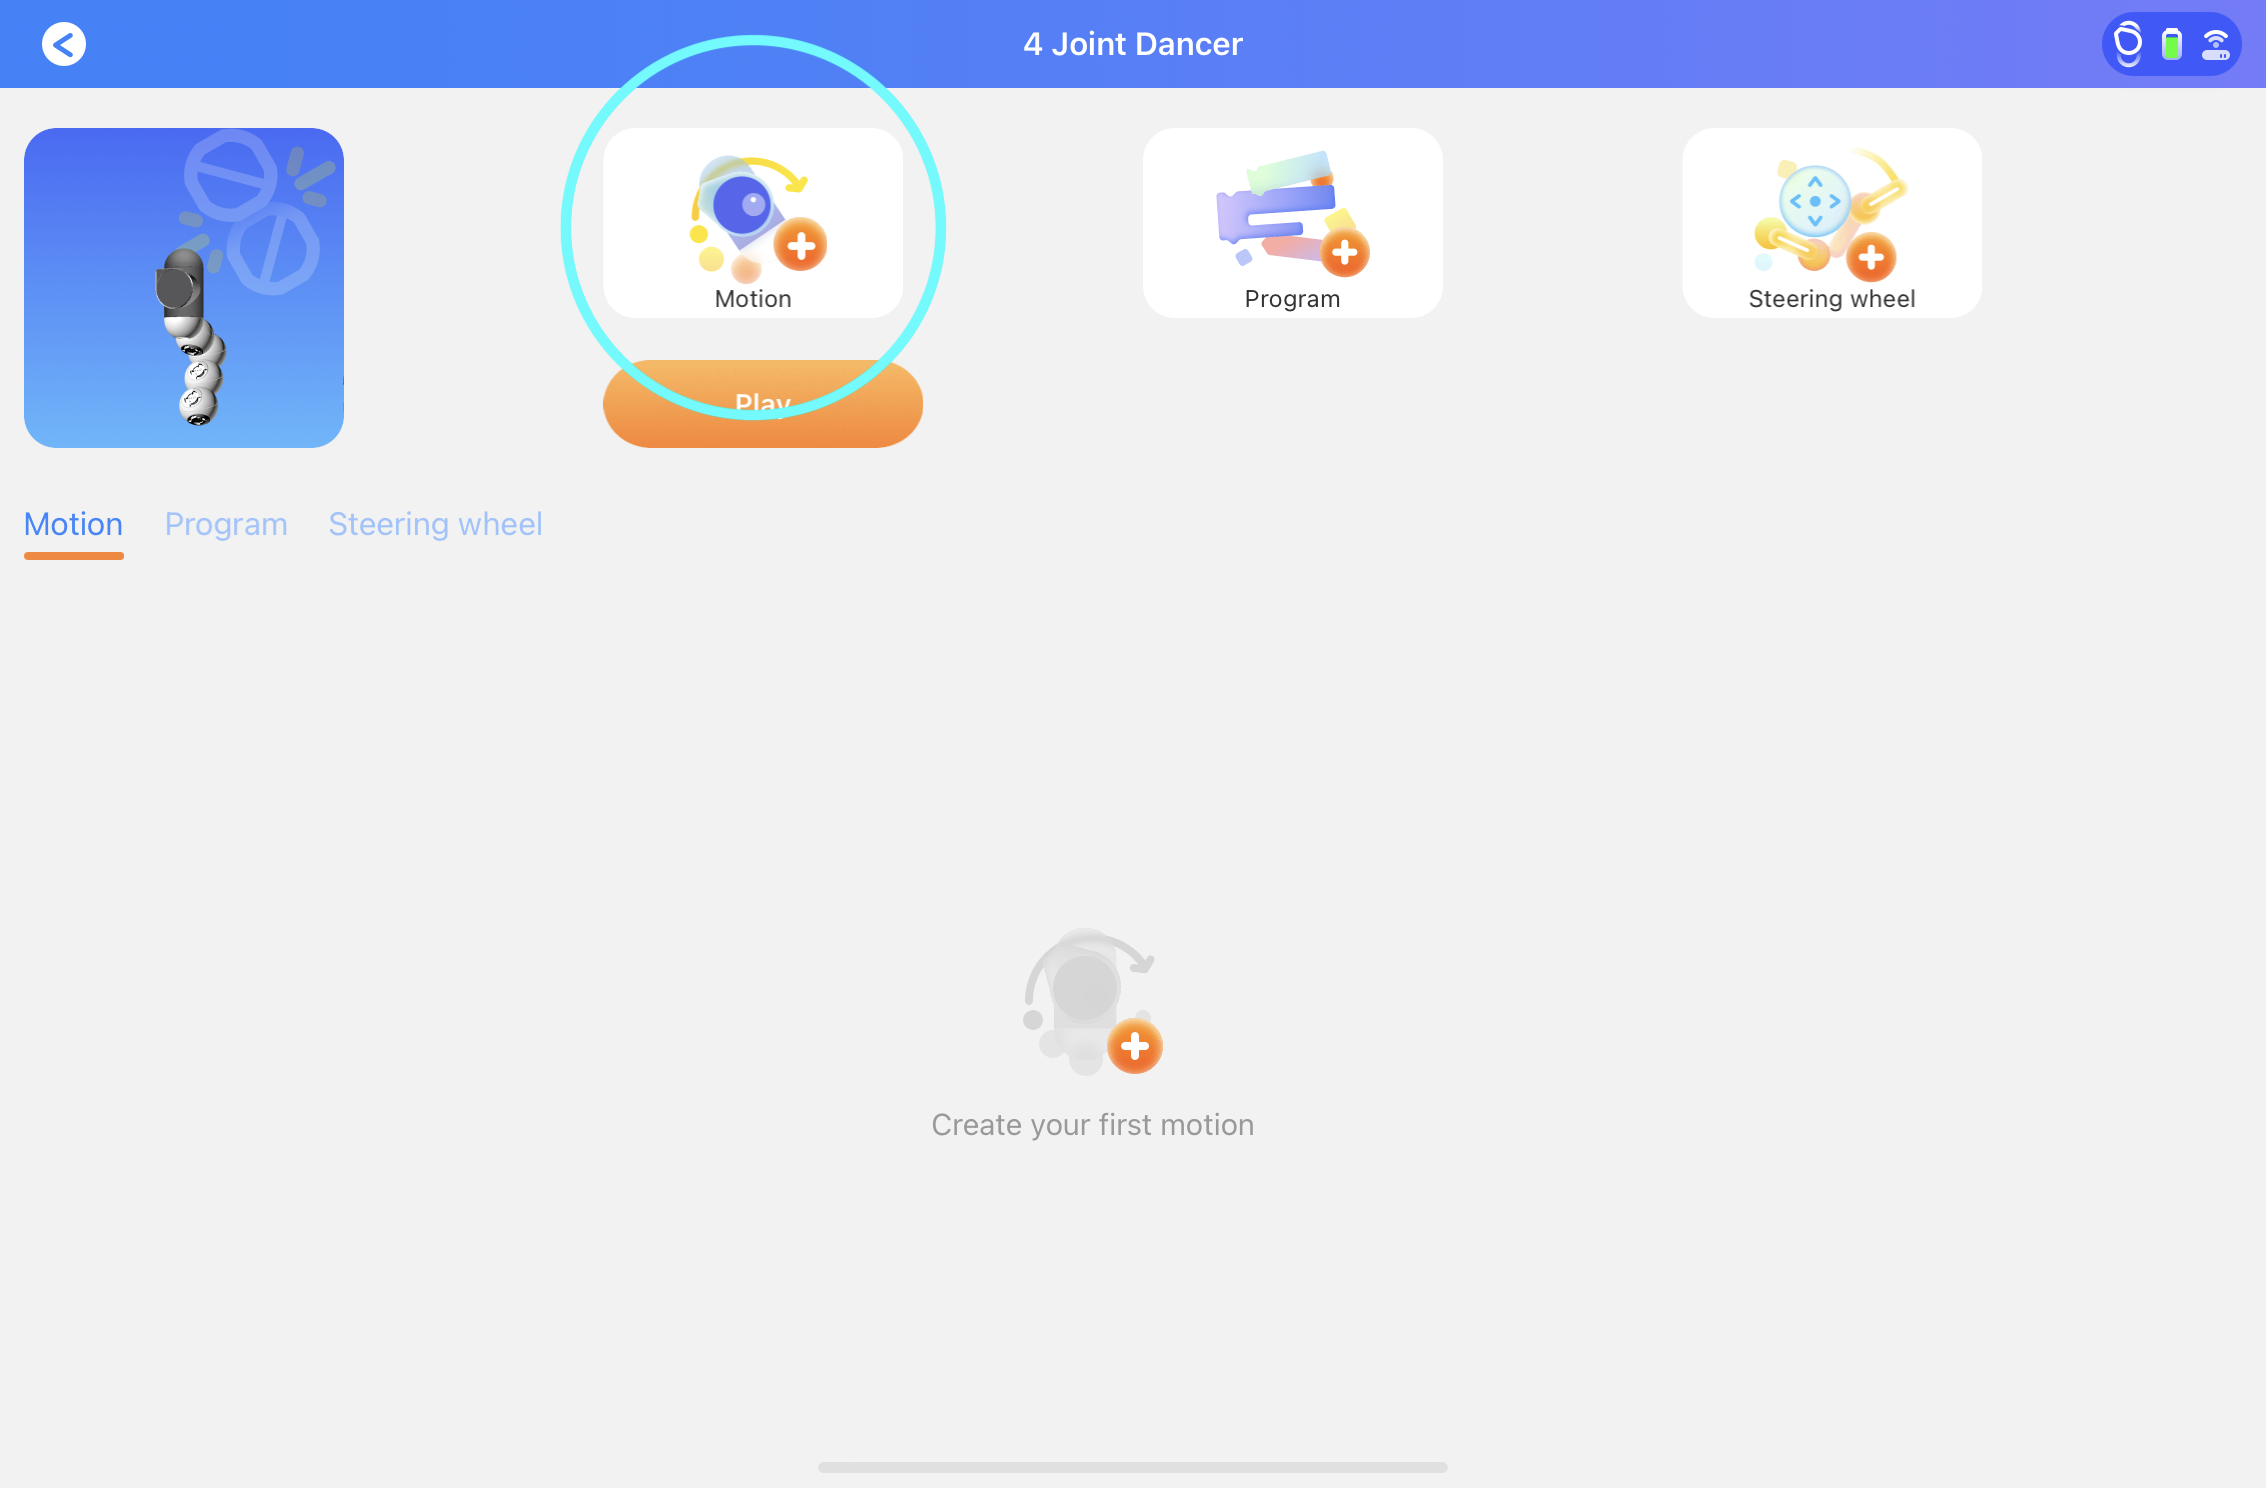
If you go back to the "My creations" page, you'll now see your new robot added to the to preset robot designs. Click on the robot you just designed.
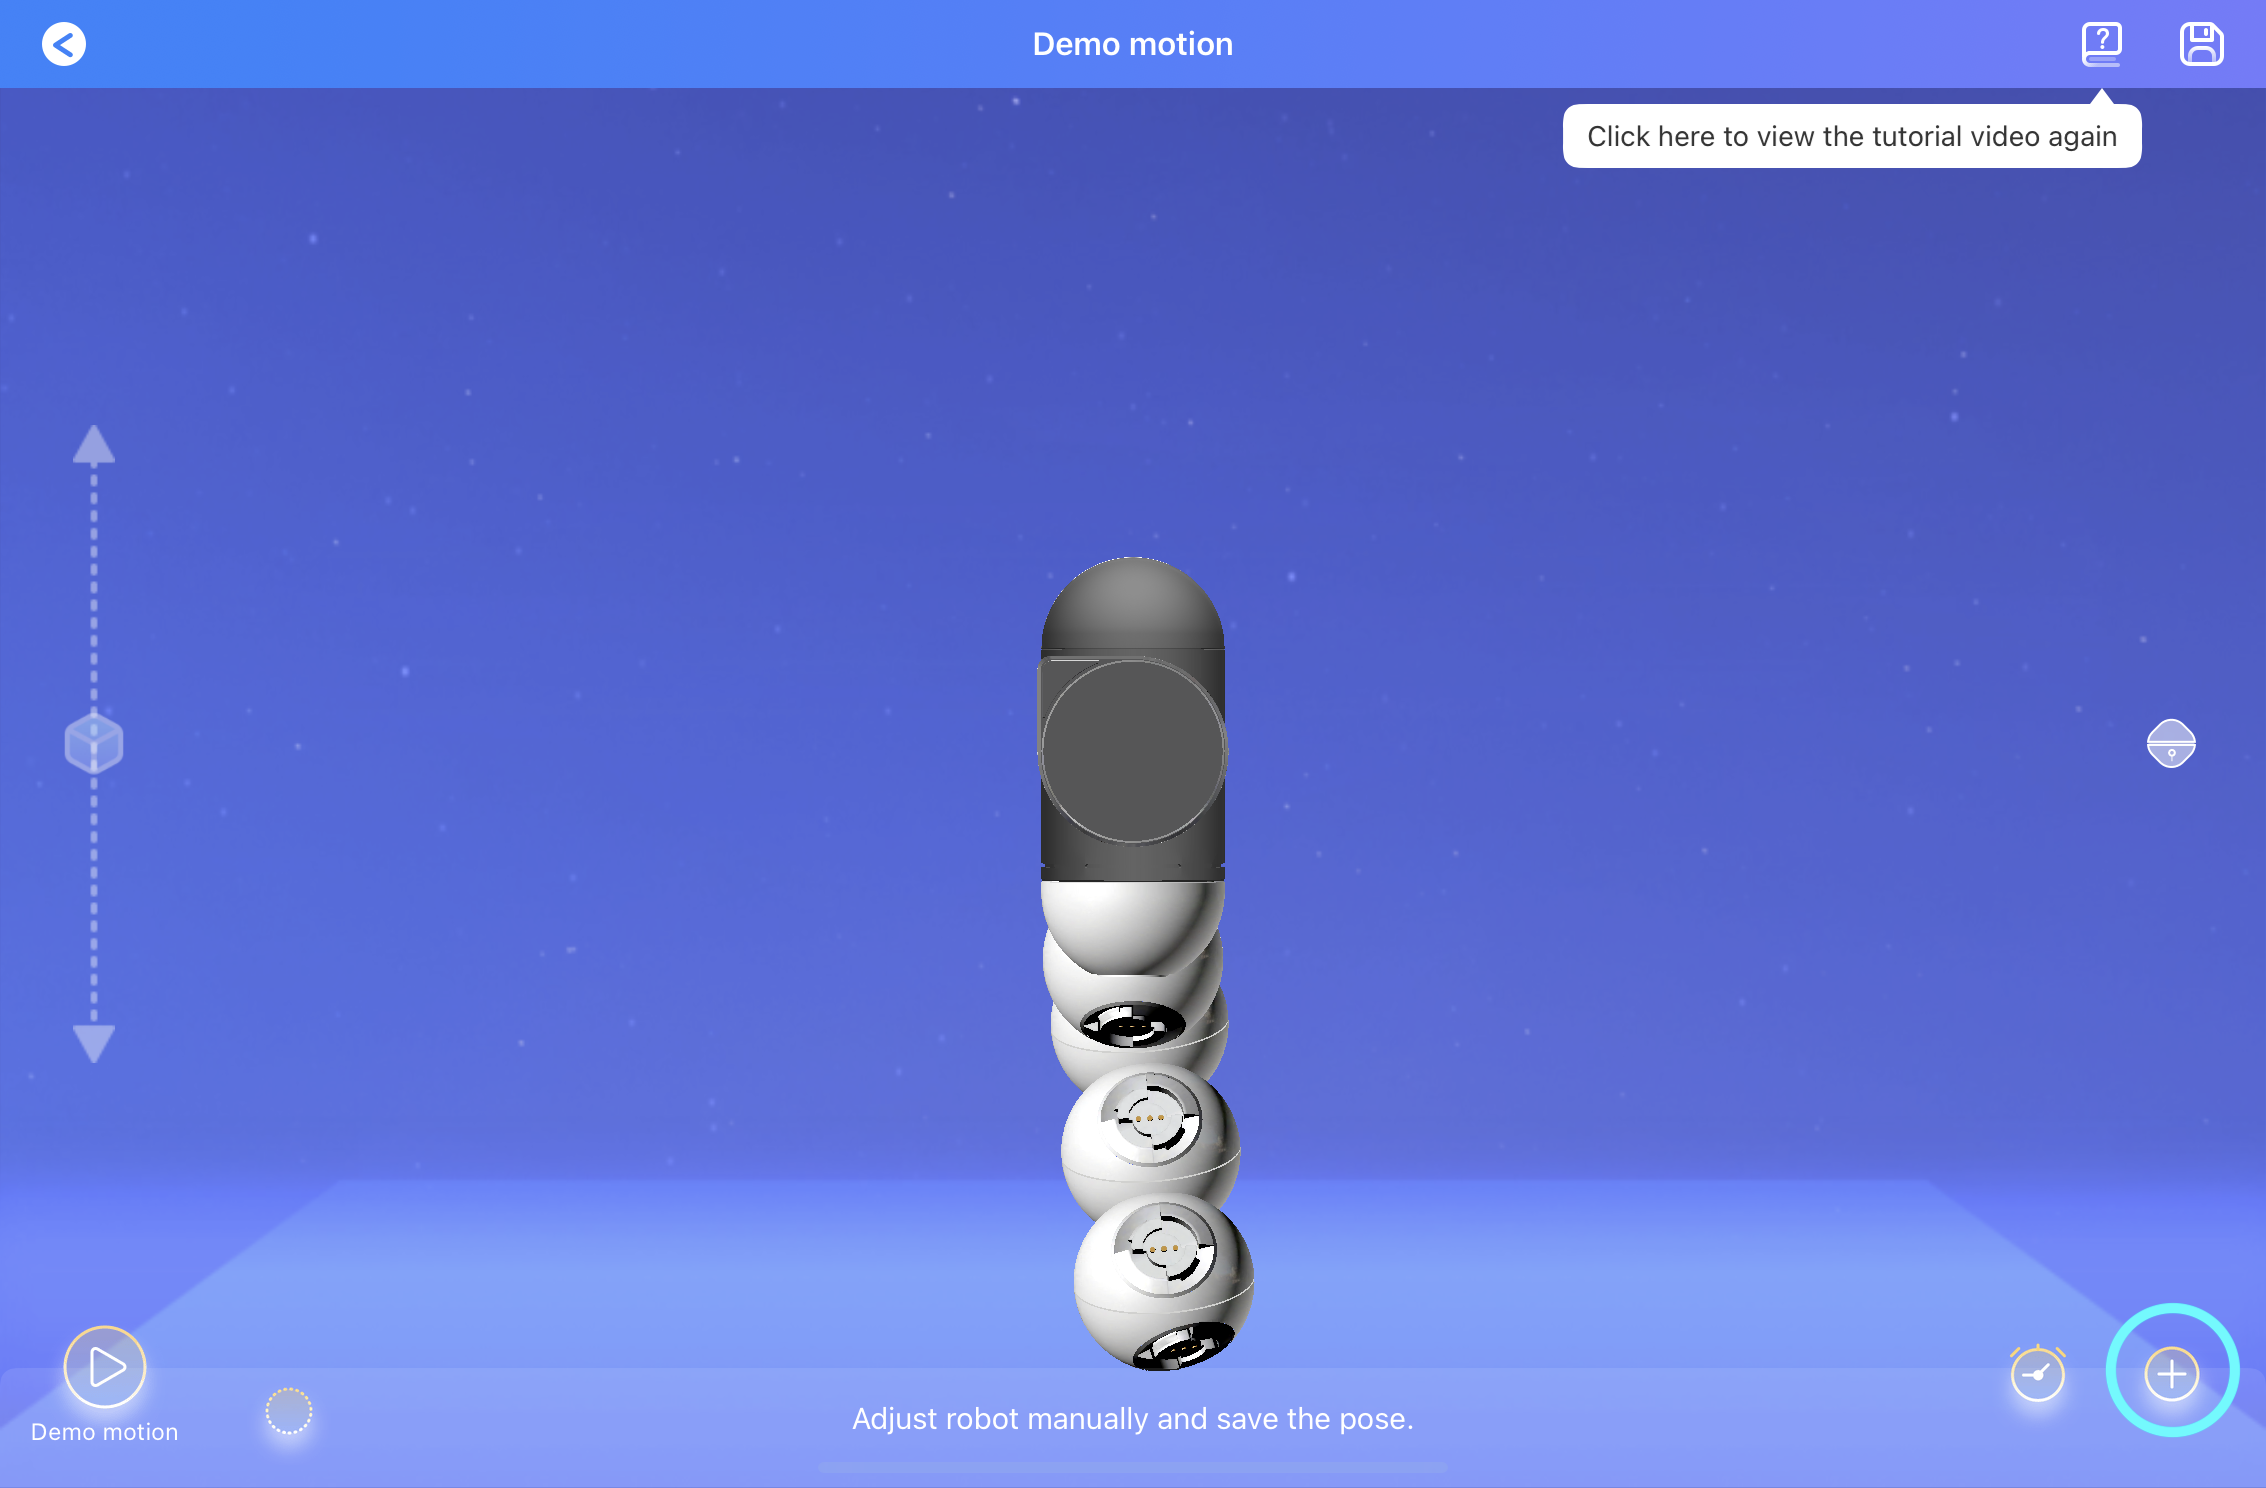
Then click on the button to create a new motion.
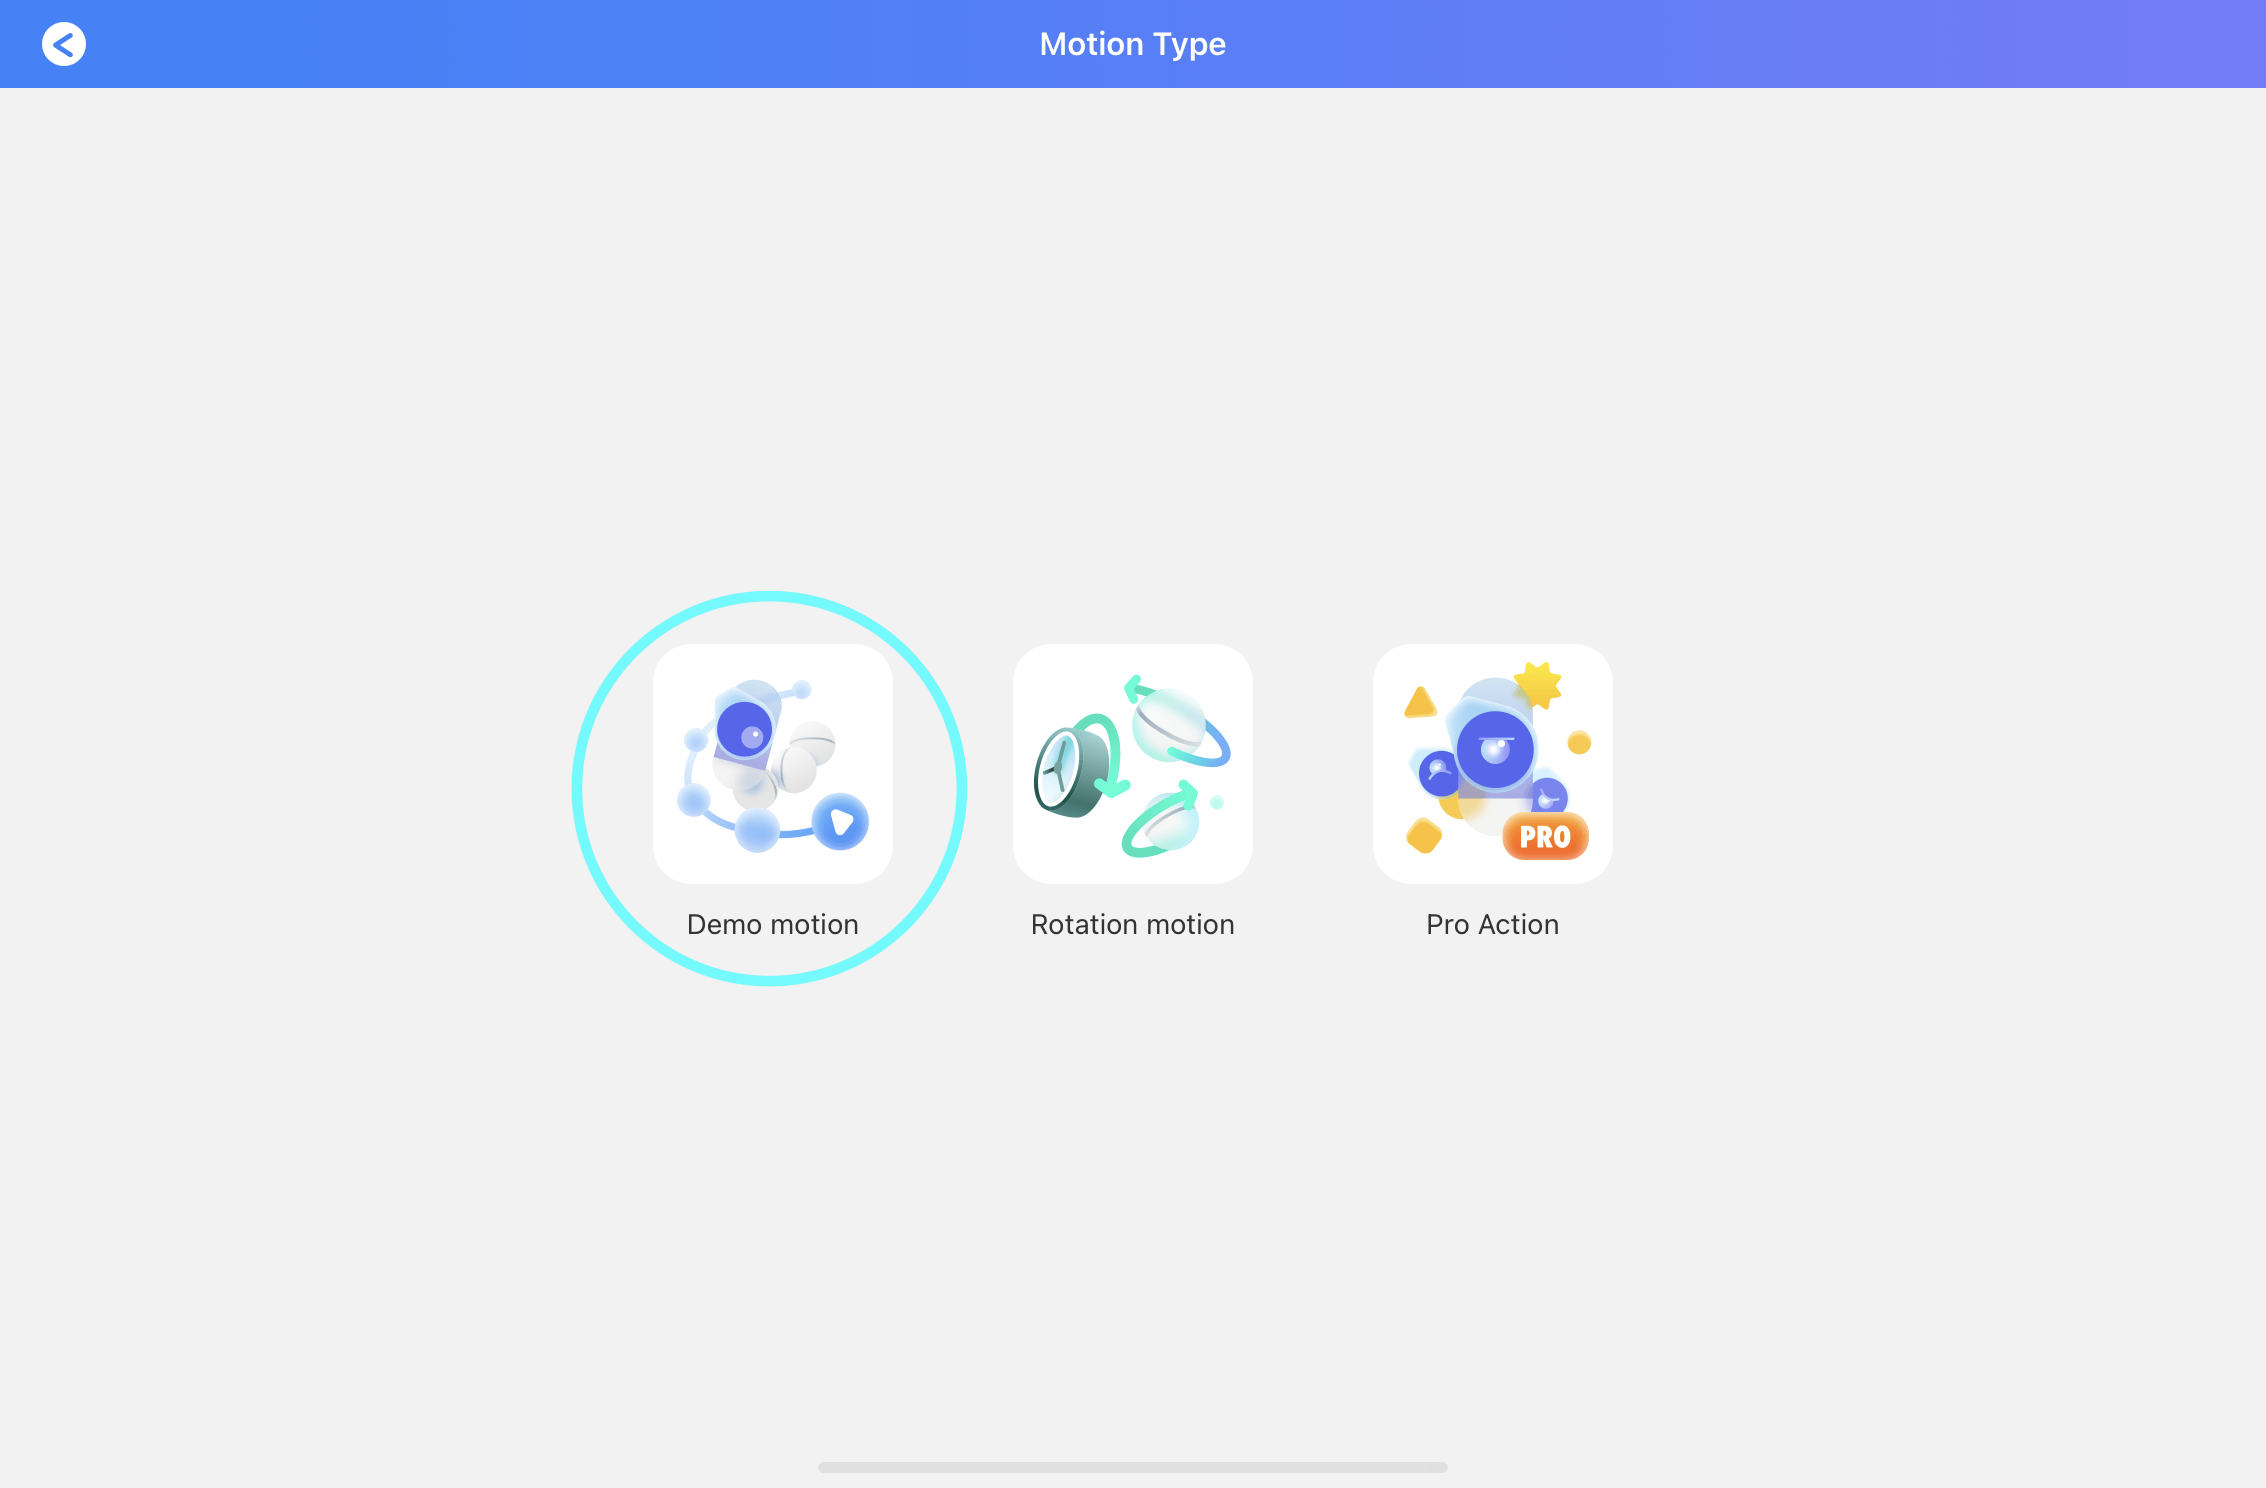
And select "Demo motion".
Before we go through how to create a new motion, we'll first think about the simple dance we want to make our robot perform. For this first simple dance, we'll have the robot shift to the right, to the left, and then back to center. The following images show sample keyframes at the important points in this simple dance: central position, movement to the right, and movement to the left.
Now that we have in mind our goal, let's go back to the tablet interface. For each of our key frames (center, right, left) move the robot into that position and then press the plus button at the bottom right of the screen. This will "record" the joint positions of the robot at the poses that you specify.
Next, drag the circles representing each pose left/right so that there is 1 second in between the first two poses (central and right) and 1.5 seconds in between the second and third pose (right and left).

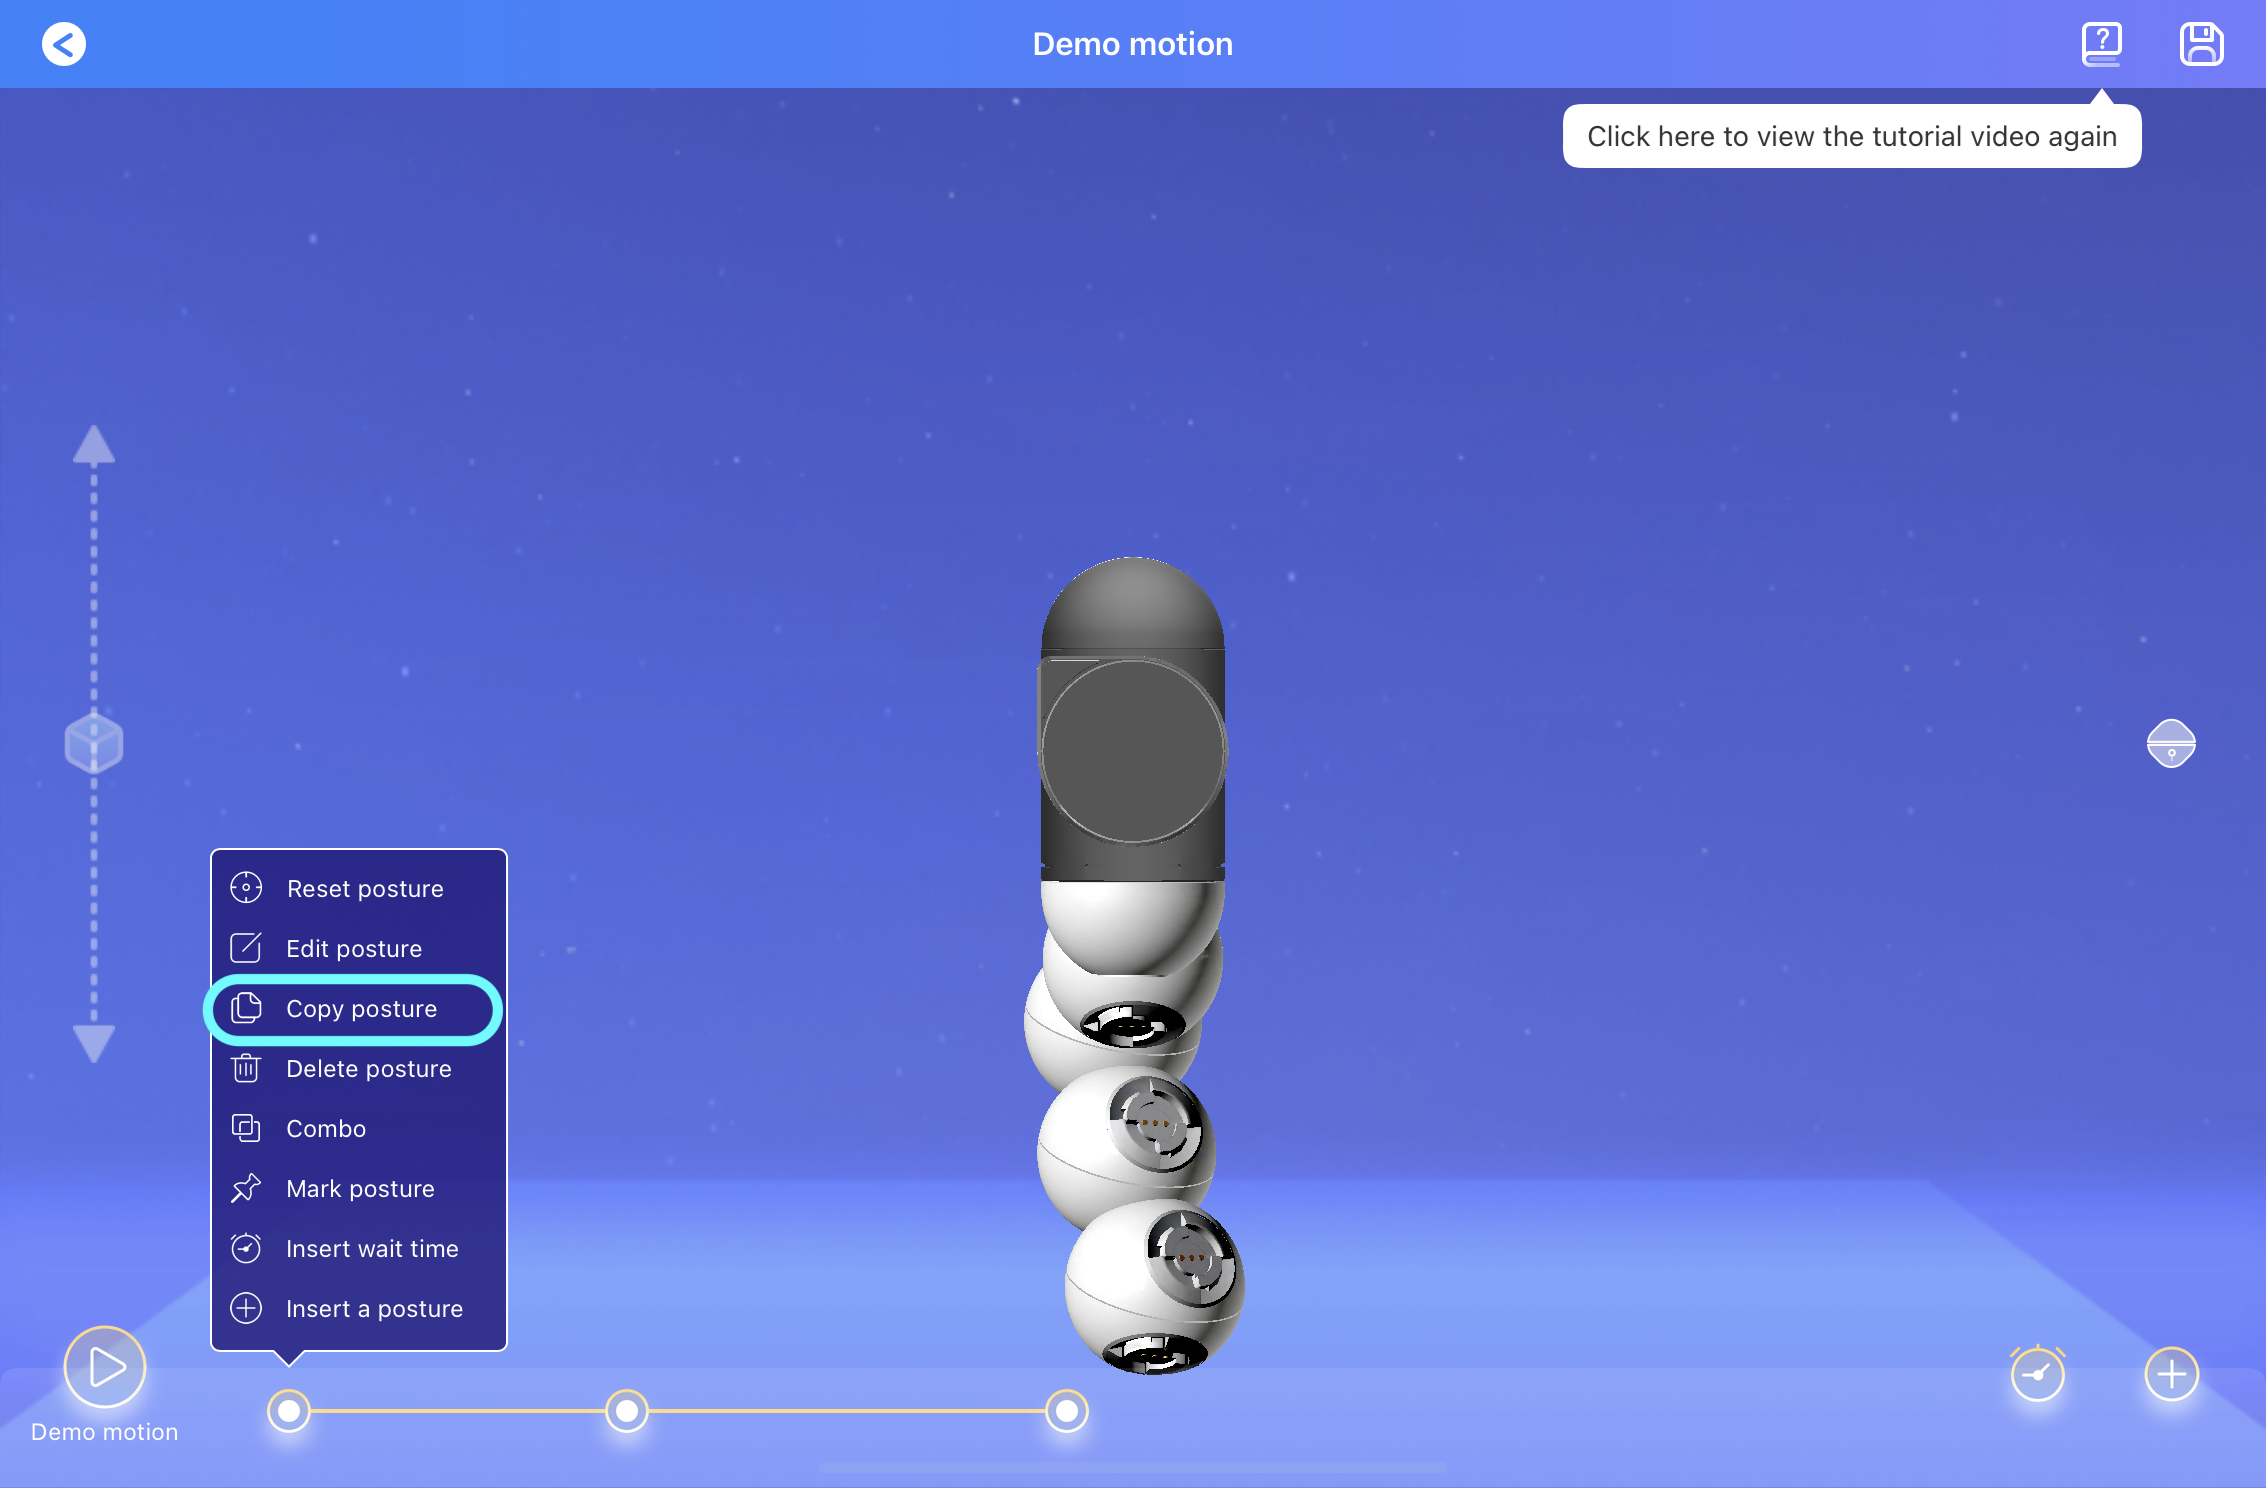
Now at the end of our simple dance, we want the robot to return to its starting position. Let's copy and paste the first pose (the central position). You can copy and paste that position by clicking on the circle representing the central pose and then clicking "Copy posture", as you can see in the image below. Then add the final pose at the end of your sequence.
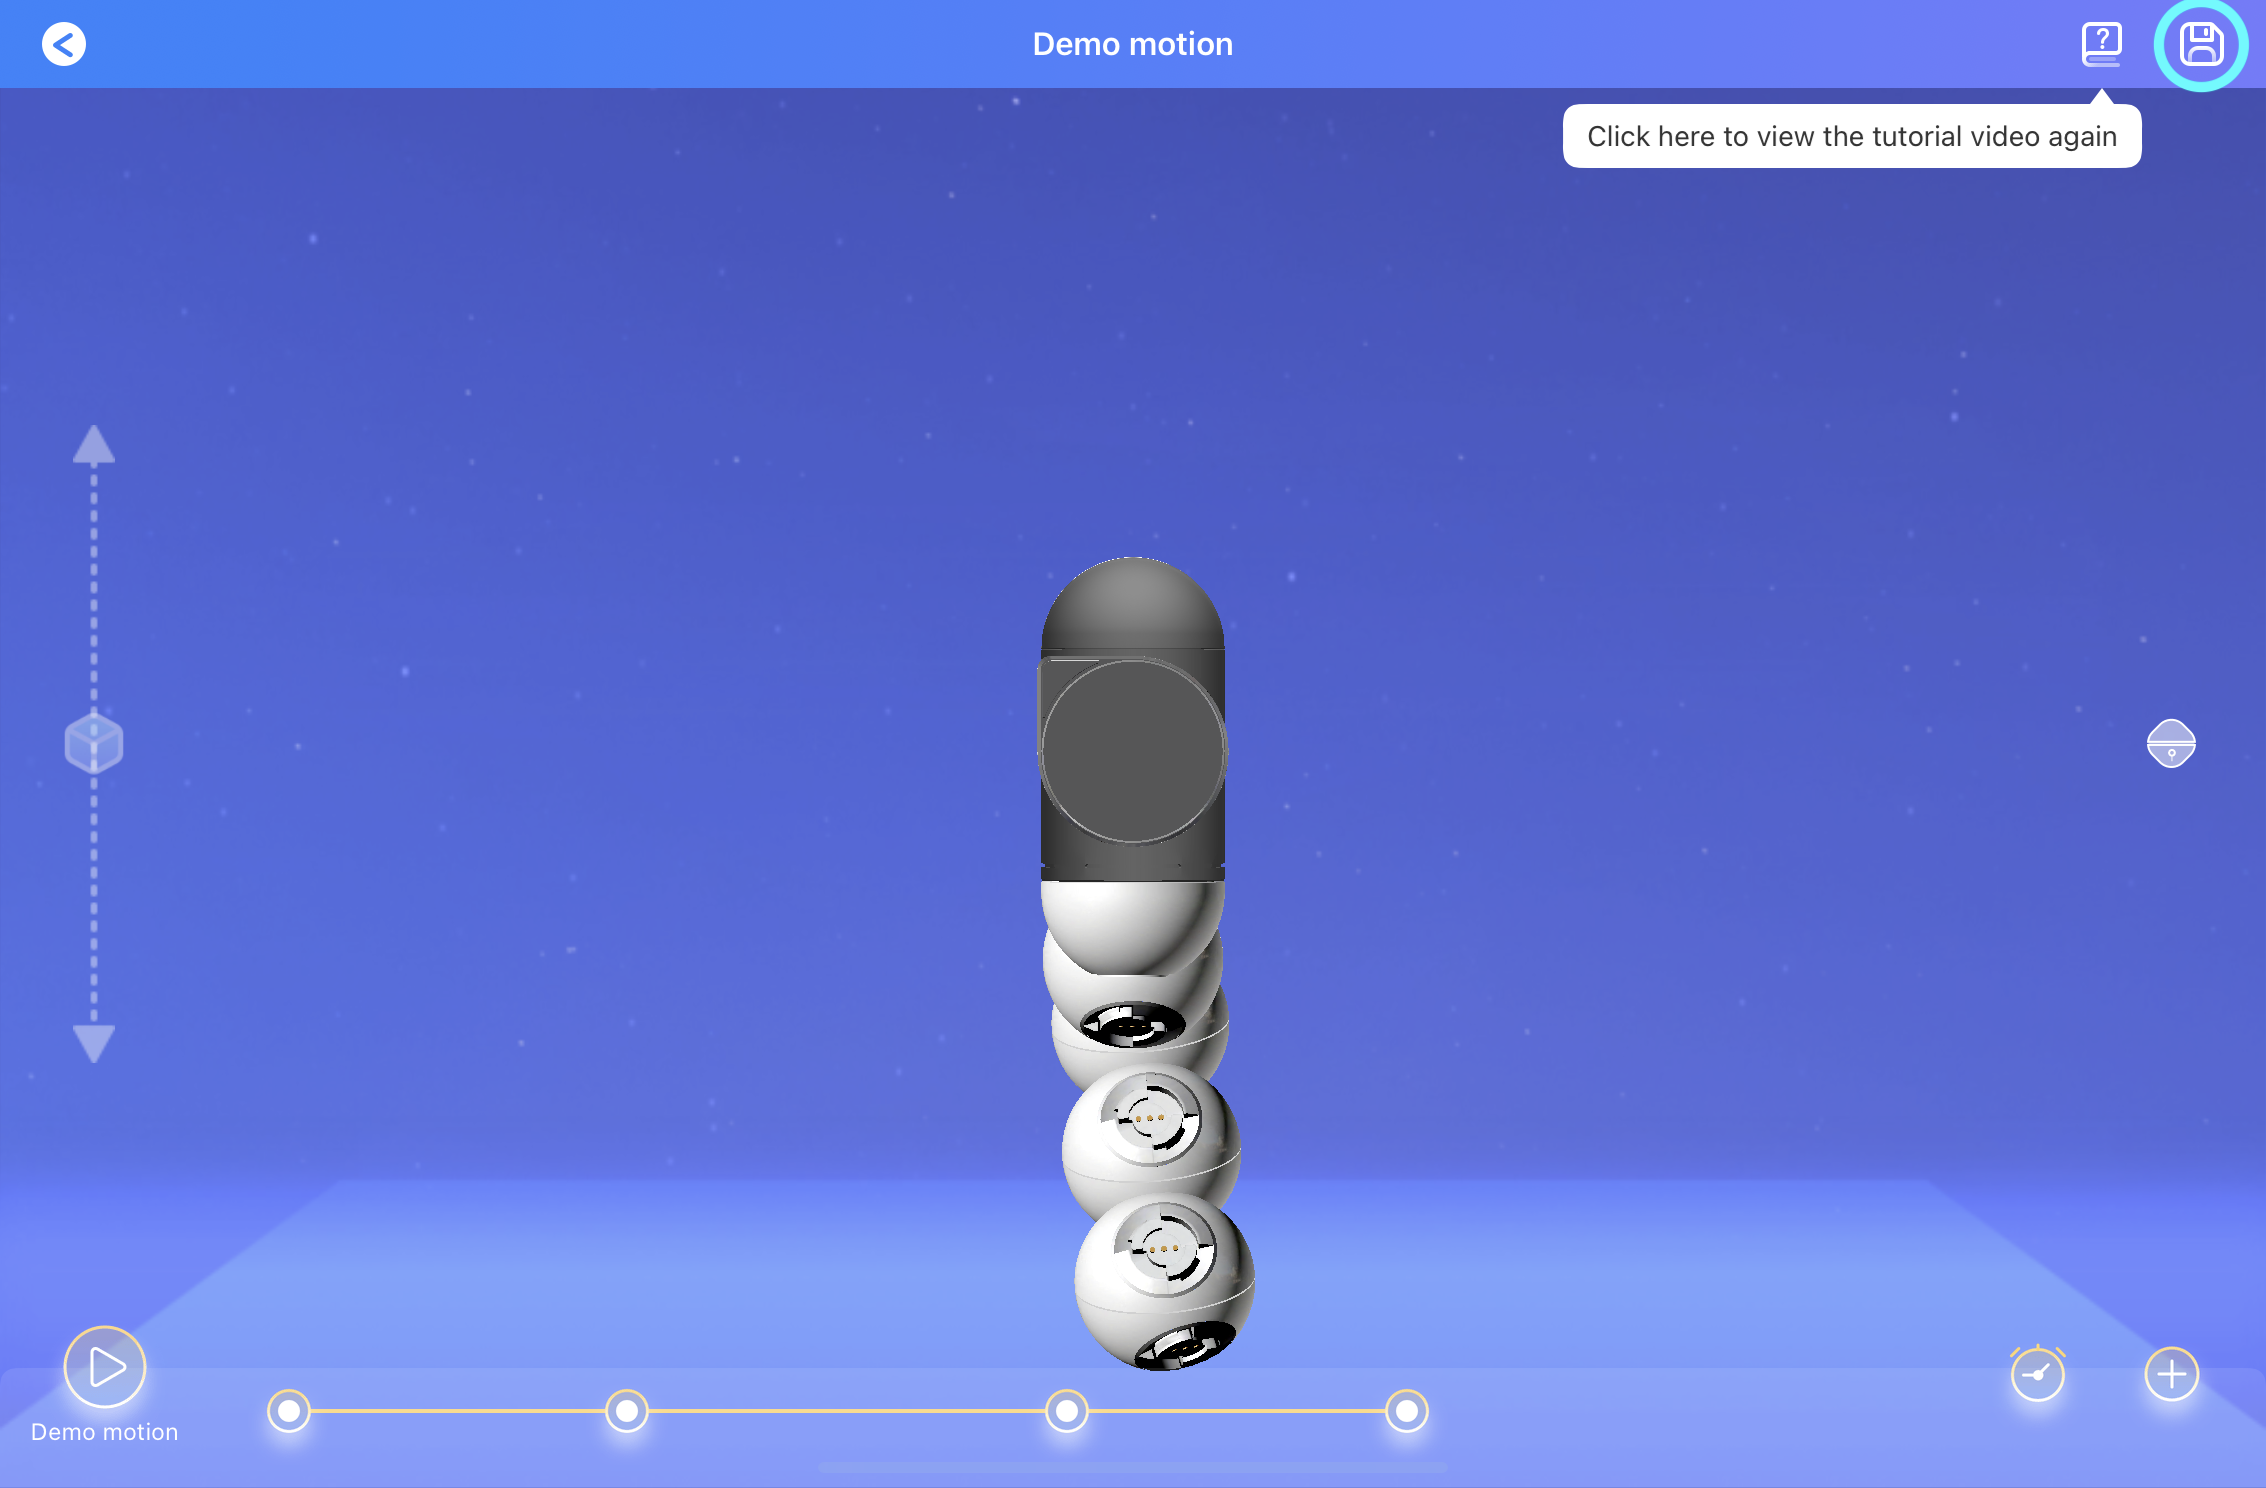
Now, let's save and play your motion. Let's save it first by hitting the "save" button in the upper right hand corner. I named my motion "Simple Dance".
Finally, play your motion by hitting the play button in the bottom left corner. Your robot dance should look something like what's pictured below.
If you're interested in learning more about creating demo motions, check out the video below. This video also shows you how you can lock some of the robot's joints as you create demo motions.
Exercise #3: Creating Your Own Robot Dance
Now that you've learned the basics of creating demo motions for the ClicBot, it's your turn to create a robot dance of your own design by creating your own new demo motion. If you want to, you can choose a song for the robot to dance to (you'll have to play it on your phone and hit "play" on both the song and the robot at the same time). We recommend that you pick one of the follow two robots to work with for this exercise. The first robot is the same one that we used in Exercise #2 to create our simple dance. The second robot is one that has a gripper attached.
Challenge Exercise: Design a Robot Movement Pattern with Emotions
If time allows, we also encouraged you to play around with the "Pro Actions" (an alternative to "Demo motion"). The Pro Actions allow you to both record motions of the robot's joints and also add emotional expressions to the robot's face. Please refer to the following video that describes how to use the Pro Actions.
Requirements to Meet Expectations for Today's Class
- You have completed the course entrance survey.
- Your group has successfully put together both the Bac and Bic ClicBot robots (Exercise #1).
- Your group has put together a robot motion sequence following the steps outlined in Exercise #2.
Acknowledgments
"Exercise #2: Designing a Custom ClicBot Robot and Robot Motion" was designed after the programming exercise from the ClicBot's makers KEYi TECH ClicBot. Demo Motion instructional YouTube video.