Class Meeting 04: Getting Started with Blockly
Learning Goals
- You will be introduced to the Blockly visual programming interface
- You will learn the basic principles of robot programming
- You will build your first programs that will control the actuators of ClicBot
Getting Started with Blockly by Tewodros Ayalew
Here is a link to the presentation slides from today.
Exercise #1: Getting Familiar with the Blockly interface
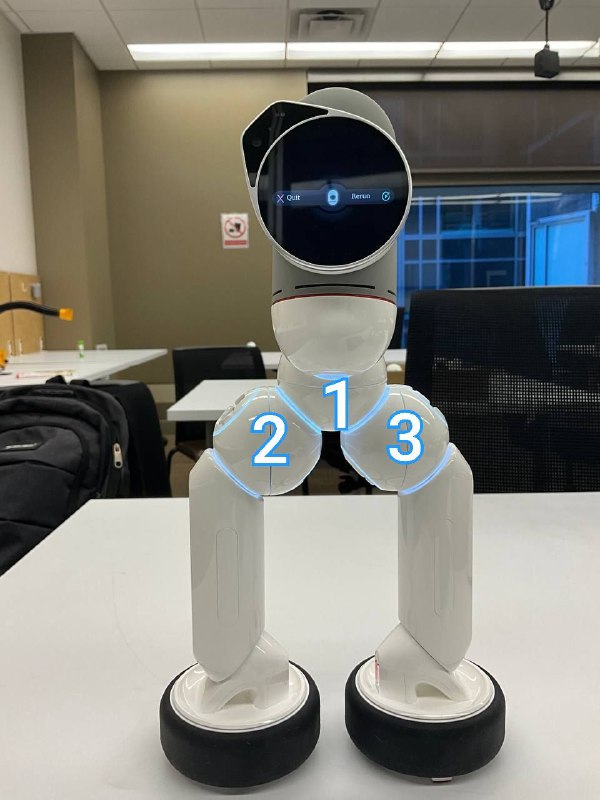
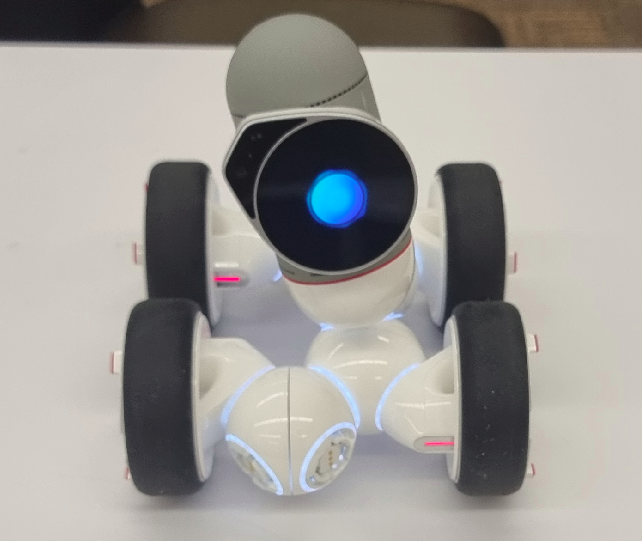
In this first exercise, you will have the opportunity to work on your very first Blockly program, which focuses on displaying various emotions on the screen of the ClicBot. First, constrct a ClicBot robot that looks like the picture below.

Once your ClicBot is built, save the configuration. Now, click on the button labeled "Program" to create your first Blockly program.
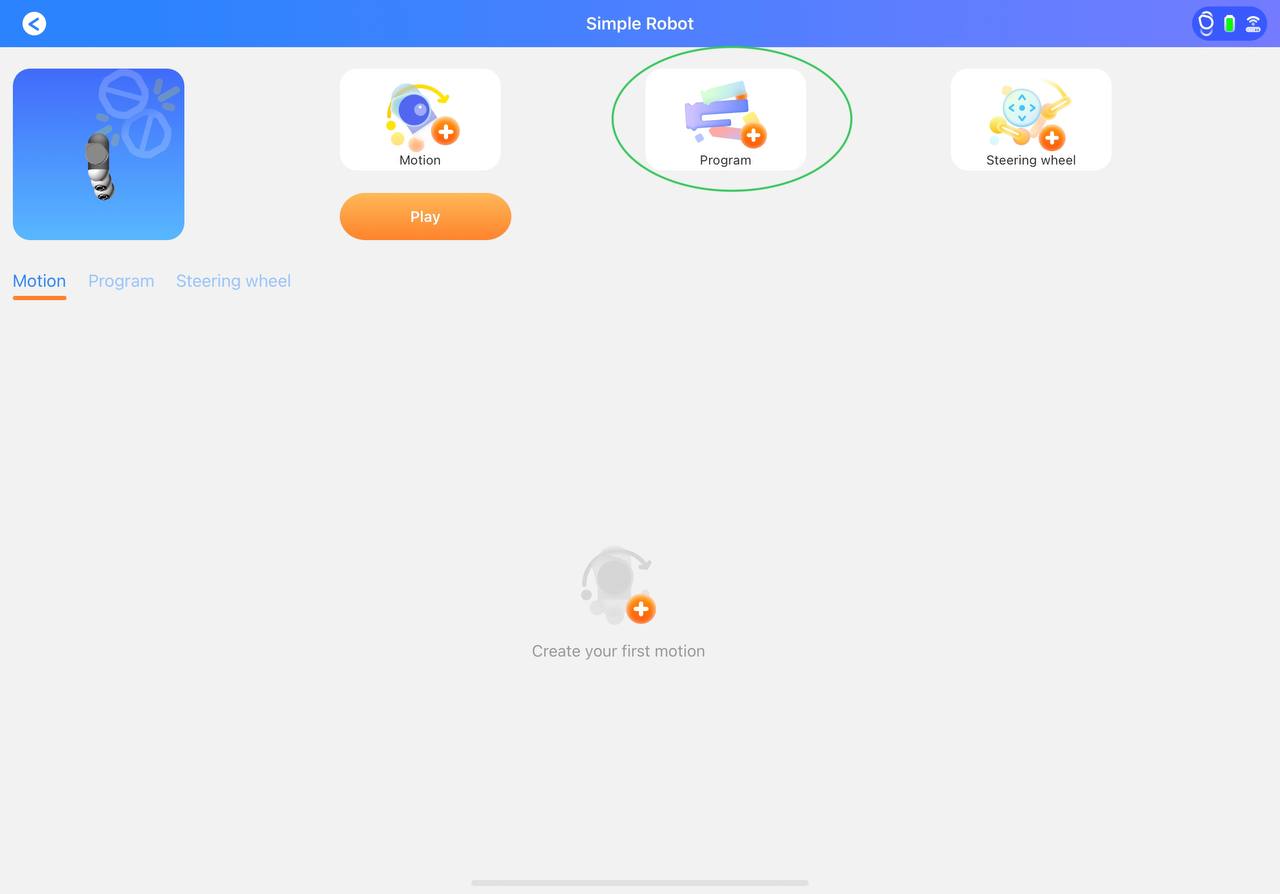
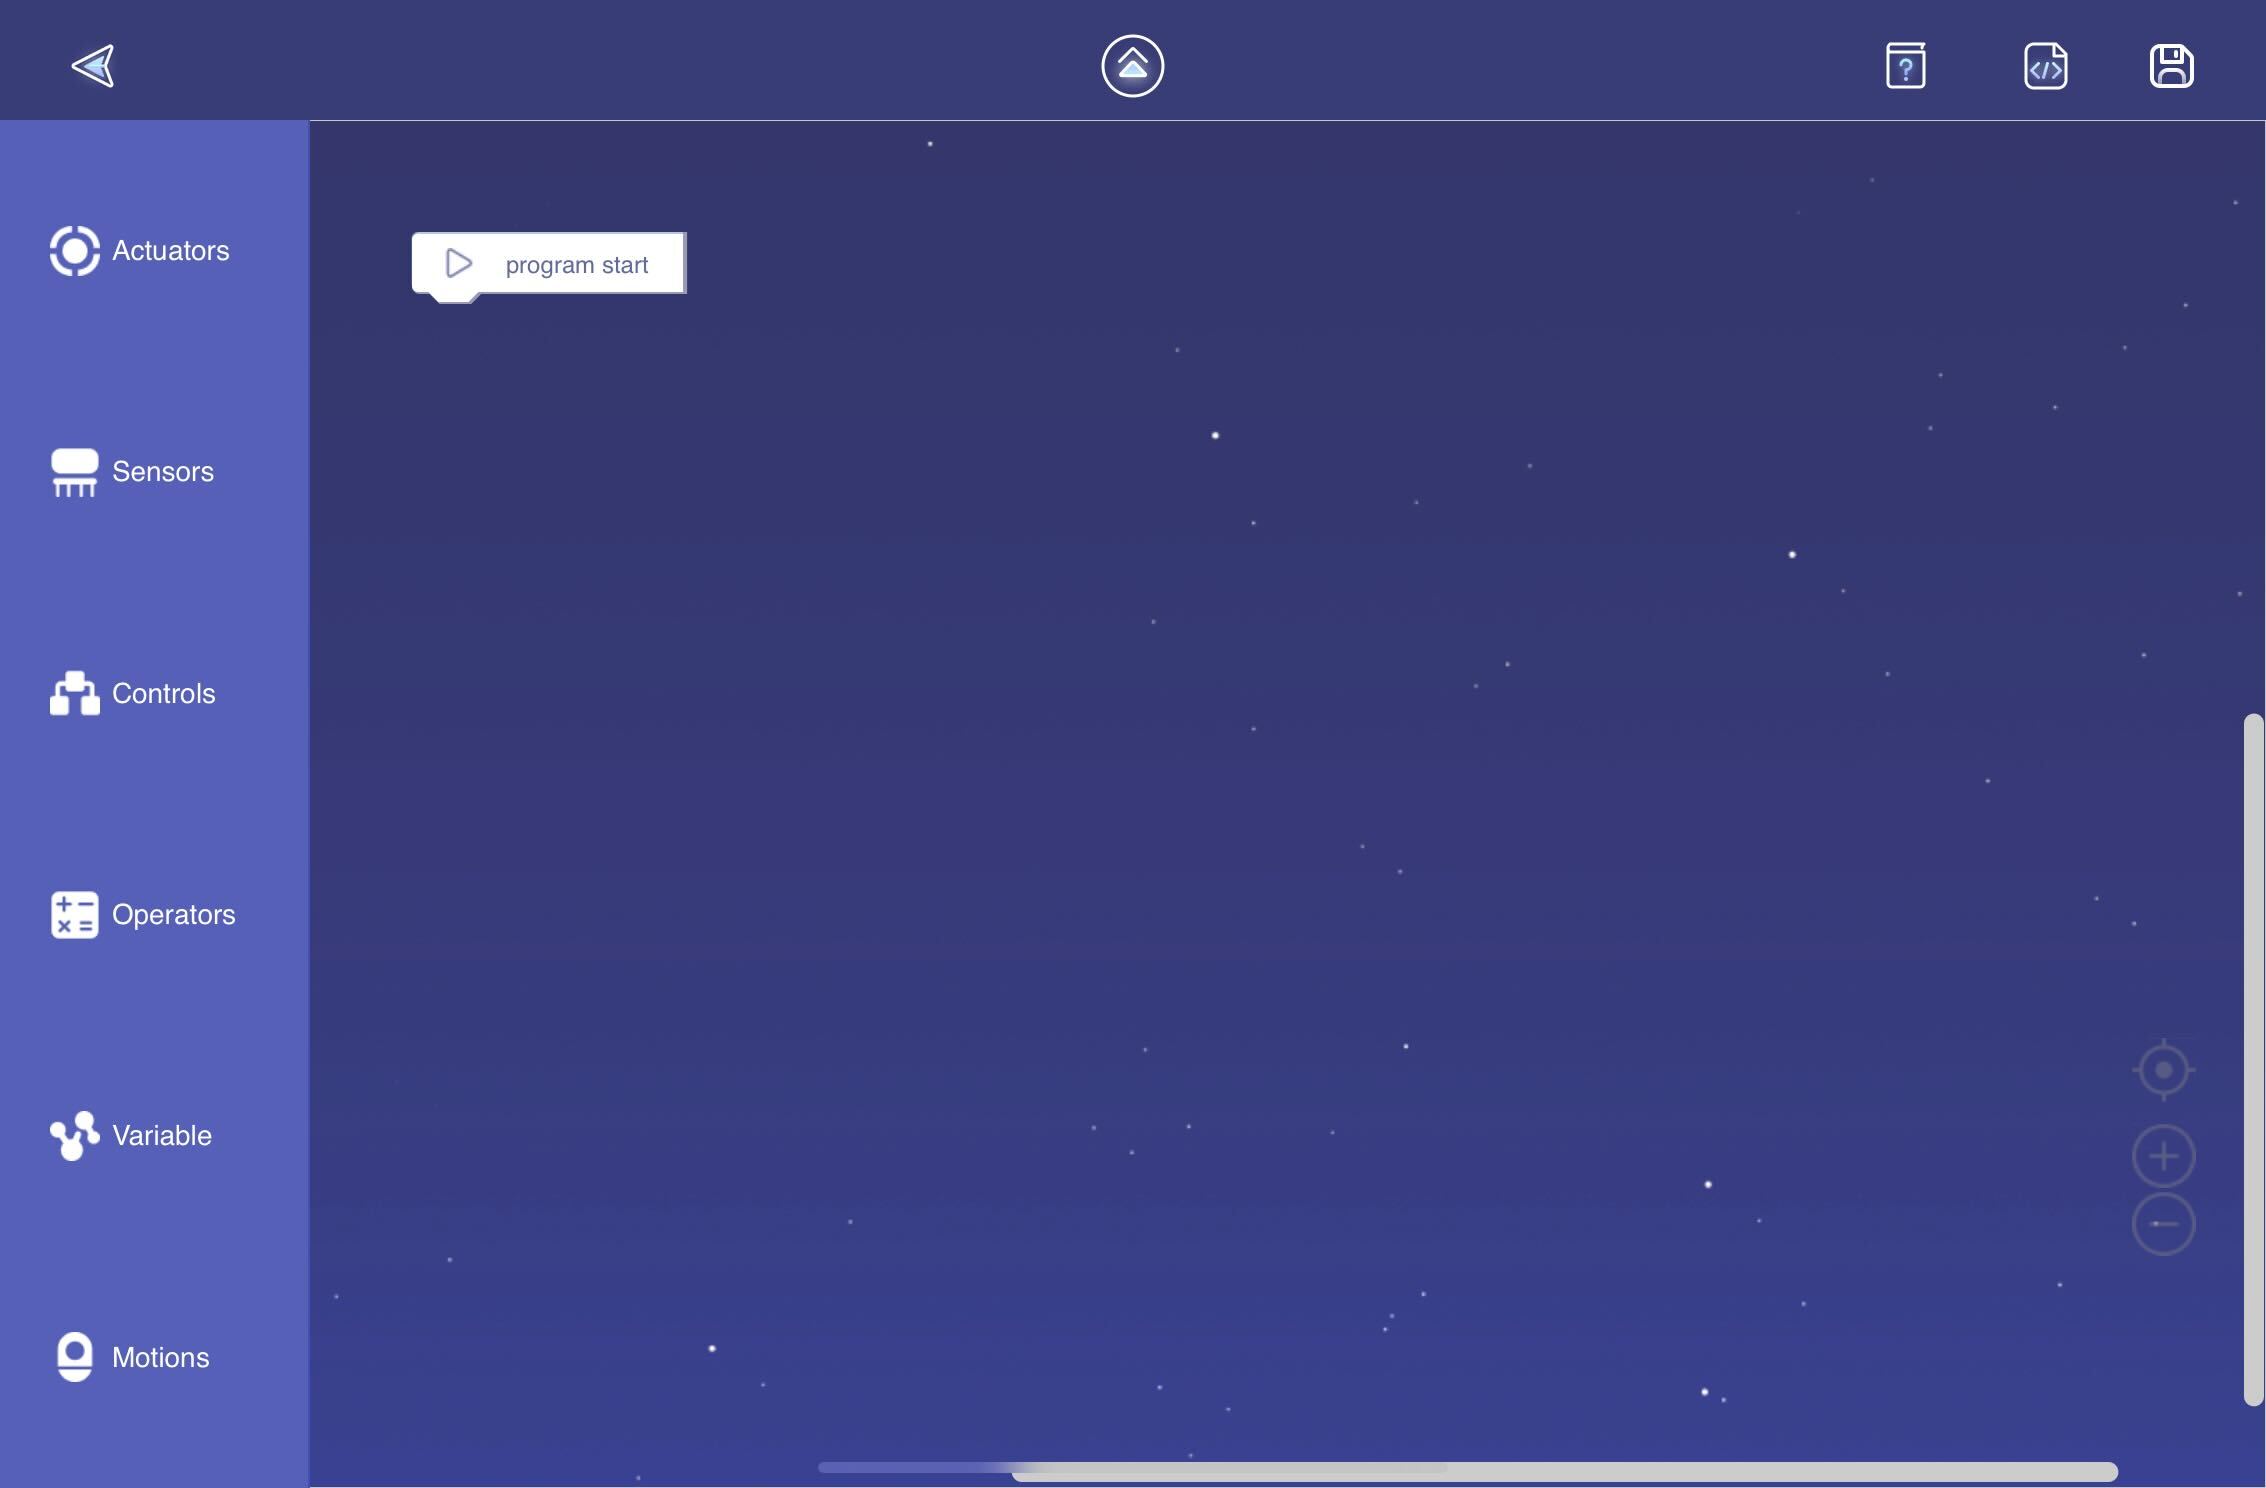
If you correctly follow the steps, you'll arrive at Clicbot's Blockly programming interface. At first, the interface will have only the "program start" block. All the blocks you need to program the Clicbot will be attached to this block.
Now, it's time to create our very first Blockly program. In this program, your task will be to program the Clicbot robot to display various emotions on its screen, just like the animated images provided below.
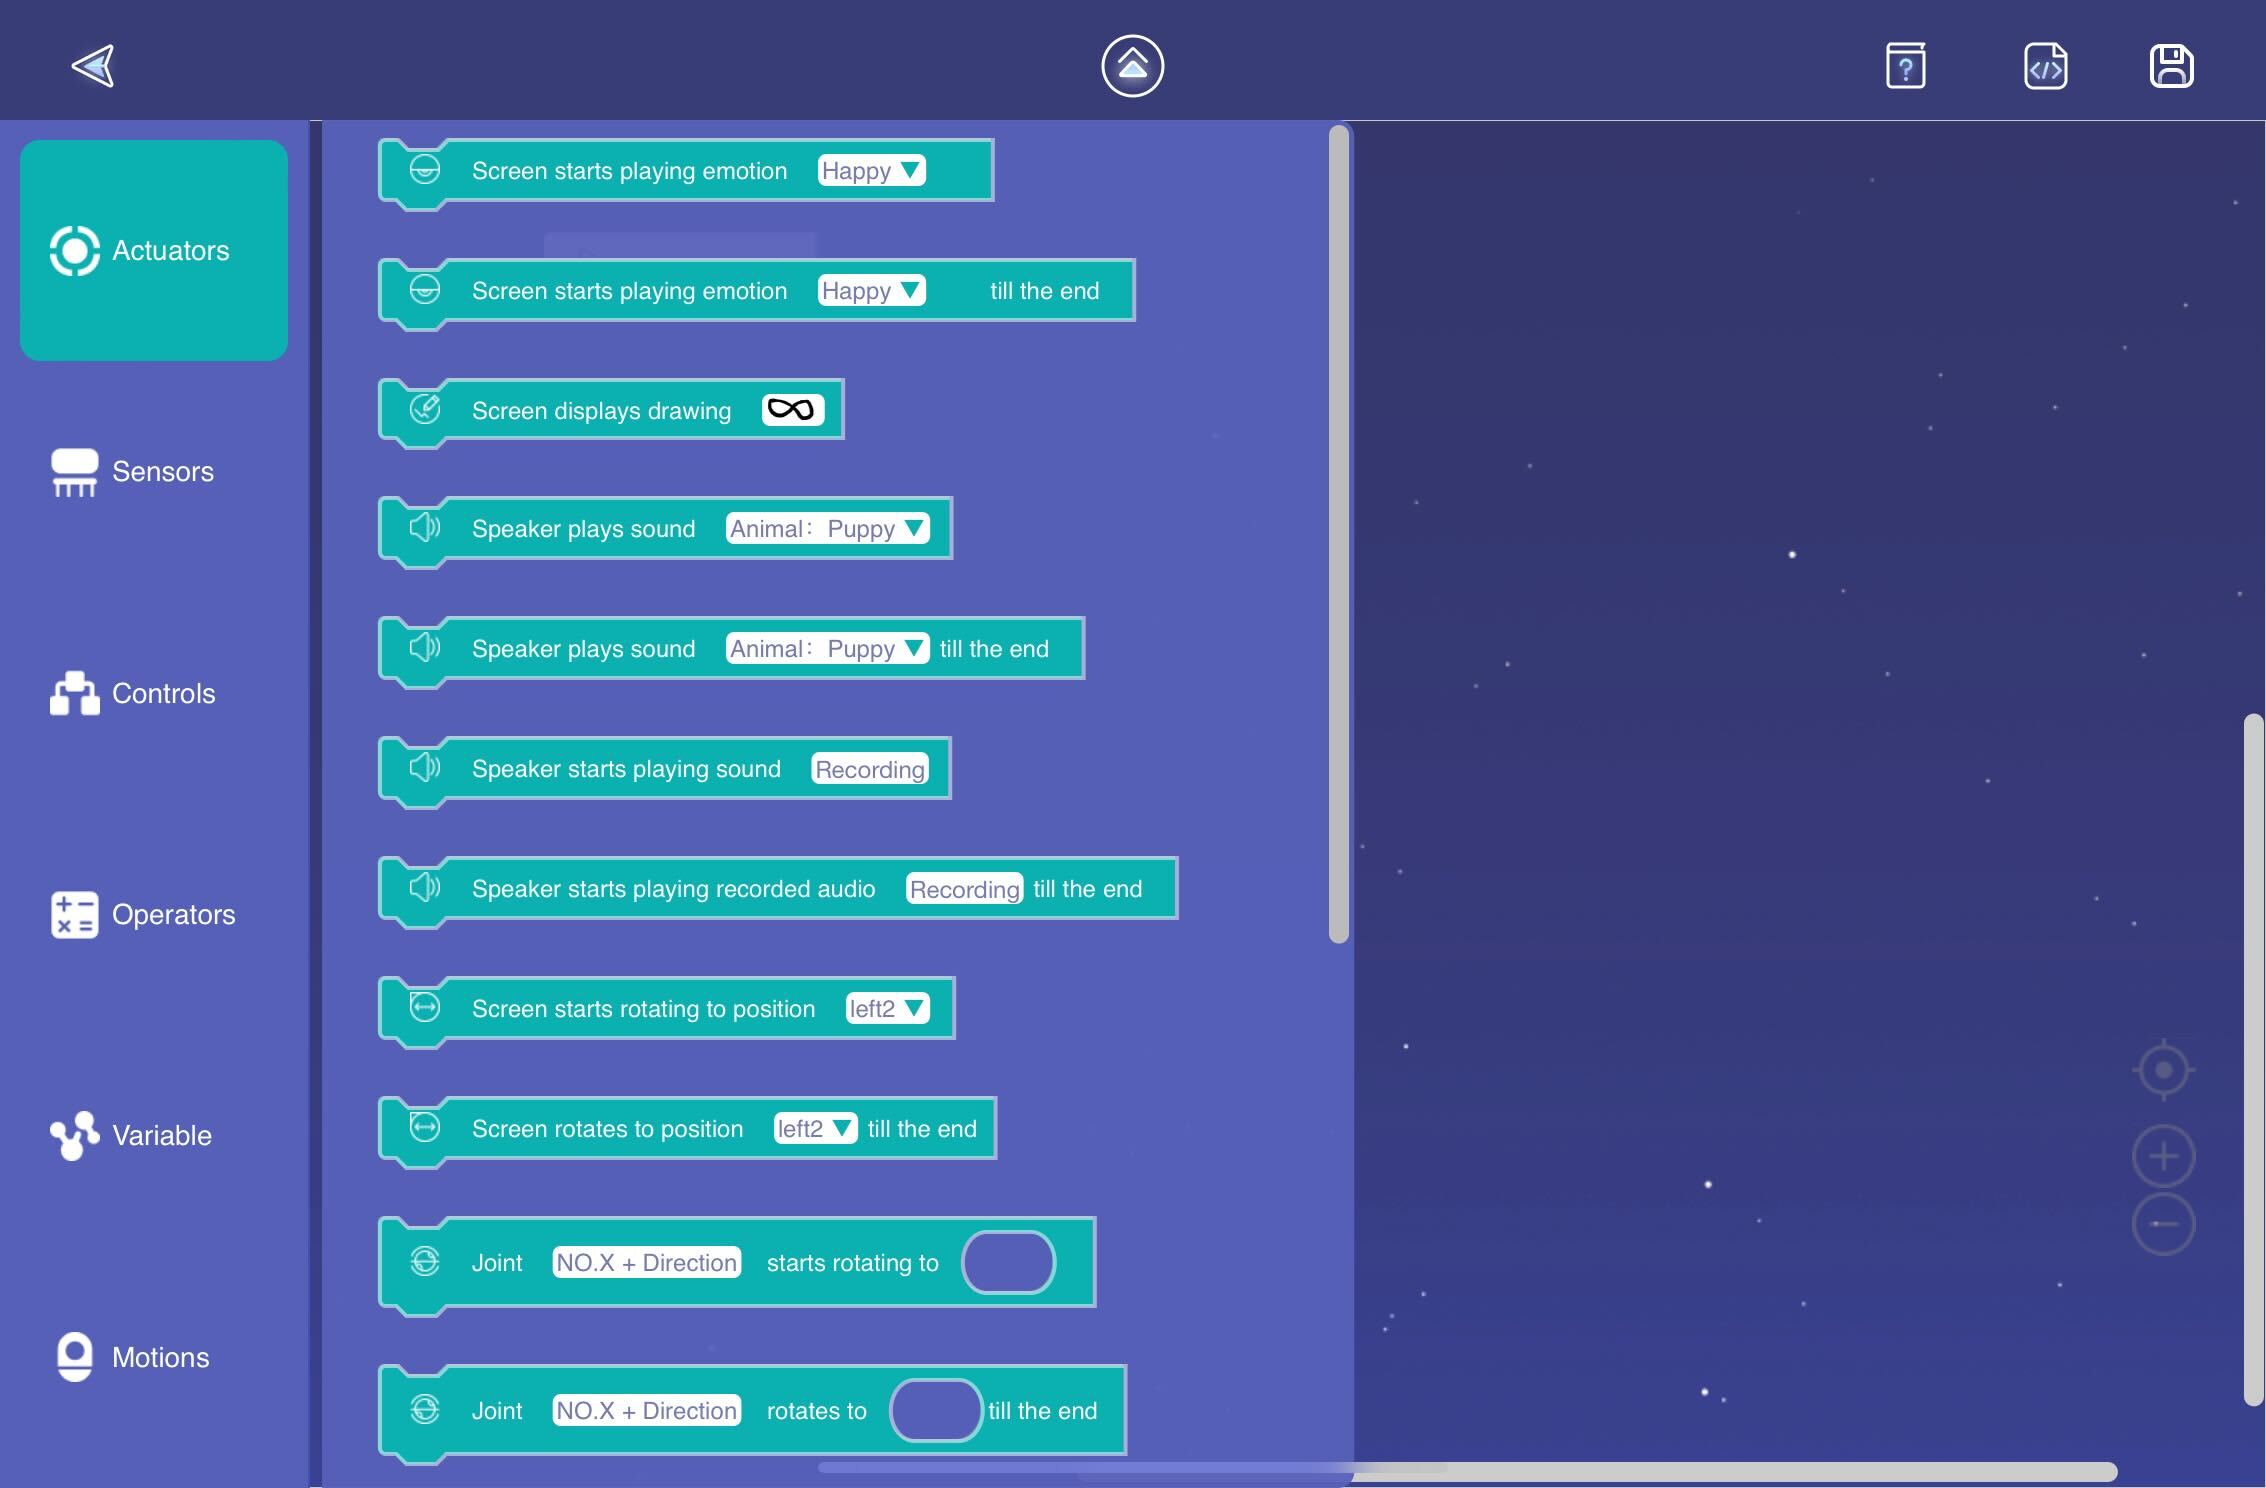
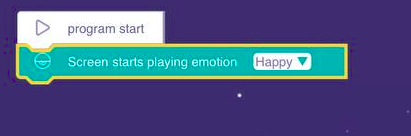
To display emotions on Clicbot's screen, begin by clicking on "Actuators" from the toolbox. Then, drag the "Screen starts playing emotion happy till the end" block and attach it to the "program starts" block in the workspace.
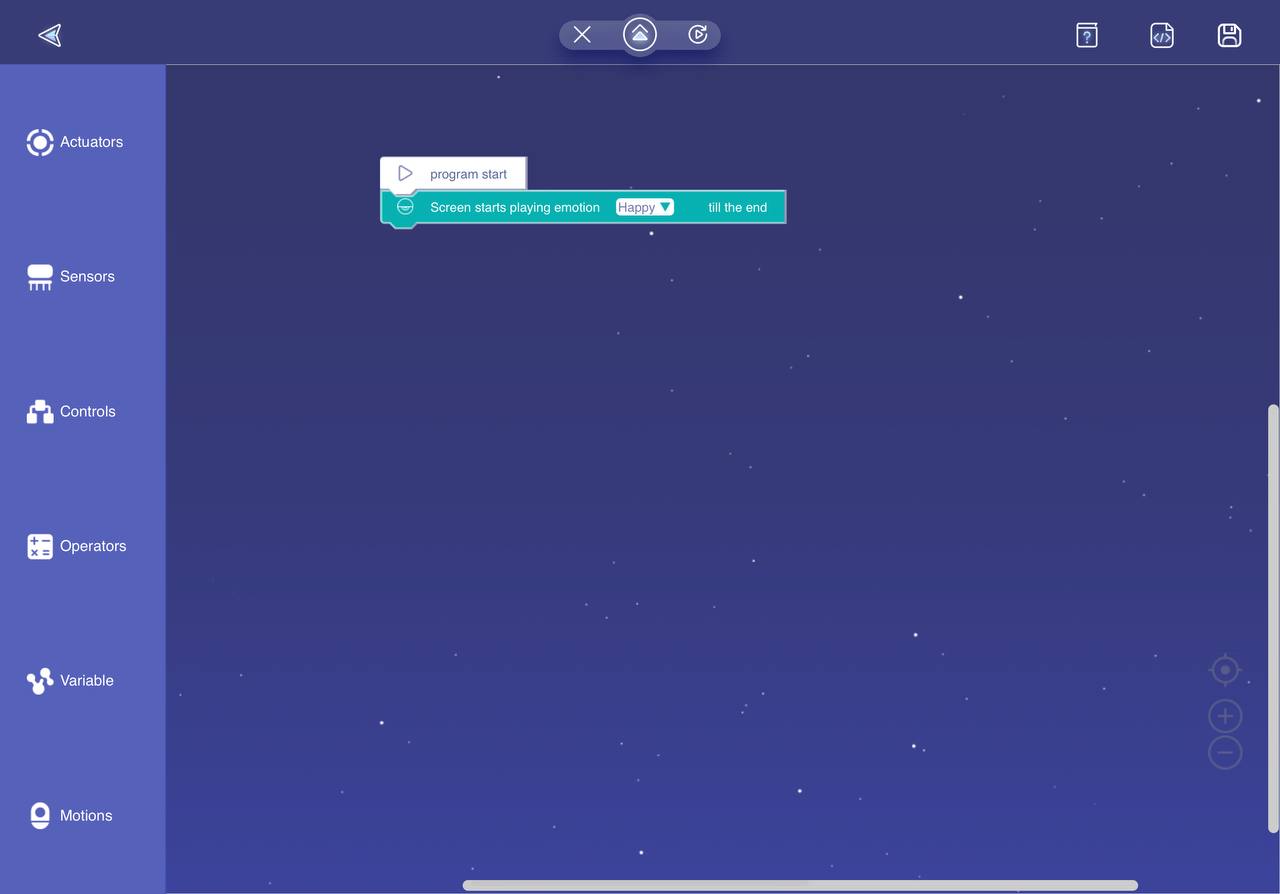
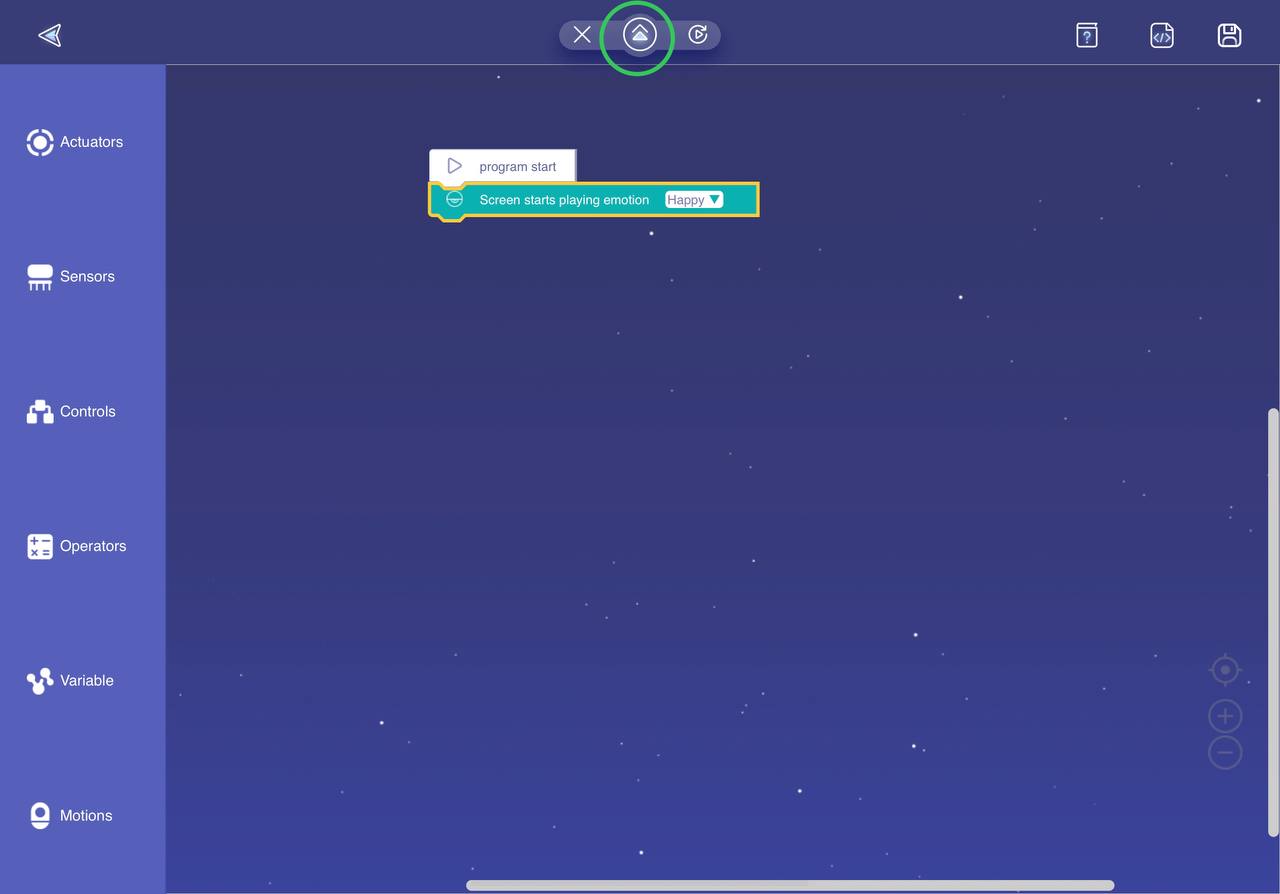
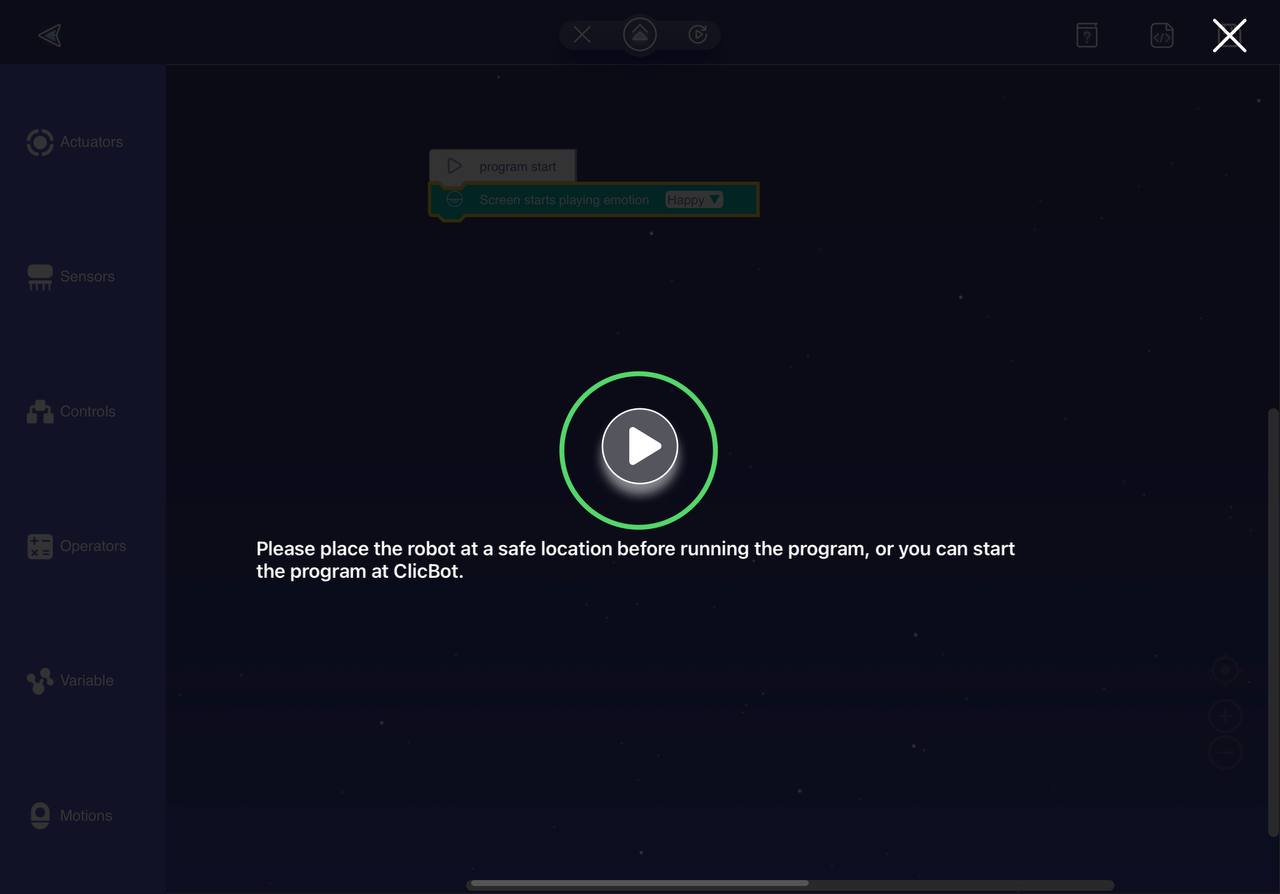
To execute the program on the Clicbot, click on the upward pointing arrow located at the top of the workspace. After executing the program, a play button will appear. Click on the "Play" button to run the program and observe its execution on the Clicbot.
Exercise 1.1: Modify the program to display the curious and sad emotions on the Clicbot's screen.
Exercise 1.2: Create a program that displays the three emotions one after the other.
Exercise 1.3: Let's make changes to the program from exercise 1.2 to play three different sounds of your choosing, alongside displaying the happy, curious, and sad emotions. The block required to play sounds can be found in the "Actuators" menu.
Exercise 1.4: Take a moment to have a discussion with your groupmates about the possible behaviors you anticipate from the programs displayed in the images below. Once you have discussed and made your predictions, you can proceed to run the program and observe how the robot behaves.
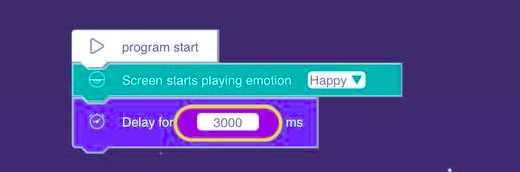
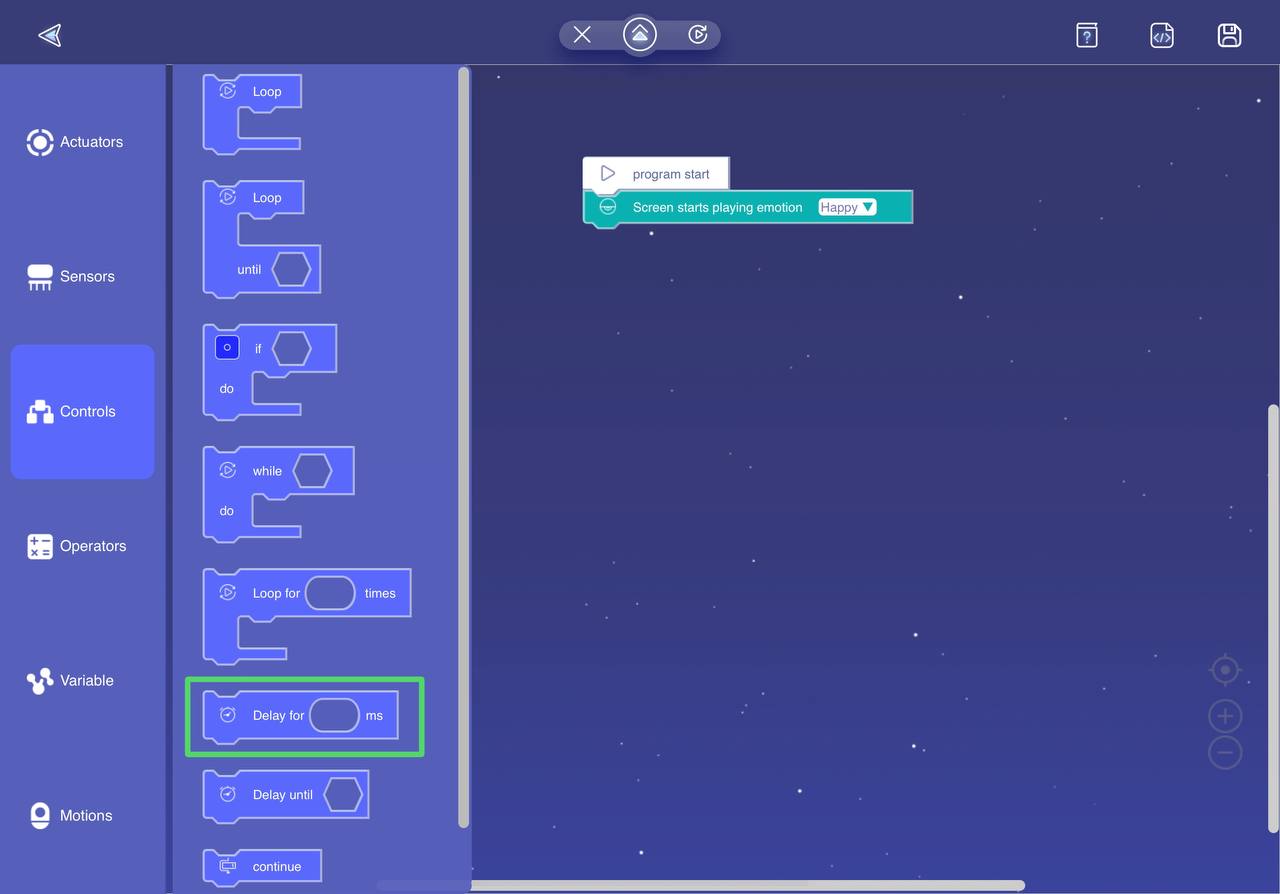
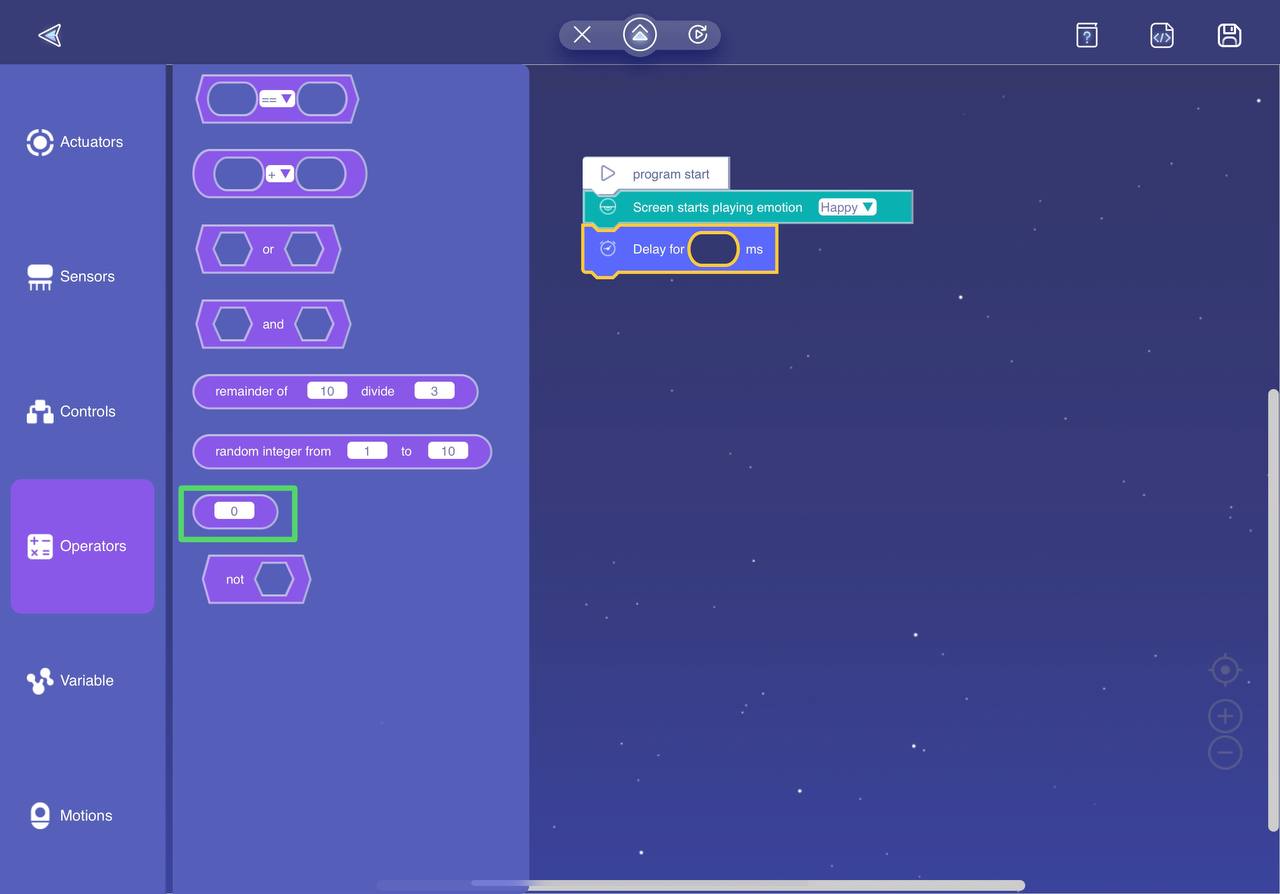
The "Delay for ___ ms" block can be found in the "Controls" menu. After attaching the delay block, you will need to select a text input block from the "Operators" menu. Drag the text input block and connect it to the empty space within the delay block. Once the text block is connected, you can click on it to modify the number value according to your desired delay duration.
Exercise #2: Simple Nonverbal Behaviors with Blockly
In this exercise, the objective is to create programs that demonstrate two specific nonverbal gestures: the bowing gesture and the disappointment head shake. To begin, you will need to assemble a robot that supports the necessary movements for performing the bowing gesture and rotational head movement.

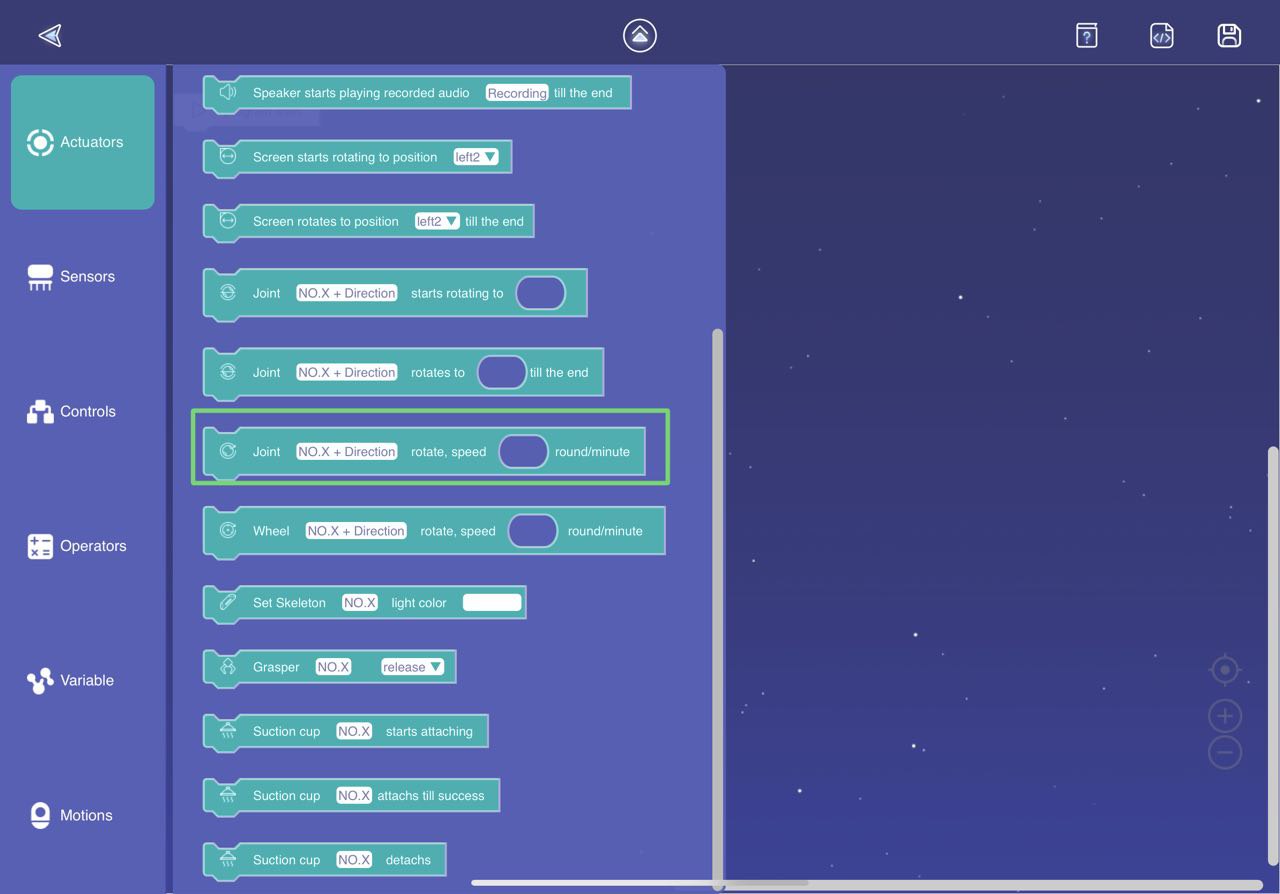
To create the bowing motion, you will need to rotate the joints labeled as 2 and 3 in the figure below by a slight degree and then return them to the original standing posture. To program this specific motion, navigate to the toolbox and click on the "Actuators" menu. From there, locate the block labeled "Joint NO.X + Direction rotate, speed ______ round/minute." Drag and attach this block to the "program start" piece found in the workspace.
Click on the "NO.X + Direction" section of the block you just attached in order to specify the joints and their rotation direction for the desired motion. For the robot shown in the figure below, please select the joints that correspond to joint 2 and joint 3.
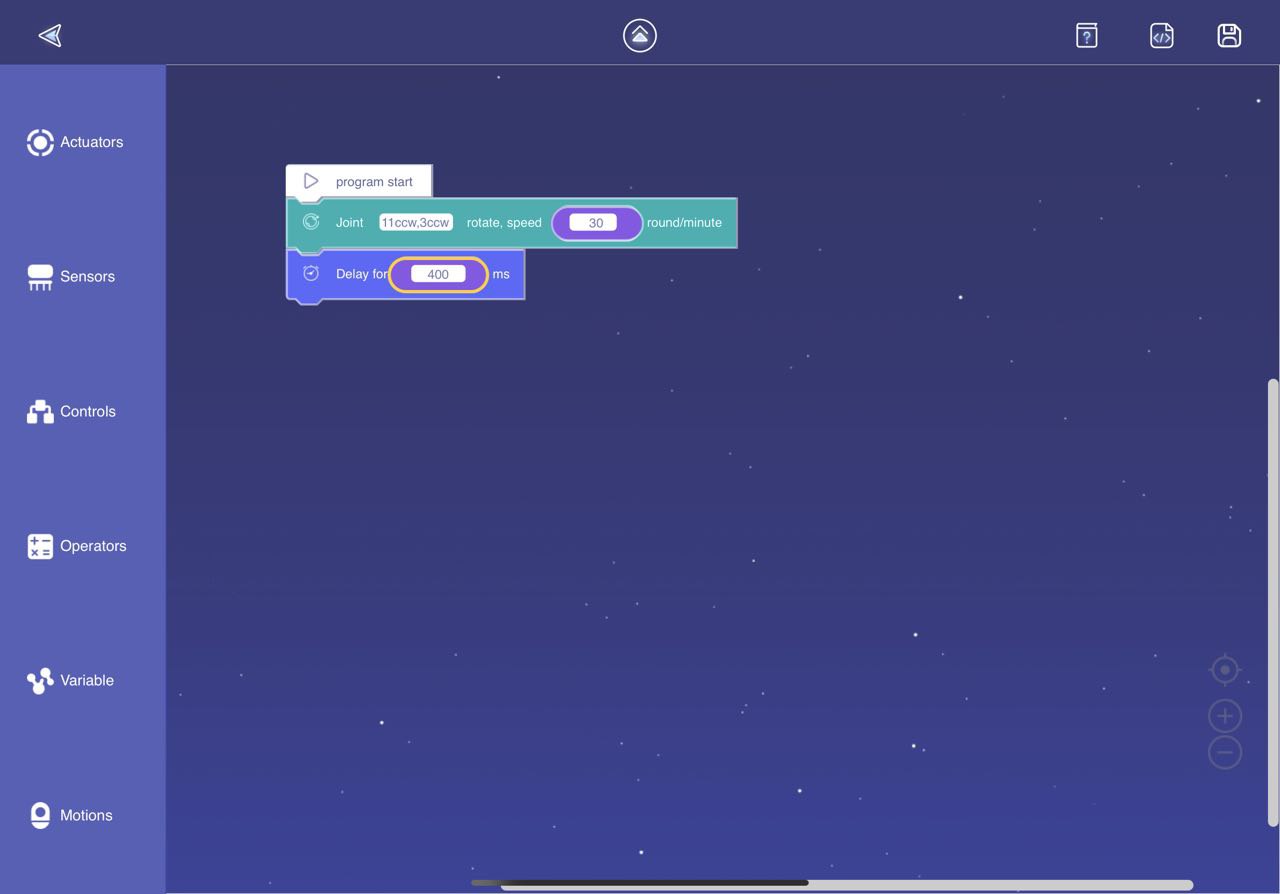
Once you have determined the joints and their rotation direction, the next step is to specify the rotation speed for those joints. To achieve this, you will need to drag the text input block from the "Operators" menu and attach it to the empty space within the previous block. Set the speed to 30 round/minute. Next, add a delay block to the program and set the delay duration to 400 milliseconds.
You can now execute the program to observe the behavior on the Clicbot.
Make sure the Clicbot is in a stable position before executing your program!
Exercise 2.1: When you run the program, you will observe that the program stops at the bowing position without transitioning back to the standing pose as intended. In this exercise, your task is to add the necessary blocks to the program in order to enable a smooth return to the standing position, allowing the Clicbot to replicate the desired behavior shown in the provided animation.
Exercise 2.2:
In this exercise, your goal is to program the Clicbot to mimic the disappointment head shake, as depicted in the animation below.
Hint: You need to rotate the joint that the head is directly attached to.

Exercise #3: Blockly For Robot Motion: Driving In A Straight Line
In this exercise, your will design programs that enable the Clicbot to move in various patterns. To begin, please assemble a four-wheeler robot similar to the ones you assembled in the previous two classes.
The first task for this exercise is to create a program that moves the four-wheeler in a straight line for 5 seconds.
To get started, access the Rotation Motion interface and create a new motion. Within the Rotation Motion, adjust the rotation direction and speed settings to ensure the robot moves in the forward direction. Once you are satisfied with the settings, save the motion to use it in the program.
If you need a refresher on how to complete this step, you can check out this link.
Now, open the Blockly programming interface for your four-wheeler Clicbot. Once the interface is loaded, navigate to the "Motions" menu in the toolbox.
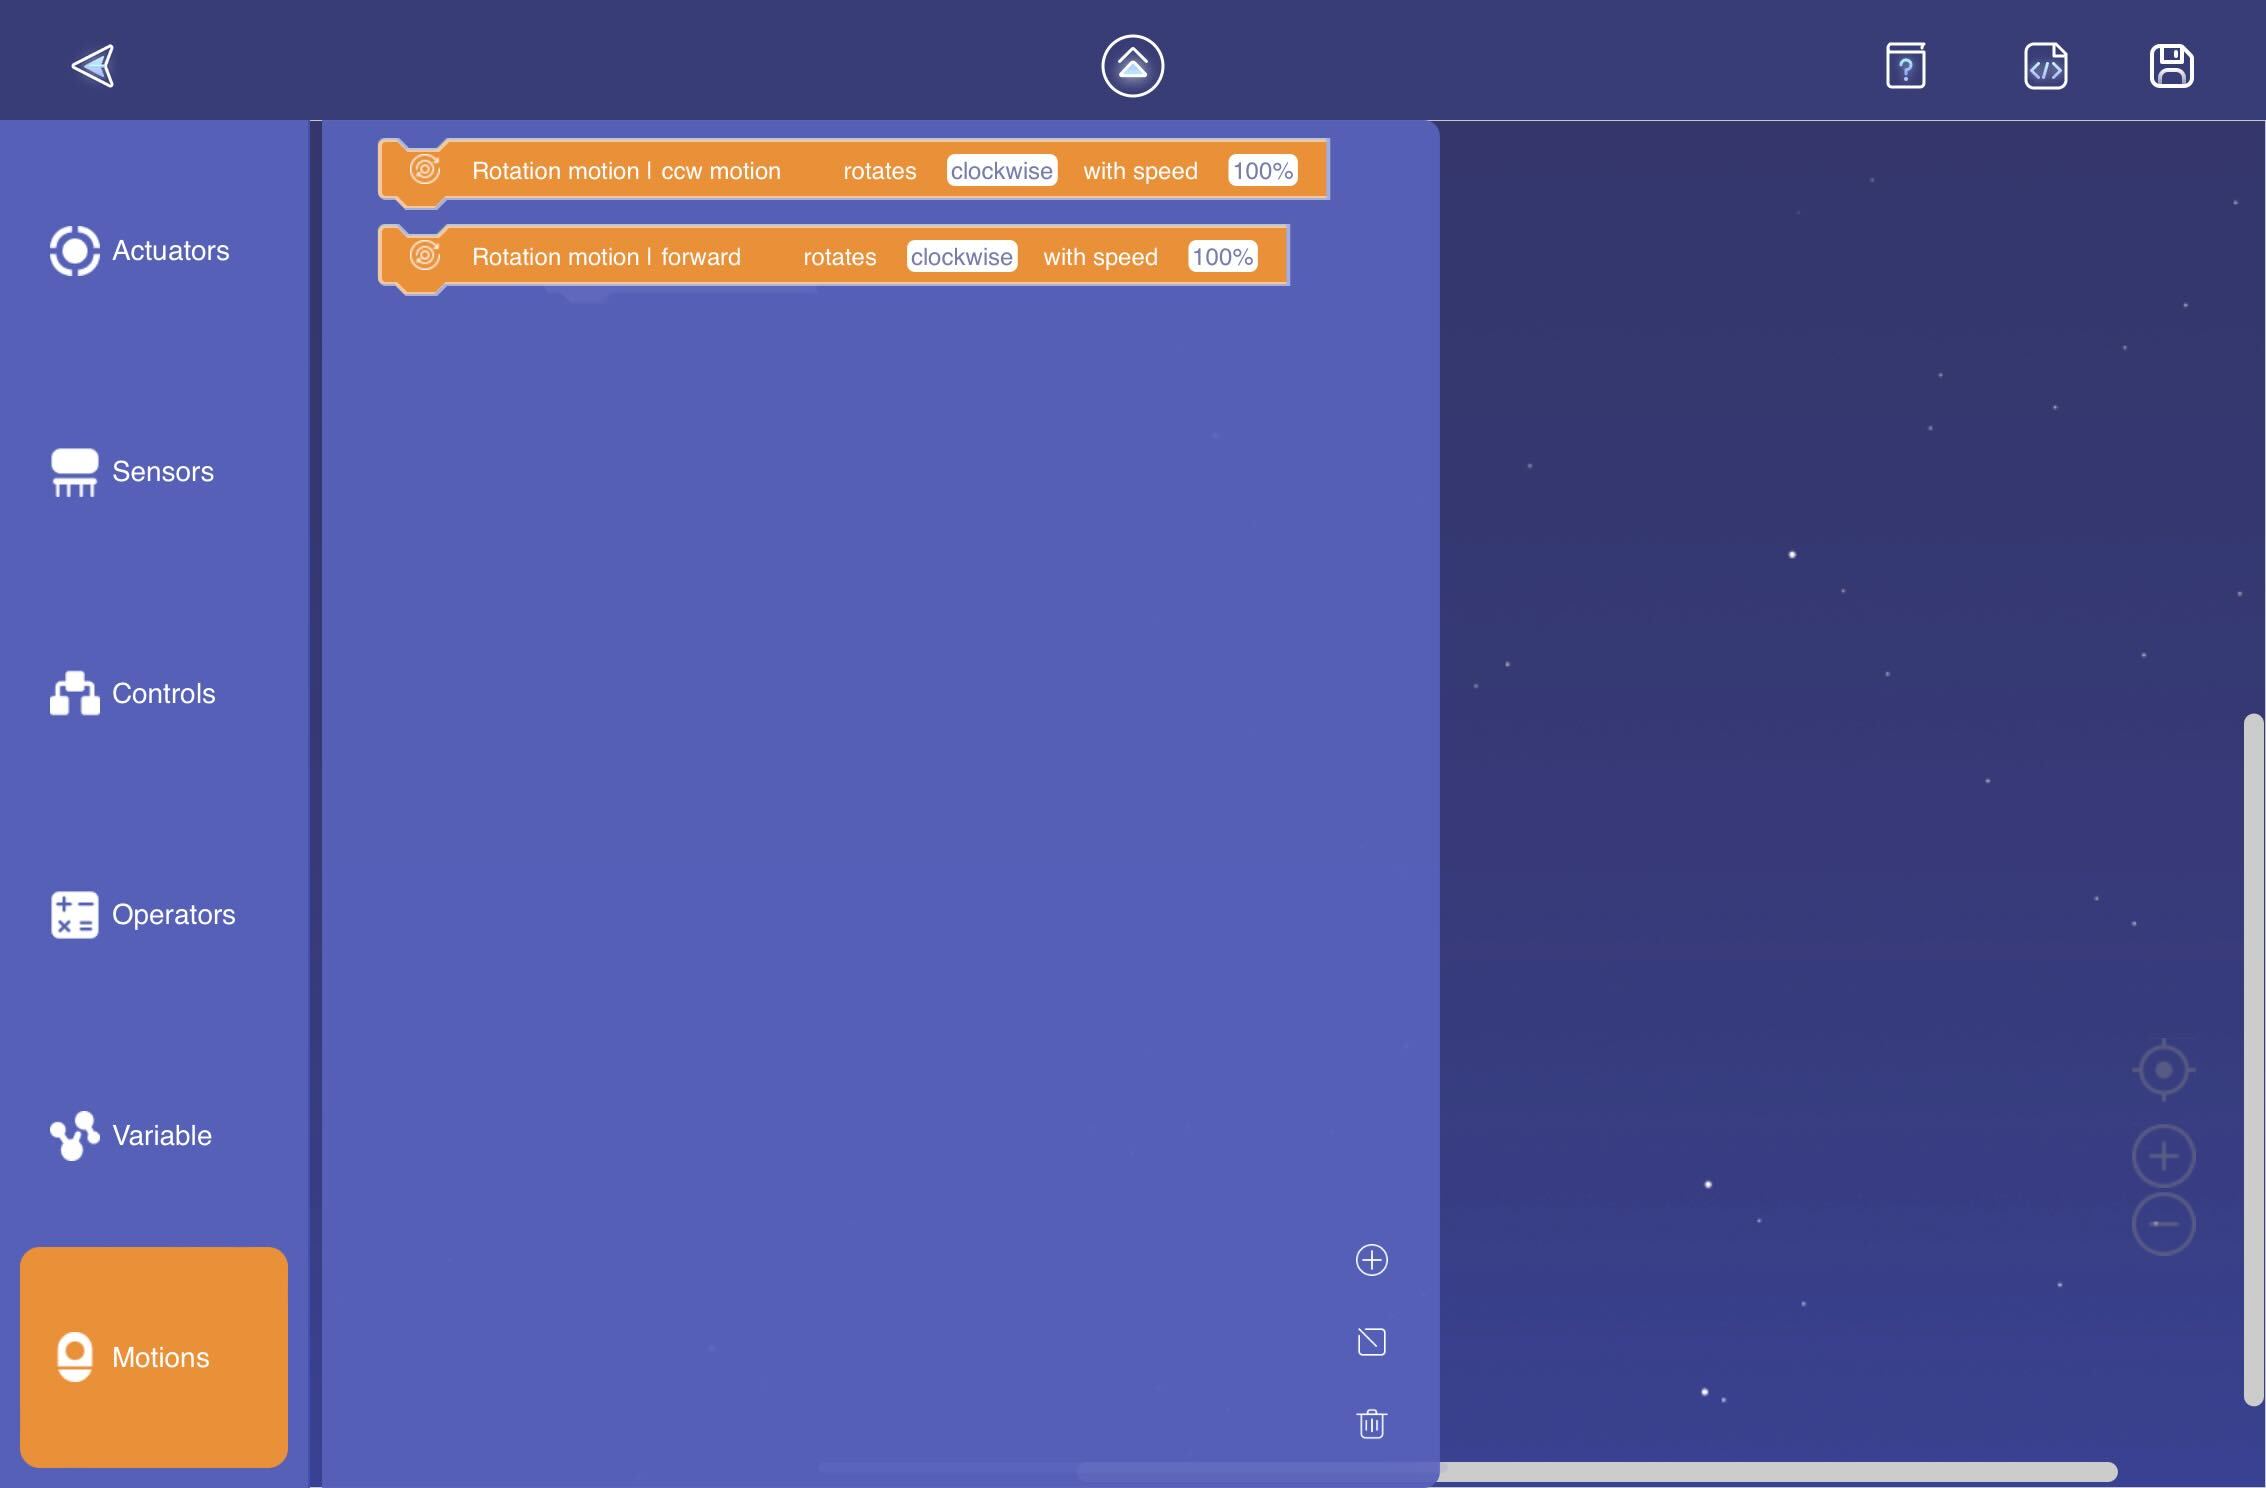
From "Motions" menu, locate the block that represents the forward motion you defined in the previous step. Click and drag this block onto the workspace and attach it to the "program start" block. Then, run the program.
You will observe a behavior similar to that in Exercise 1.4. Add a delay block with a duration of 5 seconds to introduce a pause in the program. Once you have added the delay block, rerun the program to observe the modified behavior.
Exercise #4: Blockly for Robot Motion: Driving in a Square
In this exercise, you will explore how to program your four-wheeler to drive in a square pattern once and come to a stop. The task can be conceptualized as a sequence of movements consisting of moving forward and then rotating by 90°, repeated four times, with the robot ultimately coming to a stop.
Hint: For this exercise, you will need to utilize the Rotation Motion interface to create an additional motion. This new motion will be specifically used to perform rotations.

Exercise #5: Blockly for Robot Motion: Driving in a Square (Looping)
In this exercise, your task is to modify the program you designed for Exercise #4 in order to drive in squares indefinitely. Instead of completing a single square pattern, the robot should continuously repeat the square movement.
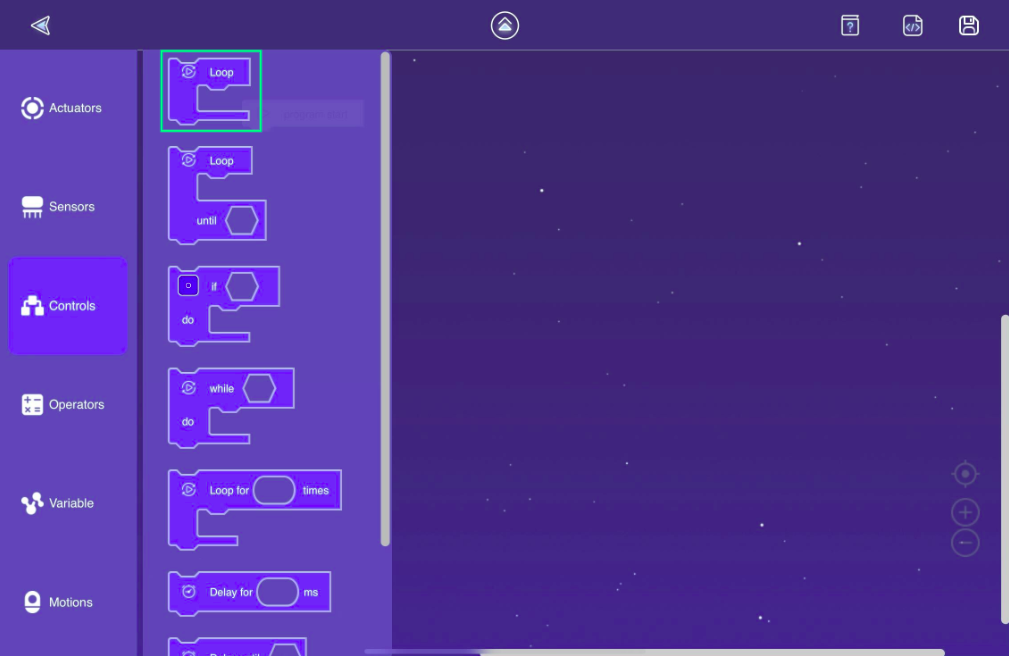
In order to achieve an indefinite repetition of block execution, it is necessary to utilize the looping block. The looping block allows for the continuous repetition of specified blocks without a predetermined limit.
- Navigate to the "Controls" menu in the toolbox of the Blockly programming interface.
- Look for the looping block within the "Controls" menu.
- Once you locate the looping block, drag and attach it to the appropriate position in the program. Make sure to include all the necessary blocks within the loop block that you want to repeat indefinitely.
By integrating the looping block, the program will continually execute the blocks contained within it, creating an indefinite repetition of their execution.
Requirements to Meet Expectations for Today's Class
- Your group has successfully completed Exercise #1
- Your group has successfully program the the bowing gesture and the disappointment head shake (Exercise #2)
- Your group has successfully program your four-wheeler to drive in a straight line (Exercise #3)
- Your group has successfully completed Exercise #4
- Your group has attempted at Exercise #5