Class Meeting 05: Responding to Sensor Input
Learning Goals
- You will allow your ClicBot to respond to different types of sensor inputs.
- You will gain experience using conditional statements (if, else if, else) in Blockly.
- You will learn about how robot expressions of emotion can shape a human-robot interaction and test out your own robot emotion expressions on ClicBot.
Conditional Statements (if, else if, else)
Here is a link to the presentation slides for today.
Programming Exercise #1: Programming ClicBot to Respond to Touch Input
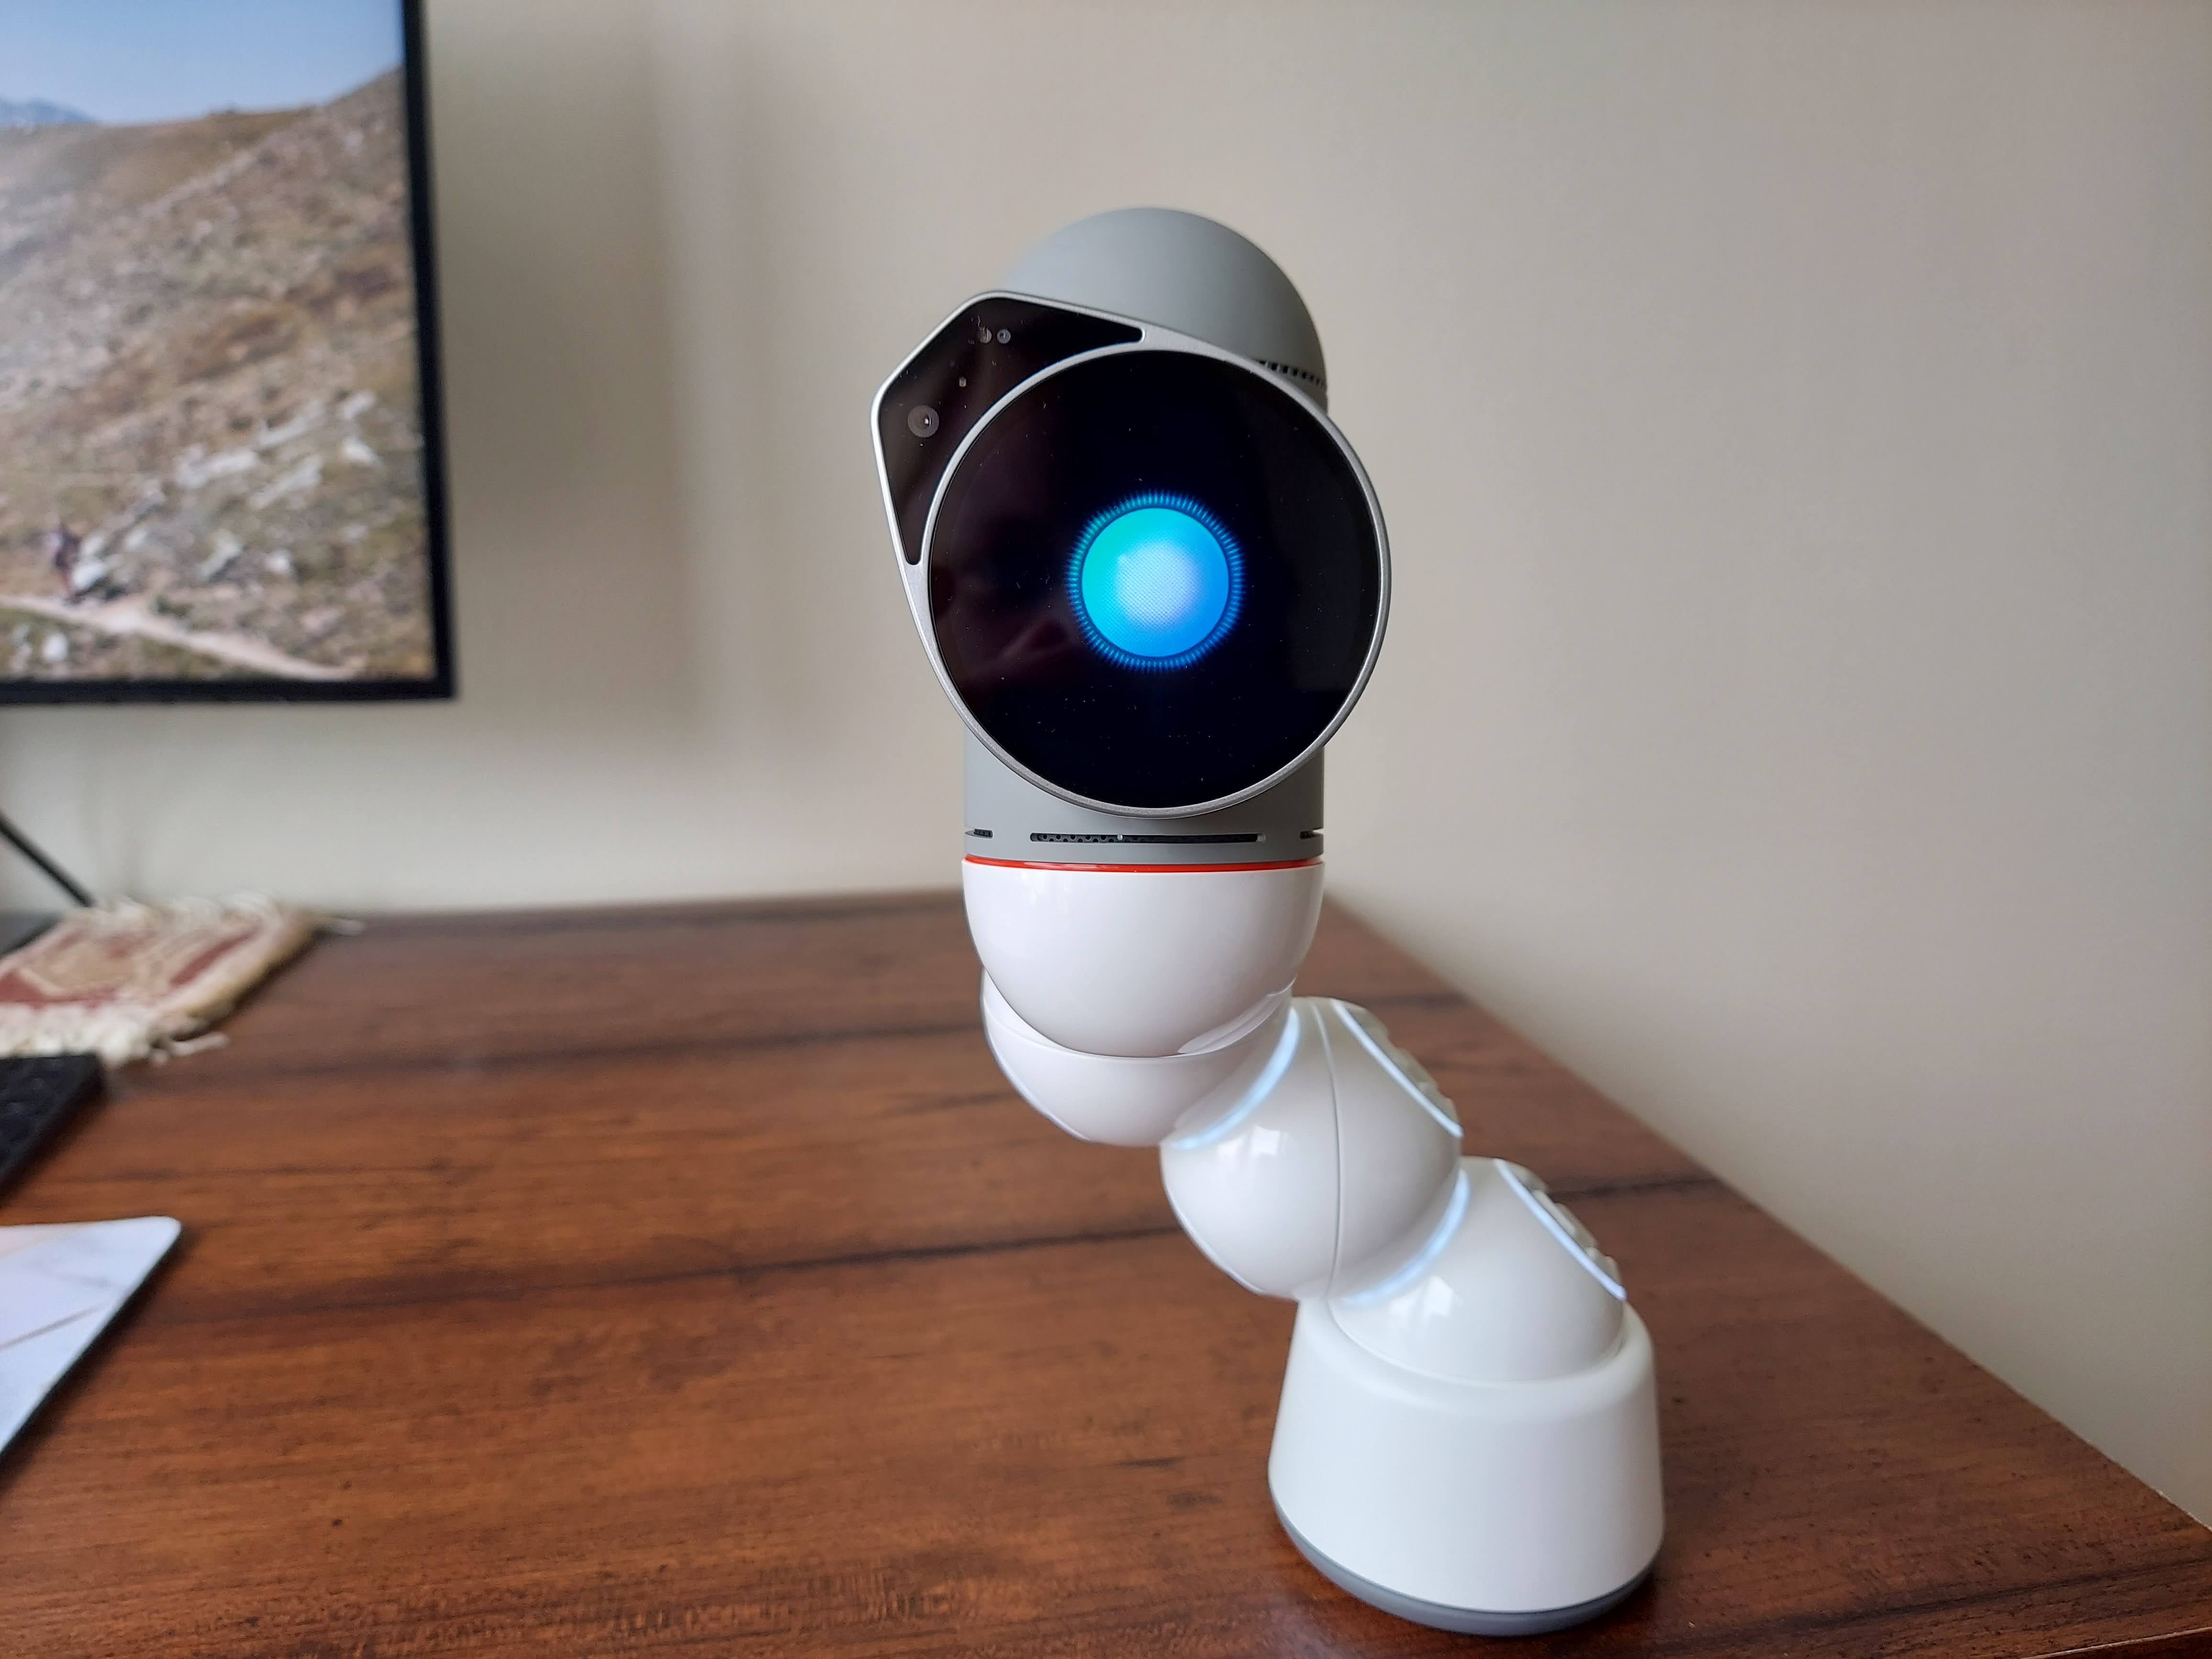
In this first exercise, you will gain experience using conditional statements (if, else if, else). To begin, build a ClicBot that has 3 joints with the base and brain at opposite ends, as pictured below.
Create a new program called "Touch Input" and build the following program. When you add the Speaker starts playing sound [] block, you'll need to record a sound. Record a sound that you think represents happiness. For example, you could record yourself saying "yay!"
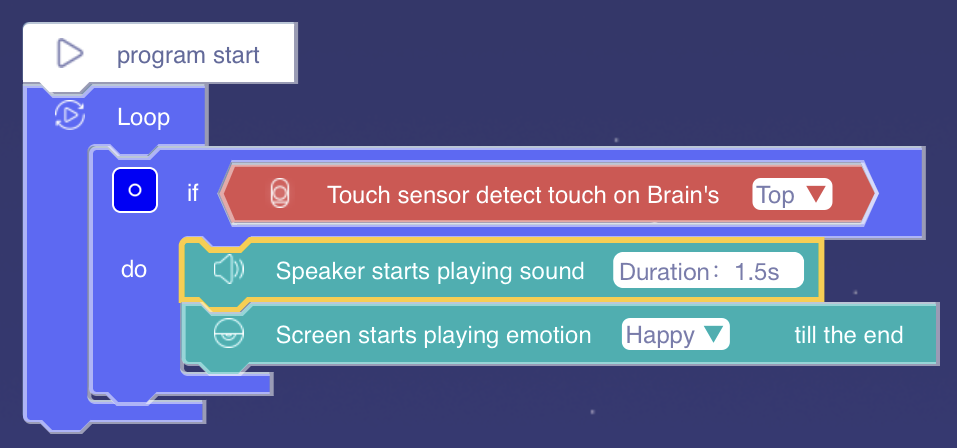
Once you've built this program and connected to your ClicBot, run the program. After the program starts running, pet your ClicBot on the head and see what it does!
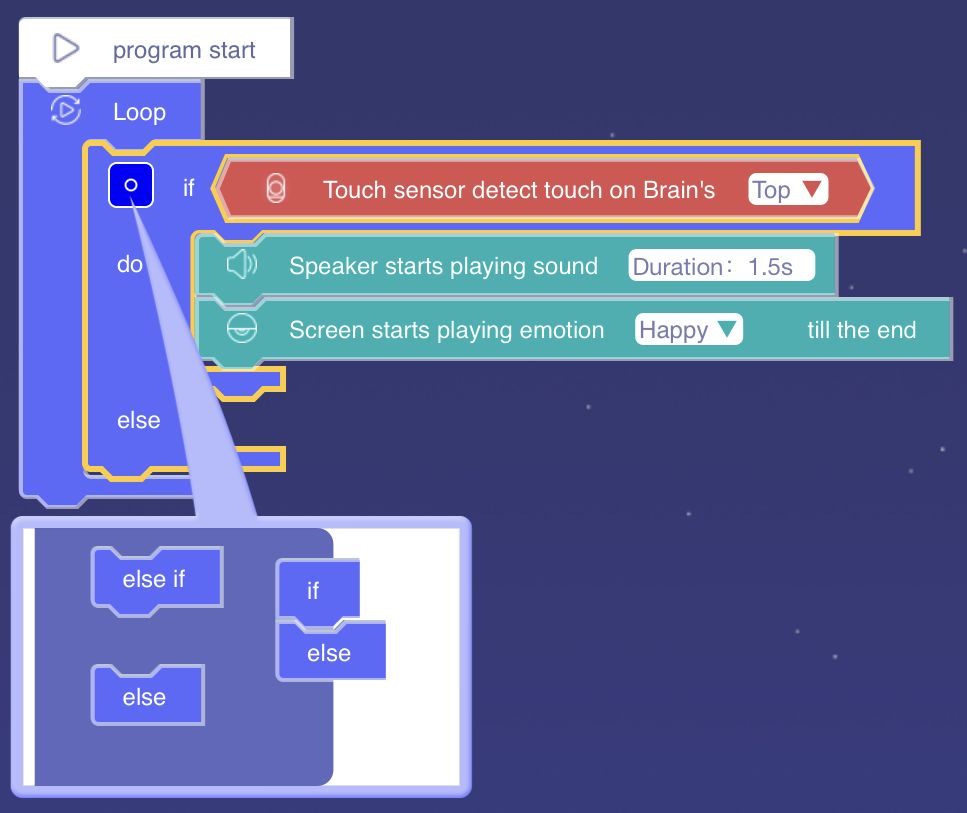
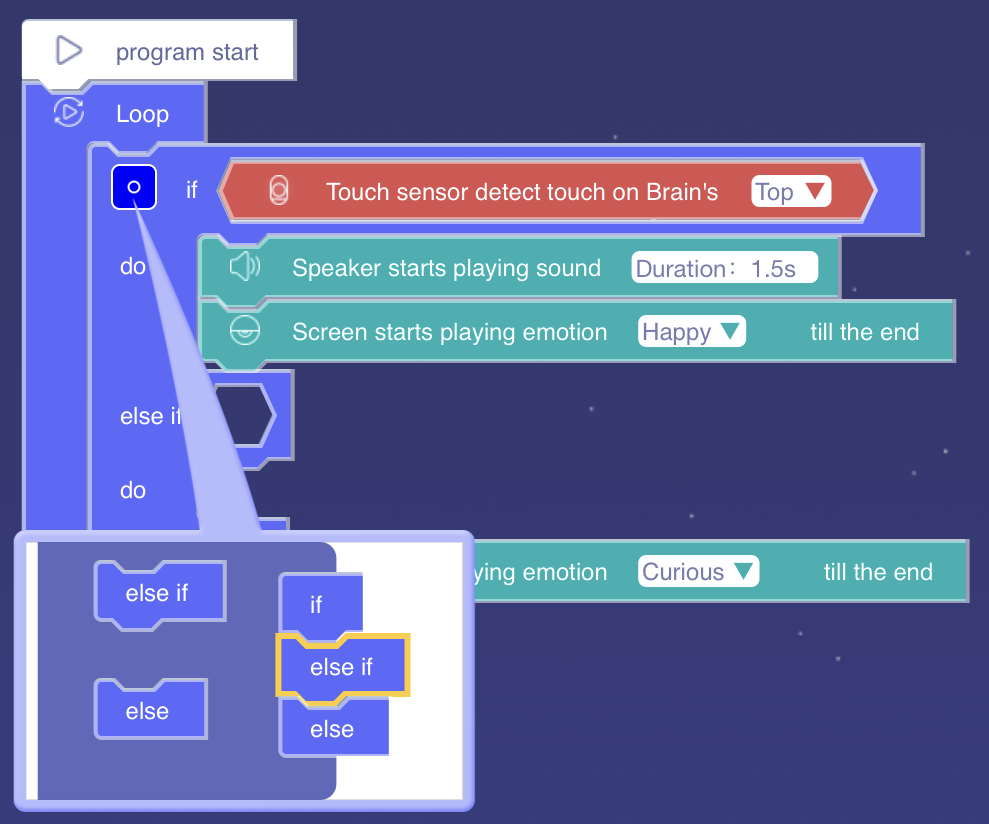
Now, build on your program by adding an else block by clicking on the blue box next to the if, as shown below, and dragging the else underneath the if.
Now, exit out of this view and add onto your program by putting the Screen starts playing emotion [Curious] inside the else.
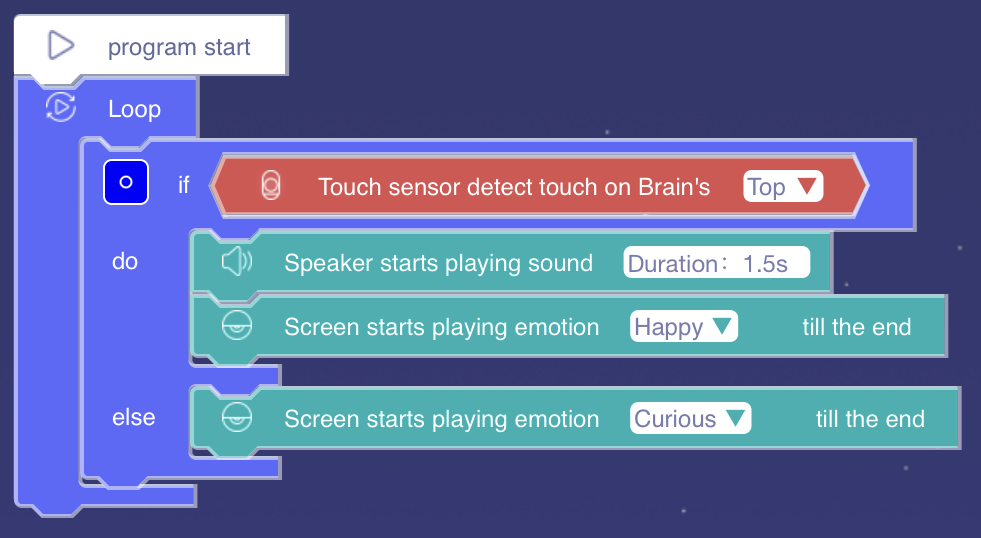
Before you run the program, discuss the prompt below.
Now run your program. Try to touch the robot on the head. What happens? If you don't notice anything happening, try keeping your hand on the robot's head for 5-10 seconds. Once you've seen the robot display both happy and curious emotions, discuss the prompt below.
Next, you will continue adding onto your program. You will add an else if block similarly to how you added the else block, see the image below.
Exit out of this view and add onto your program, copying what you see in the following code snippet. We'll need to use a new block, the or block that you can find in the "Operators" section of the menu.
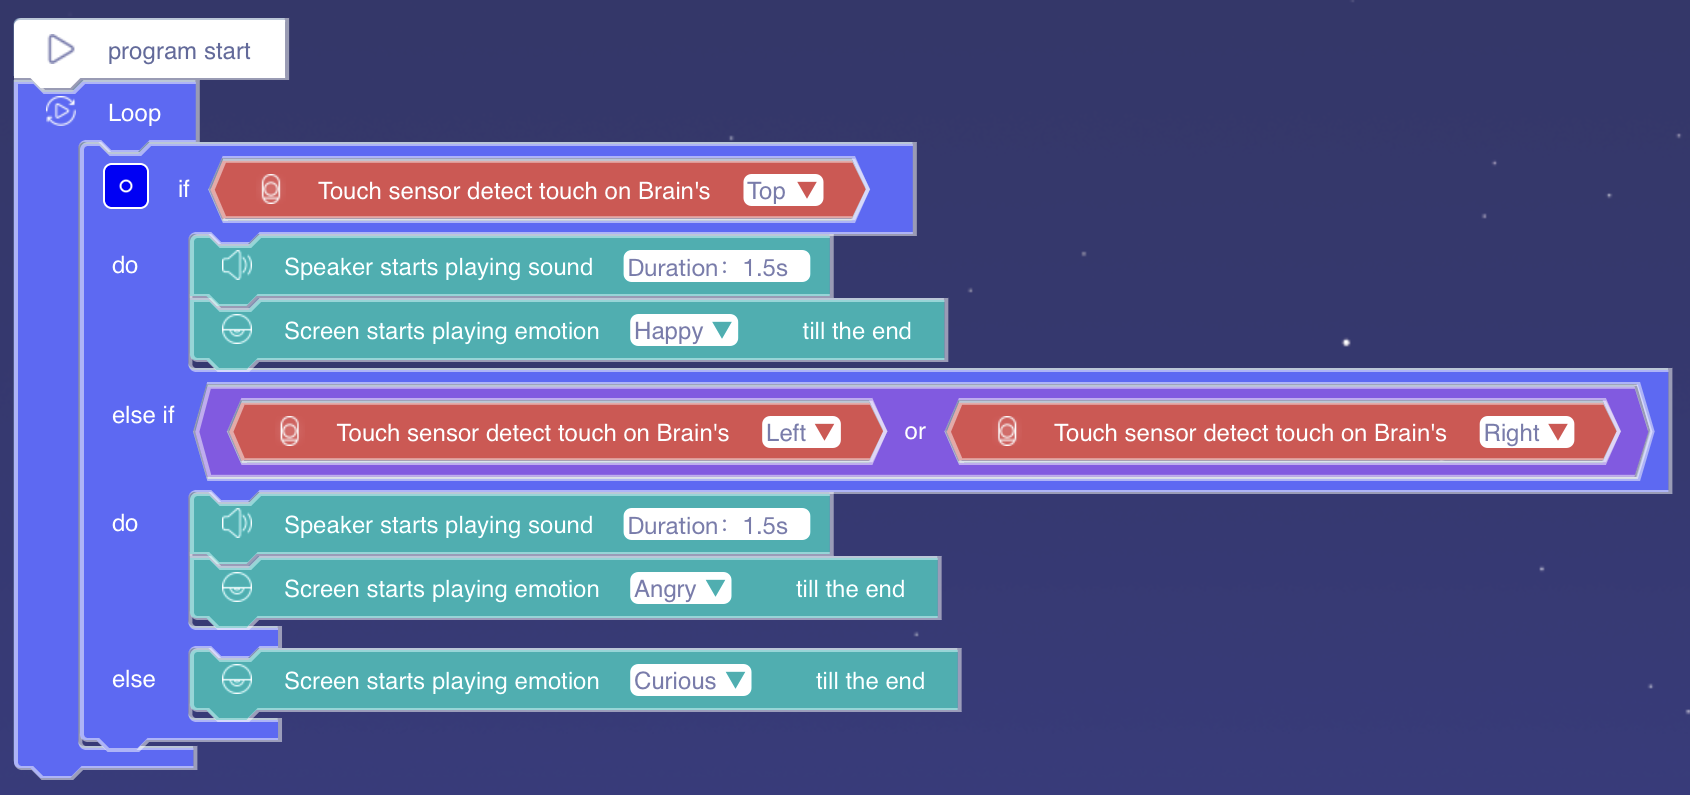
Run your program. Try both touching the robot on the head and also squeezing it on both sides of the head with one hand. Once you've been able to see all three emotions (happy, angry, curious) discuss the question below.
You've now finished this first exercise. Please wait for all groups to finish. Then, we'll go over the exercise as a class together.
Programming Exercise #2: Opposite Gesture Robot
For this programming exercise, your goal is to have your ClicBot detect your directional gestures (left, right, up, down) and respond by moving it's head in the opposite direction:
- If the ClicBot detects an UP gesture, then it will look DOWN,
- If the ClicBot detects a DOWN gesture, then it will look UP,
- If the ClicBot detects a RIGHT gesture, then it will look LEFT, and
- If the ClicBot detects a LEFT gesture, then it will look RIGHT.
Let's begin with some starter code. You can use the same ClicBot shape you used for Programming Exercise #1. Begin a new program called "Opposite Gesture" and construct the following program.

When you drag on the Joint [] starts rotating to [], you'll need to select the 2nearby joint, which will be the one that will rotate to allow the robot's head to move up and down. You can see what the joint interface selection looks like below.
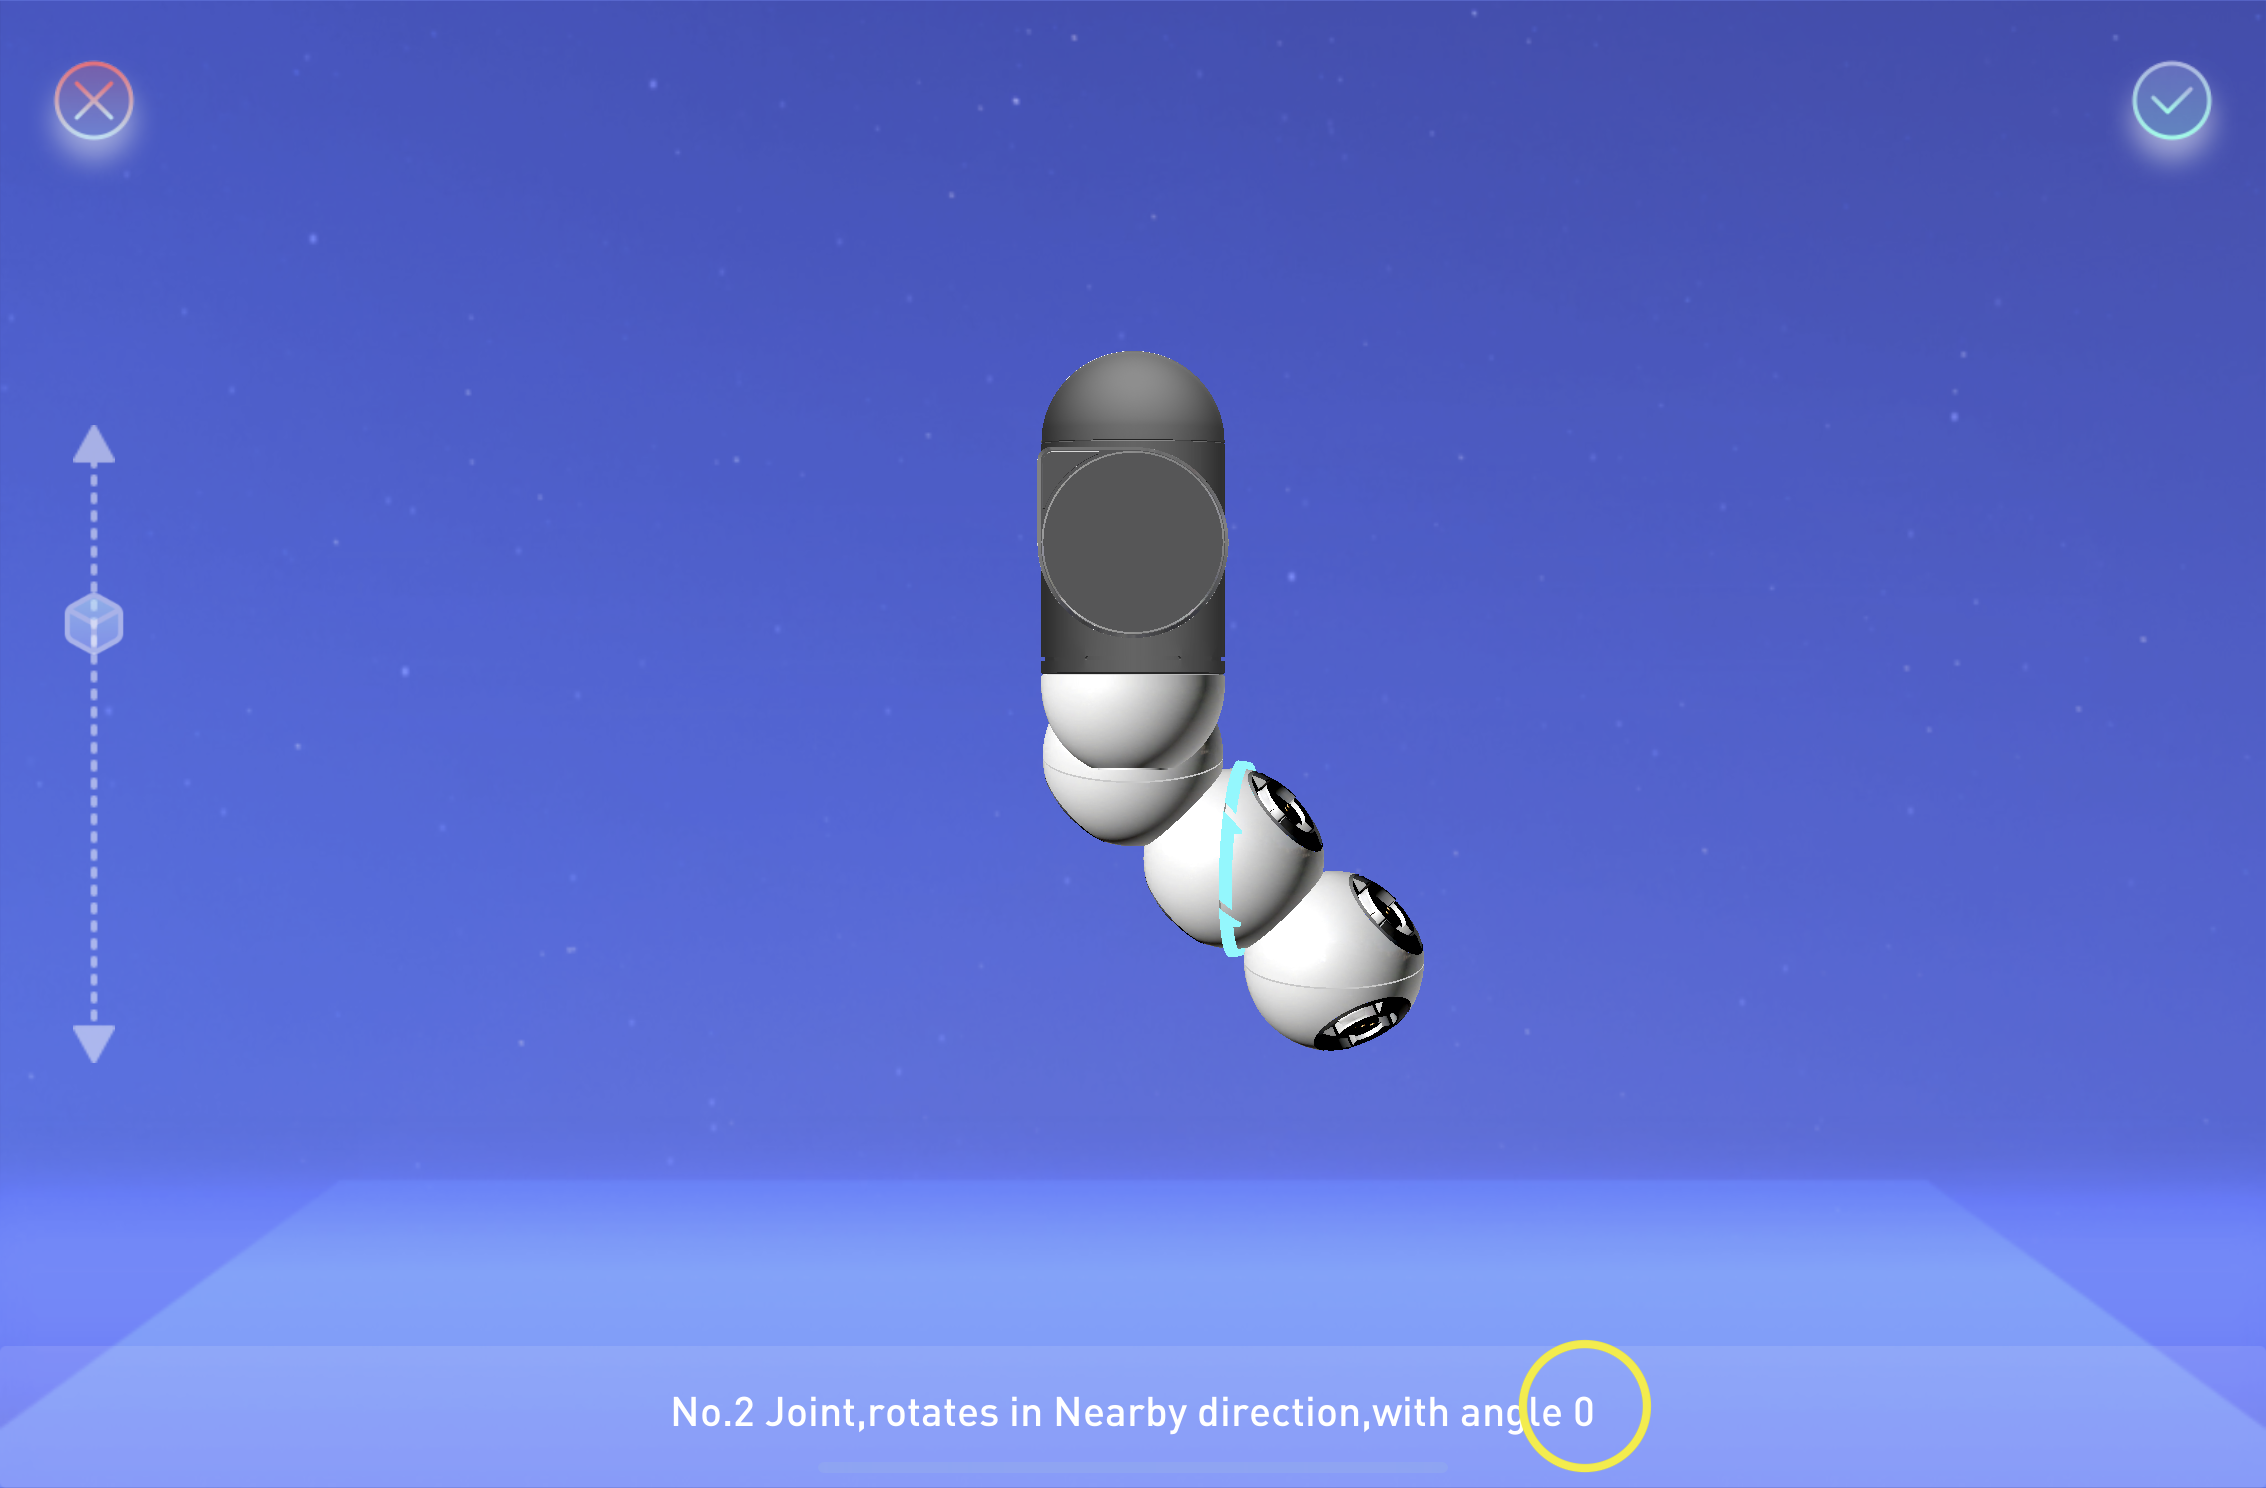
What you want to pay attention to is the joint angle listed at the bottom of the screen (circled in yellow in the image above). You can move your robot and this number should change. This will tell you what angle you want to program the robot so that it looks forward, looks up, or looks down.
IMPORTANT: If your robot has a value closer to 180 (as opposed to around 0), then you'll want to change the numbers in your starter code from 30 and 0 to 210 and 180.
Now, try running your program and giving your robot a "up" gesture. Does it work as you expect?
else block?
Now, as a group build the rest of the program so that your ClicBot can respond to the remaining gestures (down, right, left).
Here are some tips:
- As you develop your program, test it little-by-little as you go. That way, you know that each small piece you add works before you add the next one.
- To move the robot's head side to side, you can either use the
Joint [] starts rotating to []block or theScreen starts rotating to position []block.
Programming Exercise #3: Emotional Robot Dog
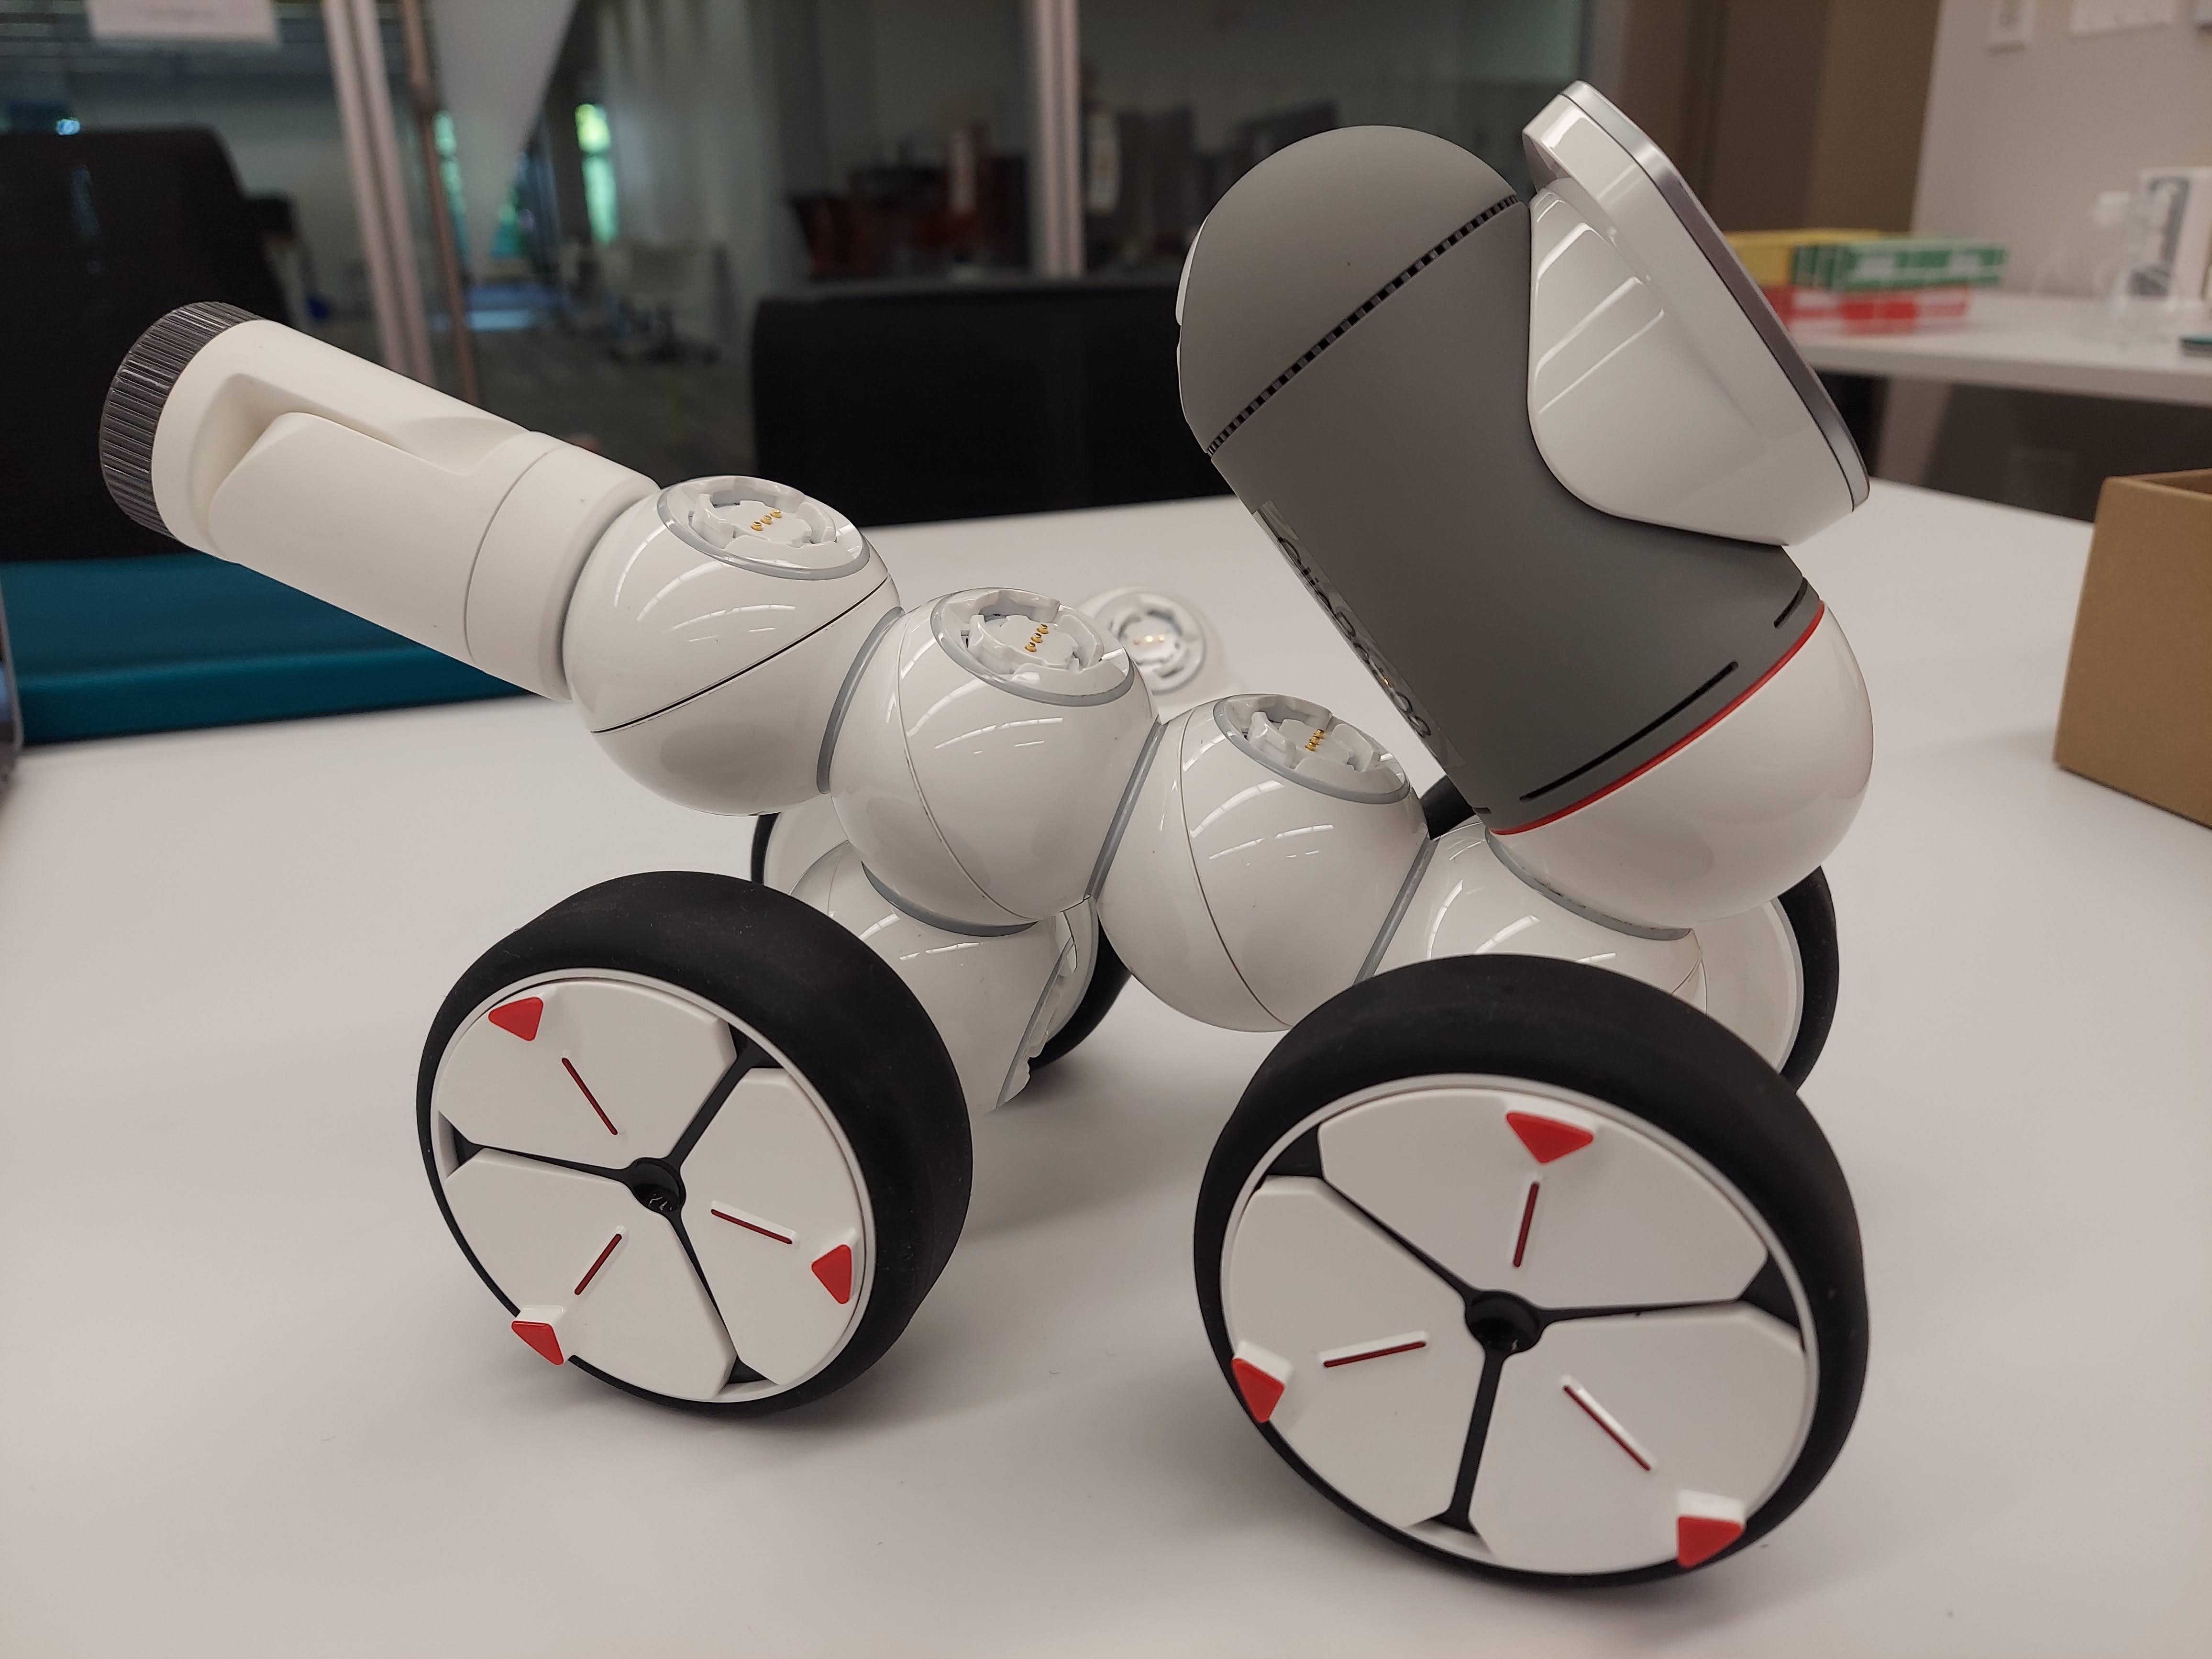
The goal of this programming exercise is to design a robot dog that responds with emotion to your touch and/or gestures. This exercise is intentionally open ended so that you can express your creativity in the types of interactions and gestures you produce.
Examples of emotional reactions you could program include:
- "Petting" the ClicBot on the head and having ClicBot act happy/excited (spin in a circle, play a happy emotion, "wag" its tail)
- Giving ClicBot a clockwise or counterclockwise gesture, asking ClicBot to spin in circles (perhaps ClicBot could act "dizzy" after spinning?)
- "Hitting" ClicBot on the side of the head producing an angry ClicBot (emotion and driving aggressively)
Some recommendations we have for you as you approach this exercise include:
- You'll probably want to use some combination of the
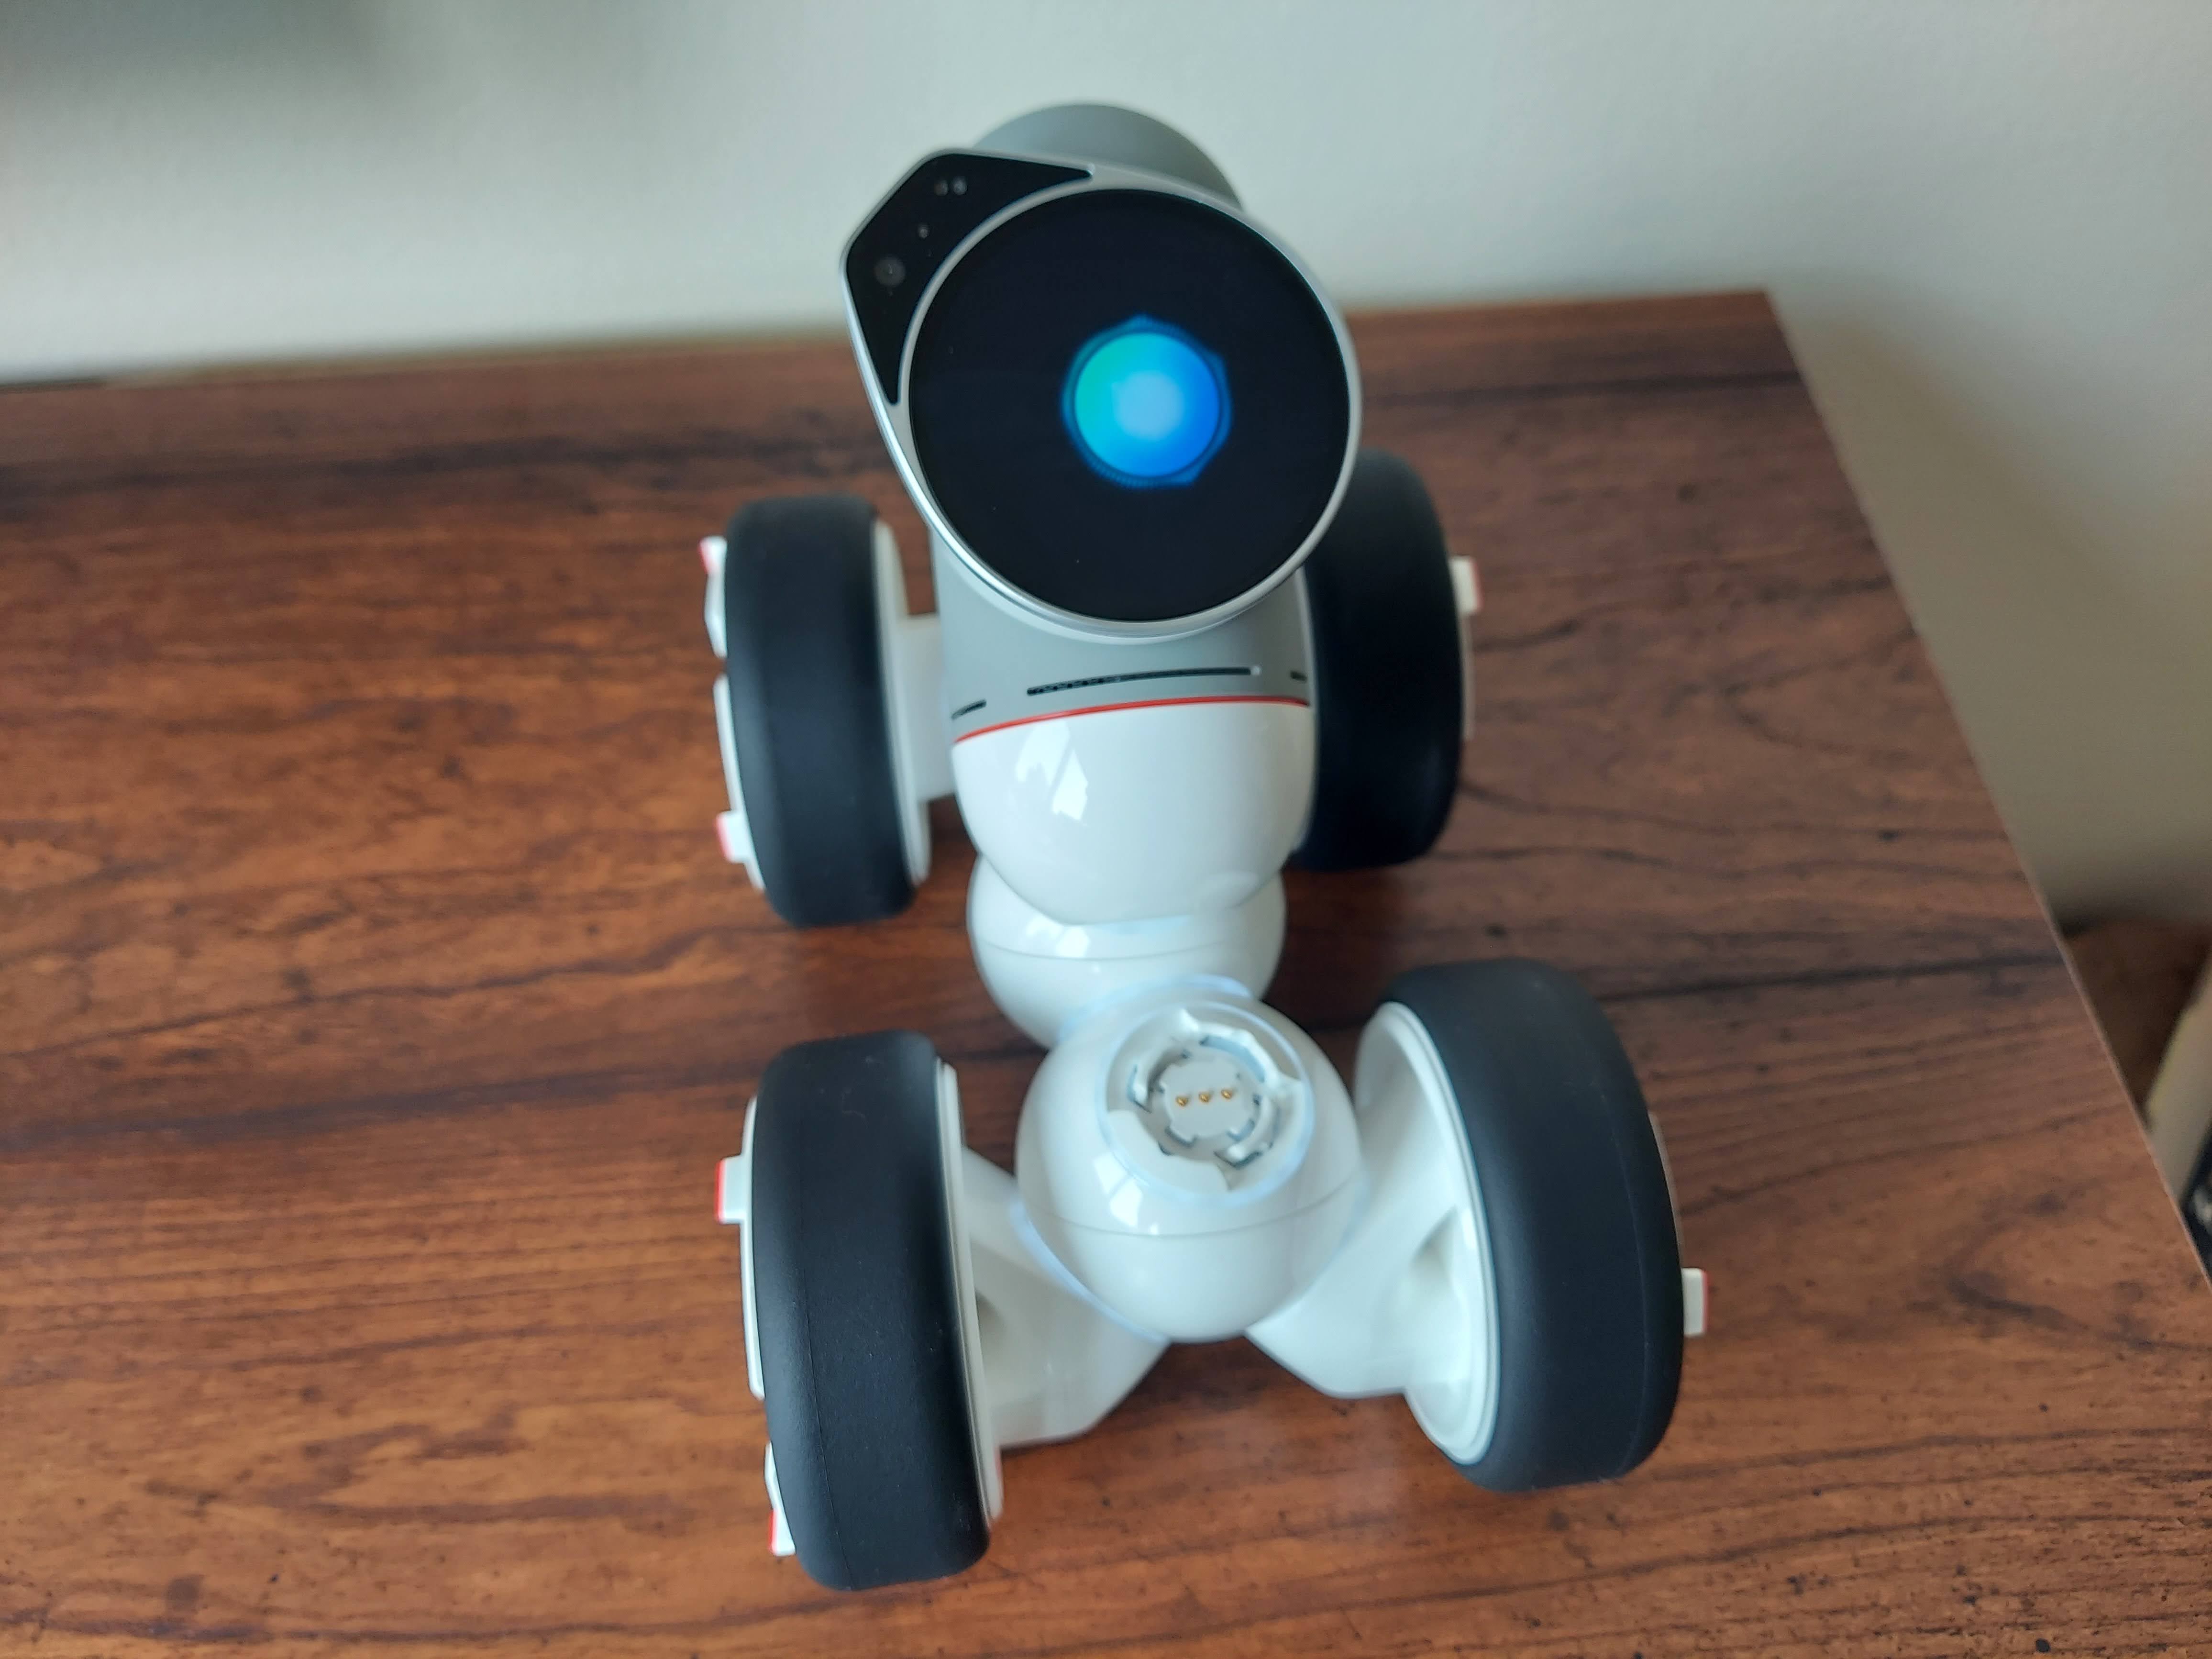
Touch sensor detect touch on Brain's []blocks, theGesture sensor detect []blocks, and theTouch screen detectblocks to approach this task. - You'll likely want to work with a ClicBot that looks somewhat like the one shown below with 4 wheels, 3 joints, and 1 brain. However, you're more than welcome to make modifications and/or create your own robot dog design.
- You can create your own motions to create multi-joint, customized robot movements.
Programming Exercise #4: Using a Joint as a Sensor
The goal of this exercise is to create a ClicBot robot that is controlled by the rotation of one of it's joints. If you rotate the joint quickly, the robot will move fast. If you rotate the joint slowly, the robot will move slowly. Let's get started.
First, build a ClicBot that looks like the following picture:
As mentioned before, you'll rotate one of the ClicBot's joints to guide it's forward speed. We've attached the ClicBot holder to make this joint easier to rotate. See below for an example of how to rotate this joint for this exercise.
Now that we have the robot set up, let's get more specific about it's behavior. You'll design three "modes" for the robot:
- Fast: When you rotate the robot's joint at a fast speed, have the robot move forward for a short distance very quickly.
- Medium: When you rotate the robot's joint at a medium speed, have the robot move forward for a short distance with a moderate speed.
- Slow: When you rotate the robot's joint at a slow speed, have the robot move forward for a short distance slowly.
The following piece of code gives you a snippet of what you'll need for this program.

You'll want to use the if block to detect how fast your joint is moving. You'll use the sensor block Detect rotation speed of Joint [NO.X] to get the rotation speed of the joint. You'll need to compare it to a numeric value. Then, you'll need to specify the wheel rotations that will follow that joint rotation speed using the Wheel [NO.X + Direction] rotation, speed block.
Some tips for this exercise:
- Before you start programming, it might be helpful to talk through and write out your if, else if, and else logic.
- You'll want to include some delay blocks to: (1) avoid the robot fleeing right after you rotate the joint and (2) determine how long the robot moves forward.
- You'll also need to think about whether or not you need an
elsecondition at the end and what that could be used for.
Requirements to Meet Expectations for Today's Class
- Your team has a completed and working "Programming Exercise #1: Programming ClicBot to Respond to Touch Input".
- Your team has a completed and working "Programming Exercise #2: Opposite Gesture Robot".
- For "Programming Exercise #3: Emotional Robot Dog", your team has implemented at least 2 emotional robot dog responses to gestures and/or touch input, where your conditional logic contains an
ifblock and at least oneelse ifblock.
Acknowledgments
"Programming Exercise #2: Opposite Gesture Robot" was designed after the programming exercise from the ClicBot Academy Conditional Clause & Gesture Sensing Robot instructional YouTube video. "Programming Exercise #4: Using a Joint as a Sensor" was designed after the programming exercise from ClicBot Academy ClicBot Academy. Joint as A Sensor & Magical Cars instructional YouTube video.