Project #1: An Image Processing System
Due: Thursday, April 18th at 11:59pm
This project is your first larger parallel program. You will use locks, waitgroups, and atomic variables. You will also identify performance bottlenecks and practice the use of Amdahl’s law and speedup factors.
Getting started
For each assignment, a Git repository will be created for you on GitHub. However, before that repository can be created for you, you need to have a GitHub account. If you do not yet have one, you can get an account here: https://github.com/join.
To actually get your private repository, you will need this invitation URL:
Project #1 invitation (Please check the Post “Project #1 is ready” Ed)
When you click on an invitation URL, you will have to complete the following steps:
You will need to select your CNetID from a list. This will allow us to know what student is associated with each GitHub account. This step is only done for the very first invitation you accept.
Note
If you are on the waiting list for this course you will not have a repository made for you until you are admitted into the course. I will post the starter code on Ed so you can work on the assignment until you are admitted into the course.
You must click “Accept this assignment” or your repository will not actually be created.
After accepting the assignment, Github will take a few minutes to create your repository. You should receive an email from Github when your repository is ready. Normally, it’s ready within seconds and you can just refresh the page.
- You now need to clone your repository (i.e., download it to your machine).
Make sure you’ve set up SSH access on your GitHub account.
For each repository, you will need to get the SSH URL of the repository. To get this URL, log into GitHub and navigate to your project repository (take into account that you will have a different repository per project). Then, click on the green “Code” button, and make sure the “SSH” tab is selected. Your repository URL should look something like this: git@github.com:mpcs52060-spr24/proj1-GITHUB-USERNAME.git.
If you do not know how to use
git cloneto clone your repository then follow this guide that Github provides: Cloning a Repository
If you run into any issues, or need us to make any manual adjustments to your registration, please let us know via Ed Discussion.
The general idea
Your task is to create an image editor that will apply image effects on series of images using 2D image convolutions. Many algorithms in image processing benefit from parallelization (especially those that run on GPUs). You will create an image processing system that runs on a CPU. You will be asked to create three implementations: a sequential baseline version, a version that processes multiple images in parallel (but each image is processed sequentially), and a version that parallelizes the processing of each image.
Preliminaries
If you are unfamiliar with image convolution then you should read over the following sources before beginning the assignment:
The locations of input and output images, as well as the effects to apply will be communicated to your program using the JSON format. If you are unfamiliar with the JSON standard then you should read up on it before beginning the assignment. JSON is a widely used serialization format that you will mostly encounter at some point in your career. Thus, it’s better that you learn it now so you can be comfortable with it in the future. How to work with JSON data inside Go is described here:
Program Usage
Your program will read from a series of JSON strings, where each string represents an image along with the effects that should be applied to that image. Each string will have the following format,
{
  "inPath": string,
  "outPath": string,
  "effects": [string]
}
For example, processing an image of a sky may have the following JSON string,
{
  "inPath": "sky.png",
  "outPath": "sky_out.png",
  "effects": ["S","B","E"]
}
where each key-value is described in the table below,
Key-Value |
Description |
|---|---|
|
The |
|
The |
|
The |
The program will read in the images, apply the effects associated with an image, and save the images to their specified output file paths. How the program processes this file is described in the Program Specifications section.
Image Effects
The sharpen, edge-detection, and blur image effects are required to use image convolution to apply their effects to the input image. The size of the input and output image are fixed (i.e., they are the same). Thus, results around the border pixels will not be fully accurate because you will need to pad zeros where inputs are not defined. You are required to use the a zero-padding when working with pixels that are not defined. You may not use a library or external source to perform the convolution for you. You must implement the convolution code yourself. The grayscale effect uses a simple algorithm defined below that does not require convolution.
Each effect is identified by a single character that is described below,
Image Effect |
Description |
|---|---|
|
Performs a sharpen effect with the following kernel (provided as a flat go array): |
|
Performs an edge detection effect with the following kernel (provided as a flat go array): |
|
Performs a blur effect with the following kernel (provided as a flat go array): |
|
Performs a grayscale effect on the image. This is done by averaging the values of all three color numbers for a pixel, the red, green and blue, and then replacing them all by that average. So if the three colors were 25, 75 and 250, the average would be 116, and all three numbers would become 116. |
The data Directory
Inside the proj directory, You will need to download the data directory here:
Proj Data : There should be a download arrow icon on the left side to download the zip folder.
Place this directory inside the proj1 directory that contains the subdirectories: editor and png. DO NOT COMMIT THIS DIRECTORY TO YOUR REPOSITORY. These are very large files and commiting this directory will result in a penalty!
Here is the strcuture of the data directory:
Directory/Files |
Description |
|---|---|
|
This is the file that contains the string of JSONS that were described above. This will be the only file used for this program (and also for testing purposes). You must use a relative path to your |
|
This directory contains the expected filtered out image for each JSON string provided in the |
|
This directory contains three subdirectories called: |
|
This is where you will place the |
Working with Images in Go and Startup Code
As part of the Go standard library, an image package is provided that makes it easy to load,read,and save PNG images. I recommend looking at the examples from these links:
A helpful tutorial for working on png images. Make sure to cite this website, if you are going to use a similar structure to the code provided. The developer directly accesses the
Pixbuffer. I would recommend you use theAt()andSet()methods as specified by the Go PNG documentation.
Note
The image package only allows you to read an image data and not modify it in-place. You will need to create a separate out buffer to represent the modified pixels. For example, you may want to update the Image struct as follows:
type Image struct {
  in  *image.RGBA64  // Think about swapping these between effects
  out *image.RGBA64  // Think about swapping these between effects
  Bounds  image.Rectangle
  ...
}
You may want to rename this to ImageTask since you’ll be using that name later on in your parallel implementation.
To help you get started, I provide code for loading, saving, performing the grayscale effect on a png image. You are not required to use this code and you can modify it as you wish. This code is already inside the proj1/sample/sample.go directory. You can run this sample program by going into the proj1/sample directory typing in the following command:
$: go run sample.go test_img.png
Program Specifications
For this project, You will implement three versions of this image processing system. The versions will include a sequential version and two parallel versions.
The running of these various versions have already been setup for you inside the proj1/editor/editor.go file. The program has the following usage statement:
usage: editor [-p=string] [-t=int] data_dir
data_dir = The data directories to use to load the images.
-p=string: Runs a parallel version of the program. The string is either (slices) to run the slice version or (full) to run the full image file version.
-t=int: Specifies as an integer, how many threads to spawn when a parallel version is running. Default= Number of cores of logical cores on the system running the program.
The data_dir argument will always be either big, small, or mixture or a combination between them. The program will always read from the data/effects.txt file; however, the data_dir argument specifies which directory to use. The user can also add a + to perform the effects on multiple directories. For example, big will apply the effects.txt file on the images coming from the big directory. The argument big+small will apply the effects.txt file on both the big and small directory. The -p=string runs one of the parallelization versions that you will implement in project with -t=int number of threads being spawn. If neither are provided the program will default to running the sequential version. The program must always preappend the data_dir identifier to the beginning of the outPath. For example, running the program as follows:
$: go run editor.go big
will run the sequential version of the program and produce inside the out directory the following files:
big_IMG_2020.png
big_IMG_2724.png
big_IMG_3695.png
big_IMG_3696.png
big_IMG_3996.png
big_IMG_4061.png
big_IMG_4065.png
big_IMG_4066.png
big_IMG_4067.png
big_IMG_4069.png
Here’s an example of a combination run:
$: go run editor.go big+small
will produce inside the out directory the following files:
big_IMG_2020.png
big_IMG_2724.png
big_IMG_3695.png
big_IMG_3696.png
big_IMG_3996.png
big_IMG_4061.png
big_IMG_4065.png
big_IMG_4066.png
big_IMG_4067.png
big_IMG_4069.png
small_IMG_2020.png
small_IMG_2724.png
small_IMG_3695.png
small_IMG_3696.png
small_IMG_3996.png
small_IMG_4061.png
small_IMG_4065.png
small_IMG_4066.png
small_IMG_4067.png
small_IMG_4069.png
We will always provide valid command line arguments so you will only be given at most 3 specified identifiers for the data_dir argument. A single + will always be used to separate the identifiers with no whitespace.
The above sample runs showed how to run the sequential version. Here are few examples of running the parallel versions
$: go run editor.go -p=slices -t=4 big //Runs the slices parallel version with 4 threads
$  go run editor.go -p=full -t=8 big   //Runs the full images parallel version with 8 threads
Both examples above, will still produce the same outputs as the sequential version but should run faster since the implementation is one of the parallel versions.
Assumptions: : No error checking is needed to be done to the strings coming in from effects.txt. You can assume the JSON strings will contain valid values and provided in the format described above. We will always provide the correct command line arguments and in the correct order. The expected directory in proj1/data is based on only running the small dataset. Thus, the resolution for mixture and big modes will make the images appear slightly different. This is okay for this assignment. We will always run/grade your solutions by going inside the proj1/editor directory so loading in files should be relative to that directory.
Part 0: Understanding the scheduler directory
The scheduling (i.e., running) of the various implementations is handled by the scheduler package defined in proj1/scheduler directory. The editor.go program will create a configuration object using the following struct:
type Config struct {
  DataDirs    string  // Represents the data directories to use to load the images.
  Mode        string  // Represents which scheduler scheme to use
  ThreadCount int     //  Runs in parallel with this number of threads
}
The Schedule function inside the proj1/scheduler/scheduler.go file will then call the correct version to run based on the Mode field of the configuration value. Each of the functions to begin running the various implementation will be explained in the following sections. You cannot modify any of the code in the proj1/scheduler/scheduler.go or proj1/editor/editor.go file.
Part 1: Sequential implementation
Inside the proj1/scheduler/sequential.go file, implement the function:
func RunSequential(dataDirs string)  {

}
The sequential version is ran by default when executing the editor program when the -p flag is not provided. The sequential program is relatively straightforward. This version should run through the images specified by the strings coming in from effects.txt, apply their effects and save the modified images to their output files inside the data/out directory. Make sure to preappend the data_dir identifier.
Note
You should implement the sequential version first. Make sure your code is modular enough such that you can potentially reuse functions/data structures later in your parallel version. Think about what libraries should be created. We will be looking at code and design style more closely when grading this assignment.
You may find this code useful:
effectsPathFile := fmt.Sprintf("../data/effects.txt")
effectsFile, _ := os.Open(effectsPathFile)
reader := json.NewDecoder(effectsFile)
Part 2: TAS Lock Implementation
Before implementing the parallel versions, you will need to implement your own TAS lock. You will use this lock as your synchronization primitive in your parallel implementations. Inside the proj1/ppysnc/pplock.go, fill in the PPLock struct with any necessary fields you need to implement the lock. You are required to implement the NewPPLock and Lock() and Unlock() methods. You cannot modify their function/method signatures. Again, we are not requiring a specific implementation but your lock implementation must adhere to the mutual exclusion, and deadlock-freedom properties discussed in lecture. You cannot implement the default TAS lock provided in the upstream repository. Your lock does not need to include fairness; however, extra-credit will be given to locks with fairness that still provide good performance.
Part 3: Multiple Images in Parallel
The first parallel implementation will process multiple images in parallel, but each individual image is fully handled by only one thread. This implementation is invoked by running -p=full. Inside the proj1/scheduler/parfull.go file, implement this version in the following function:
func RunParallelFull(dataDirs string, threadCount int) {

}
The code should be implemented as follows:
Create a queue, where each node contains all information about the tasks related to an individual image (e.g. input file, output file, effects). You can either implement your own queue (e.g. as a linked list), or use an existing sequential data structure. The queue can be populated sequentially while reading the JSON input strings. It does not matter if your queue is FIFO or any other order.
Spawn Go routines. The number of Go routines should be
threadCountparameter passed into theRunParallelFullfunction, or the number of images in the queue (whichever is smaller). The Go routines should take image tasks from the queue and process them. You must use your ``PPLock``lock to safeguard accesses to the queue (i.e. items can only be taken out of the queue by a Go routine that holds the lock). You cannot use any existing thread-safe queue data structures or locks.Go routines should run until all tasks from the queue are processed. The main goroutine should wait until all Go routines have terminated. This is best implemented using a wait group; Please use the standard
sync.WaitGroupimplementation provided by Go.
Part 4: Parallelize Each Image
In the second parallel implementation, you will parallelize the processing of individual images. For now, we assume that only one image is processed at a time. This implementation is invoked by running -p=slices. Inside the proj1/scheduler/parslices.go file, implement this version in the following function:
func RunParallelSlices(dataDirs string, threadCount int) {

}
The code should be implemented as follows:
Iterate over the same queue as in Part 3. For each image, spawn Go routines that operate on slices of the image. Take inspiration from the examples shown during class to compute the start and end index that each Go routine needs to work on.
Let each Go routine apply effects to its own slice of the image.
Only start working on the next image when the current image is fully processed. You can use waitgroups for this.
A performance hint about this part:
Take care to minimize the amount of data copying, i.e. pass pointers or slices instead of copying chunks of data around all the time.
Convolutions have a slightly larger read set than write set, i.e. they read from more indices than they write to. If multiple effects E1, E2, … are applied and slices are processed in parallel, you need to manage the fact that the output of E1 in one slice affects the input of E2 in neighboring slices. A few options come to mind (bonus points for coming up with new ones):
Use waitgroups so that nobody works on E2 before everyone has finished E1.
Give larger overlapping slices to Go routines, and let the slices shrink with each effect so that the output slices have just the right non-overlapping size when writing to the shared output.
Your grade will depend on the performance, which is affected by how well you manage this fact and how well you avoid data copies.
Part 5: Performance Measurements and Speedup Graphs
Please measure the performance of your code on the Linux cluster, and report your findings. You may measure program run times using terminal commands such as time and/or by wrapping everything in a Python script and using Python’s timing functions. You may use a combination of multiple approaches.
Using just one thread, measure the overall time of your program, as well as the time spent in the program parts that you are parallelizing. After obtaining these numbers, use Amdahl’s law to determine the speedup that you are expecting for
{2,4,6,8,12}threads. We want to see the original numbers and how you used the formula to obtain the results. You will observe that timings vary a little bit each time you run your program. Please run every experiment at least 5 times, and use the average time from those runs.Use the same numbers and Amdahl’s law to determine the speedup you might get in the limit, with an infinite number of threads.
Create speedup graphs. The y-axis will list the speedup measurement and the x-axis will list the number of threads. As a reminder, the speedup is the time for one thread, divided by the time for N threads.
Make make sure to title the graph, and label each axis. Make sure to adjust your y-axis range so that we can accurately see the values. That is, if most of your values fall between a range of [0,1] then don’t make your speedup range [0,14].
We will keep things simple and only look at measuring single data directories:
small,mixture, andbig. Each speedup graph is based around a single parallel version (e.g.,slices) where each line represents running a specific data directory. The set of threads will be{2,4,6,8,12}and will remain the same for all speedup graphs.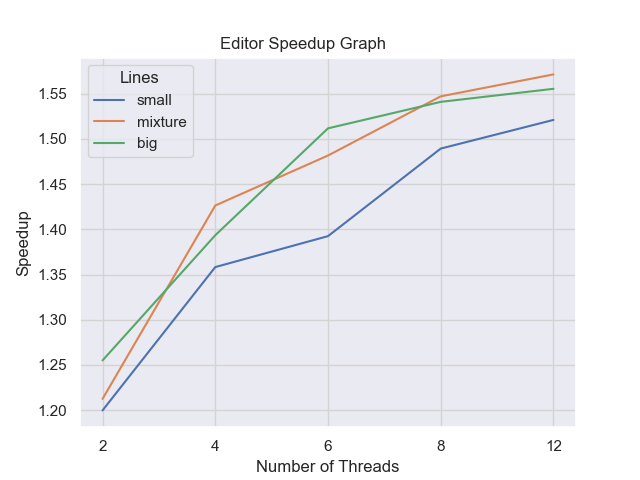
Your graph may look vastly different from mine and that’s okay!. It’s fine if the lines vary from thread to thread or look odd. However, to receive a good performance grade, most of the lines must have speedups.
The names for each graph file will be the name of the parallel versions (i.e., speedup-slices.png and speedup-full.png)
All your work for this section must be placed in the benchmark directory along with the generated speedup graphs. Modify the benchmark-proj1.sh script so that it contains all commands (or calls another script that does) to reproduce your timings and your plot, i.e. the experiment should be fully automated with just calling the benchmark script as:
sbatch benchmark-proj1.sh
Part 6: Performance Measurements and Speedup Graphs
Please submit a report (pdf document, text file, etc.) summarizing your results from the experiments and the conclusions you draw from them. Your report should also include the graphs as specified above and an analysis of the graphs. That is, somebody should be able to read the report alone and understand what code you developed, what experiments you ran and how the data supports the conclusions you draw. The report must also include the following:
A brief description of the project. A paragraph or two recap will suffice.
Instructions on how to run your testing script. We should be able to just say
sbatch benchmark-proj1.sh; however, if we need to do another step then please let us know in the report- As stated previously, you need to explain the results of your graph. Based on your implementation why are you getting those results? Answers the following questions:
What are the hotspots and bottlenecks in your sequential program?
Which parallel implementation is performing better? Why do you think it is?
Does the problem size (i.e., the data size) affect performance?
How close are your programs to the expected speedup computed with Amdahl’s law? If they are not close, why?
Based on the topics we discussed in class, identify the areas in your implementation that could hypothetically see increases in performance (if any). Explain why you would see those increases.
Please note: The course staff will not provide help with answering these questions! This is exactly what we are grading you on. You need to apply what we have discussed in lecture to answering these questions so please do not come to office hours verifying if your answers to the questions are correct.
Grading
Programming assignments will be graded according to a general rubric. Specifically, we will assign points for completeness, correctness, design, and style. (For more details on the categories, see our Assignment Rubric page.)
The exact weights for each category will vary from one assignment to another. For this assignment, the weights will be:
Sequential Version 10%
Each Parallel Version: 25%
Design & Style: 10%
Performance: 15%
Analysis Report: 15%
There are no automated tests for this assignment. We will manually run your programs to verify visually with comparing your results to the expected output directory. You will be provided with partial credit if your program is not deterministic.
Design, Style and Cleaning up
Before you submit your final solution, you should, remove
any
Printfstatements that you added for debugging purposes andall in-line comments of the form: “YOUR CODE HERE” and “TODO …”
Think about your function decomposition. No code duplication. This homework assignment is relatively small so this shouldn’t be a major problem but could be in certain problems.
Go does not have a strict style guide. However, use your best judgment from prior programming experience about style. Did you use good variable names? Do you have any lines that are too long, etc.
As you clean up, you should periodically save your file and run your code through the tests to make sure that you have not broken it in the process.
Submission
Before submitting, make sure you’ve added, committed, and pushed all your code to GitHub. You must submit your final work through Gradescope (linked from our Canvas site) in the “Project #1” assignment page via two ways,
Uploading from Github directly (recommended way): You can link your Github account to your Gradescope account and upload the correct repository based on the homework assignment. When you submit your homework, a pop window will appear. Click on “Github” and then “Connect to Github” to connect your Github account to Gradescope. Once you connect (you will only need to do this once), then you can select the repsotiory you wish to upload and the branch (which should always be “main” or “master”) for this course.
Uploading via a Zip file: You can also upload a zip file of the homework directory. Please make sure you upload the entire directory and keep the initial structure the same as the starter code; otherwise, you run the risk of not passing the automated tests.
As a reminder, for this assignment, there will be no autograder on Gradescope. We will run the program the CS Peanut cluster and manually enter in the grading into Gradescope. However, you must still submit your final commit to Gradescope.